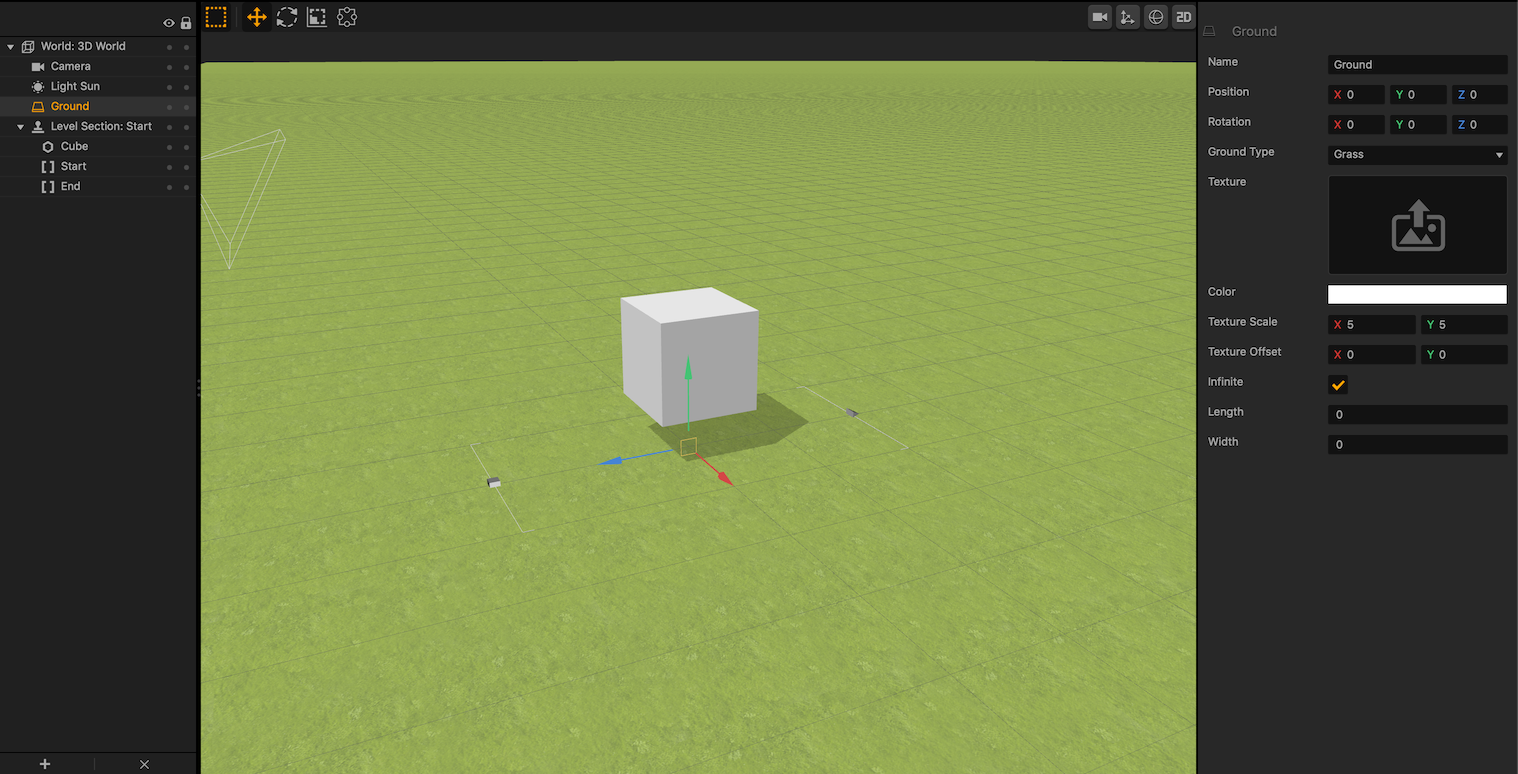
Rotate Towards Node – Buildbox 3 Manual

By |

Rotate Towards Node

This action node rotates an asset to face the camera or another specified asset.

Option Description
Name Type a custom name for this node, if needed.
Smooth Enter a decimal from 0 to 1 to determine how smooth the rotation will be, 1 being 100%.
Target Click the dropdown and select:

  • Camera—makes the asset rotate along the Y axis until its positive Z axis aligns with the camera.
  • Target Asset—makes the asset rotate along the Y axis until its positive Z axis aligns with the asset specified by the Target Asset attribute.
Target Asset Click the Edit 
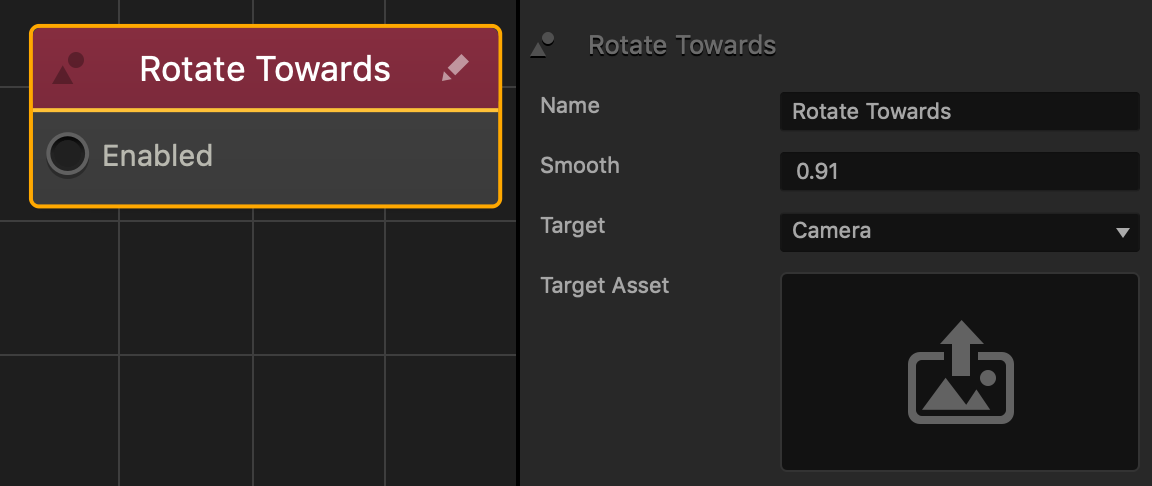
button and select an asset to rotate towards.

If needed, you can also customize this node. For details, see Customizing Nodes.

Creating a 3D Animated Character – Buildbox 3 Manual

By |

Creating a 3D Animated Character

An Animated Character is a 3D model with a skeleton that can perform movements such as run, walk and jump. To create an Animated Character, you need to have multiple FBX files that contain a model, skeleton, and animation. If you want to apply multiple animations to a single character, each FBX file must have the same model and skeleton.

To make an animated character react and move to the the players movement controls, you need to have FBX files that contain an idle, walk, run, and jump animation.

If a 3D model contains more than 50,000 polygons, some polygons will not be displayed.

Set Up Your Character

The following walks you through how to setup a 3D animated character with multiple animations and allow the player to control it in the game.

If you do not have any FBX files, feel free to download the Erik Animation Pack.
1. Import FBX Files

To import the animation FBX files:

  1. Drag all the FBX files you want to use from your computer into the scene and on the dropdown wheel, drop them on Character.
    When you import multiple FBX files, the FBX Import Options window appears where you can add all your animations to a single asset.
  2. In the FBX Import Options window, make sure that the Modify Selected and Add Animation options are selected, then click Import.
2. Set Up Animations

To set up the animations of the character:

  1. In the World workspace and in the Asset panel on the left, click the name of the character asset.
  2. In the Options panel on the right and on the bottom, click Add Brainbox.
  3. At the top, select Animated Platformer. Multiple attributes appear in the options panel.
  4. In the Scene attribute field, click the Edit button .
  5. In the Sub Scene Manager window and on the right, select the name of your idle animation or skeleton and click Save.
  6. In the Options panel and in each of the Animations attributes, click the dropdown and select the respective animation names.
    The example below displays the attributes with the appropriate Erik Animations.
  7. In the Asset panel, double-click the character to open its Node Map.
  8. If there are any Sub Scene and Keyframe Animation nodes outside the Animated Platformer.
  9. Select any Sub Scene and Keyframe Animation nodes that are not in the Animated Platformer group and press DELETE.
    In the example below you would delete both the Sub Scene and Keyframe Animation nodes labeled as Erik@idle.

    If you do not delete the Sub Scene outside the Brainbox group, you will see two models attached to the character when you preview your game.
  10. On the Navigation bar at the top, click the name of your 3D World to go back to the Scene Editor.

Add Movement Controls

After your character and animations are set up, add any of the following movement controls.
Keyboard Controls

To add keyboard controls:

  1. In the World workspace and in the Asset panel, click the name of the character asset.
  2. In the Options panel, click Add Brainbox and click Keyboard Controls.
  3. To change the Jump Key and the Run Key, click the field and type the desired key.
  4. Preview your game and use the following keys to move your asset.
    • To move the character, use the W, A, S, D or arrow keys.
    • To make the character run, use the same movement keys while holding the Run Key.
    • To make the character jump, press the Jump Key.
  5. In the Options panel and in the Movement Parameters section, adjust the attributes as desired. For more details, see Animated Platformer.
Mobile Controls

To add a mobile joystick control:

  1. On the Mind Map, drag a UI Node to the grid and connect the Load input to the UI output of a 3D World.
  2. Double-click the UI Node to open the UI editor.
  3. In the Asset Panel, click Asset Library and double-click the Joystick to add it to the Asset panel.
  4. Click Asset Library to go back to the UI Editor.
  5. From the Asset Panel, drag the Joystick to the grid and resize and position it as desired.
  6. In the Options panel, scroll to the bottom and in the EventName field, delete the default text and type Joystick.
  7. On the Navigation bar at the top, click 3D World or click the Mind Map icon and on the Mind Map, double-click the 3D World node.
  8. In the Asset panel, click the character asset.
  9. In the Options Panel, click Add Brainbox and select Mobile Controls. Its attributes now appear in the Options panel.
  10. In the Event Group delete the default text.
  11. In the Event Name delete the default text and type Joystick.
  12. Preview your game and use your mouse to drag the Joystick in any direction.
Keyboard Camera Controls

To add keyboard controls that rotate the camera around the character:

  1. In a 3D World workspace and in the asset panel, select your character.
  2. In the Options panel, click Add Brainbox and select Keyboard Camera Controls.
  3. To change the speed of the camera rotation, enter a numeric value in the Rotation Amount field.
  4. To change the keys, click the Left Turn Key or Right Turn Key field and type the desired key.

Mobile Controls Brainbox – Buildbox 3 Manual

By |

Mobile Controls Brainbox

This Advanced Platformer Brainbox allows the player to move the asset with a UI Joystick control.

This Brainbox requires the Animated Platformer Brainbox.

After you add this Brainbox to an asset, you need to add a Joystick asset to the UI Screen Node connected to the current 3D World.

  1. On the Mind Map and in the Node Panel, drag a UI Screen node into the grid.
  2. On the UI Screen Node connect the Load input to the UI output of the desired 3D World.
  3. Double-click the UI Screen node to open the UI Editor.
  4. In the Asset Panel on the left, click the Asset Library button.
  5. Double-click the Joystick asset to add it to the Asset Panel.
  6. From the Asset Panel, drag the Joystick asset into the UI Editor.

After you add a UI joystick asset, you need to make sure that the Event Name attribute in both the Brainbox and the Joystick have the same name.

Brainbox Attributes

Attribute Description
Sensitivity Enter a numeric value to determine how far the player needs to drag the joystick handle in order for the asset to move at the maximum distance.
Event Group Enter the name in the field that matches the name of a Joystick asset Event Group attribute.
Event Name Enter the name in the field that matches the name of a Joystick asset Event Name attribute.
Run UI Button Click the drop down and select the following options the player can tap or click to make the asset move at the run speed specified by the Animated Platformer Brainbox.

  • Screen—allows the player to tap or click the screen.
  • UI Control Button—the space on the screen specified by a UI Control Button on a UI Screen.
Jump UI Button Click the drop down and select the following options the player can tap or click to make the asset jump.

  • Screen—allows the player to tap or click the screen.
  • UI Control Button—the space on the screen specified by a UI Control Button on a UI Screen.

Brainbox Node Group

After you add this Brainbox to an asset, a custom Mobile Controller node, a Receive node, and two UI Button nodes appear in the node map.

Ground – Buildbox 3 Manual

By |

Ground

Every 3D World contains a Ground that is present in every scene, much like the Camera and the Start/End points. When an asset has physics enabled, it will not pass through the ground.

Assets with a Mesh physics shape will not collide or move across the ground properly. For more on setting collision shapes, see Changing Collision Shapes.

  • By default, the Ground covers the entire scene, and cannot be deleted.
  • To hide the ground, click the Ground Type dropdown and select No Ground.
  • You can use the tools in the toolbar to rotate and move the ground in the scene.

Ground Attributes

Attribute Description
Name Enter a different name for the ground, if desired.
Position Enter a numeric value in any of the axis fields to move the ground.
Rotation Enter a numeric value in any of the axis fields to rotate the ground.
Ground Type Click the dropdown to change the appearance of the ground.

  • Grass—applies a grass texture to the ground.
  • Road—applies a road texture to the ground.
  • No Texture—applies a color defined by the Color attribute.
  • Custom Texture—applies the texture specified by the Texture attribute.
Texture To apply a custom texture to the ground, set the Ground Type to Custom Texture and drag a PNG image into the Texture attribute field.
Color To add a color to the ground, click the color field and choose a color.

  • If the ground contains a texture, the color will overlay on top of the texture.
  • If you choose a white color, there will be no color overlay.
Texture Scale Enter a numeric value in any of the axis fields to change the size of the texture.
Texture Offset Enter a numeric value in any of the axis fields to change the position of the texture.
Infinite If checked, the ground will cover the entire view of the scene. If unchecked, the ground will change its size to a length and width of 1.
Length
  • Enter a numeric value to extend or shrink both sides that make up the length of the ground.
  • For example, a value of 2 will change the total length of the ground to be a value of 4.
  • Changing the size will uncheck Infinite.
Width
  • Enter a numeric value to extend or shrink both sides that make up the width of the ground.
  • For example, a value of 2 will change the total width of the ground to be a value of 4.
  • Changing the size will uncheck Infinite.

Analytics – Buildbox 3 Manual

By |

Analytics

Analytics provides data that keeps track of how many times players do the following actions:

  • Install your app
  • Launch your app
  • Make in-app purchases
Facebook is currently the only analytics option. More options will be available in future updates.

To integrate analytics in your game:

  1. On the Navigation bar, click the Settings button.
  2. In the displayed Project Settings window, click the SDKs tab.
  3. Click the appropriate App Store, for example, iOS or Android.
  4. In the middle of the screen, click Add and in the Analytics section, select the name of the analytics provider.

    The selected analytic settings appear.
  5. If needed, go to the Facebook Developers page, create an account and follow their directions to create your App ID and App Name.
  6. In the App ID and App Name field, enter the name and Id of your app as it appears on the facebook dashboard.

Keyboard Camera Controls Brainbox – Buildbox 3 Manual

By |

Keyboard Camera Controls Brainbox

This Advanced Platformer Brainbox allows the player to rotate the camera around an Animated Platformer asset with the assigned keyboard buttons.

This Brainbox requires the Animated Platformer Brainbox.

Brainbox Attributes

This Brainbox contains two attributes:

  • Left Turn—rotates the camera counter-clockwise.
  • Right Turn—rotates the camera clockwise.
Attribute Description
Button
  • Each Button attribute has a default key assigned to it.
  • To assign a different keyboard button, click the field and press the key you want to assign on your keyboard.
  • The following keys are not supported: Ctrl, Alt, Shift, CMD, Opt.

Brainbox Node Group

After you add this Brainbox to an asset, a custom Platformer Rotate Camera node and two Keyboard Button nodes appear in the node map.

Keyboard Controls Brainbox – Buildbox 3 Manual

By |

Keyboard Controls Brainbox

This advanced platformer Brainbox allows the player to move an Animated Platformer asset with the W, A, S, D and arrow keys on their keyboard.

This Brainbox requires the Animated Platformer Brainbox.

To move the asset across the scene in a given direction, the player needs to press and hold the following keys:

Keyboard Button Movement Direction
W, Up Arrow Forward
A, Left Arrow Left
S, Down, Arrow Backward
D, Right Arrow Right

Brainbox Attributes

This Brainbox contains two additional controls that allow the player to make the asset:

  • Run—increases the movement speed of the asset when the player presses and holds this button.
  • Jump—makes the asset ascend along the Y axis before being affected by gravity and falling.
Attribute Description
Button
  • Each Button attribute has a default key assigned to it.
  • To assign a different keyboard button, click the field and press the key you want to assign on your keyboard.
  • The following keys are not supported: Ctrl, Alt, Shift, CMD, Opt.

Brainbox Node Group

After you add this Brainbox to an asset, a custom Keyboard Controller node appears in the node map along with three Keyboard Button nodes.

What’s New JS API

By |

What’s new in Buildbox 3.4 JS API

3.4.3
  • Touch events can be disabled with disableTouch() after they’ve been enabled with enableTouch(). You can see this in action if you drag a new “Is Touched” node out of the Node Library.
3.4.2
3.4.1

3.3.10
  • New name() function added to Linker
  • New setParent() function added to Entity
  • signal() function updated with new source parameter, which contains the output connection that sent the signal.
    • The updated Logger node is an example of how to use the new parameter.
3.3.9
3.3.7
3.3.1

Sun – API Reference

By |

Sun

The Sun is a light source that comes default in every World. It can be accessed by running this.scene().findFirst(‘Light Sun’);.

Function Description
color()

Returns the color of the Sun in RGB (Red, Green, Blue) format. The minimum value is 0 and the maximum is 1 (think of it as the 0-255 scale divided by 255). For example, {r:0, g:0, b:0} is black and {r:1, g:1, b:1} is white.

intensity()

Returns the intensity of the Sun.

rotation()

Returns the rotation of the Sun in degrees.

rotationQuat()

Returns the rotation of the Sun in Quaternion.

setColor(value)

Sets the color of the Sun. Expected range of {r, g, b} is 0-1.

setIntensity(value)

Sets the intensity of the Sun.

setRotation(value)

Sets the rotation value of the Sun, in degrees.

setRotationQuat(value)

Sets the rotation value of the Sun, in Quaternion.


color()

Returns the color of the Sun in RGB (Red, Green, Blue) format. The minimum value is 0 and the maximum is 1 (think of it as the 0-255 scale divided by 255). For example, {r:0, g:0, b:0} is black and {r:1, g:1, b:1} is white.

Returns

Vec3 the color of the Sun

↑ Back to top


intensity()

Returns the intensity of the Sun.

Returns

number the intensity of the Sun. Range is 0-1000.

↑ Back to top


rotation()

Returns the rotation of the Sun in degrees.

Returns

Vec3 the {x, y, z} rotation value of the Sun

↑ Back to top


rotationQuat()

Returns the rotation of the Sun in Quaternion.

Returns

Quaternion the Quaternion rotation value

↑ Back to top


setColor(value)

Sets the color of the Sun. Expected range of {r, g, b} is 0-1.

Parameters

Vec3 value – the {r, g, b} color

↑ Back to top


setIntensity(value)

Sets the intensity of the Sun.

Parameters

number value – the intensity of the Light, ranging from 0-1000

↑ Back to top


setRotation(value)

Sets the rotation value of the Sun, in degrees.

Parameters

Vec3 – the {x, y, z} rotation value

↑ Back to top


setRotationQuat(value)

Sets the rotation value of the Sun, in Quaternion.

Parameters

Quaternion – the Quaternion rotation value

↑ Back to top

Did you find this page useful?

Please give it a rating:

Please provide some feedback!

This is very helpful to us.

Tell us how we can improve this post?

Animated Platformer Brainbox – Buildbox 3 Manual

By |

Animated Platformer Brainbox

This Advanced Platformer Brainbox provides the asset with a set of 3D animations that play depending on player actions and a set of movement restrictions which include how high the asset can jump.

Before you add this Brainbox to an asset, check the asset Node Map for additional Sub Scenes.

  • If the asset contains additional Sub Scenes, all associated meshes will display.
  • If you only want the mesh associated with this Brainbox to show, delete any additional Sub Scene nodes.
  • There are some situations where having additional Sub Scenes can be useful. For example, attaching a weapon or shield mesh that requires animations.

After you add this Brainbox to an asset, you need to specify the skeleton and animations you want to play by doing the following:

  1. To assign a skeleton:
    1. In the Scene attribute, click the Edit button .
    2. In the Sub Scene Manager window, click the name of the skeleton you want to use on the right.
    3. Click Save.
  2. To add an animation to any of the animation attributes, click any of the following Animation drop-down lists and select the name of your animation:
    • Idle—plays when the asset is not moving or jumping.
    • Walk—plays when the player uses a control to make the asset run.
    • Run—plays when the player uses a control to make the asset run.
    • Falling—plays when the asset is falling along the Y axis.
    • Jumping—plays when the player uses a control to make the asset run.
    • Dying—plays when something causes the asset to become defeated. See also Manage Health, Damage, and Defeat.
    You can leave an Animation attribute as None if you do not have an animation for the respective attribute.

Brainbox Attributes

Attribute Description
Scene
  • Allows you to select a skeleton for the specified animations.
  • To select a pre-existing skeleton, click the Edit button  and in the Sub Scene Manager window, select the desired skeleton
  • To import and add a new skeleton, drag an FBX file into the field.
Scale Enter a numeric value in any of the axis fields to change the size of the mesh.
Animations Click the drop-down to assign an animation to the respective attribute.
Looped Select the checkbox to make the animation play continuously.
Max Walk Speed Enter a numeric value to determine the quickest possible walking speed for the asset.

If a joystick control is assigned to this asset, its movement speed is determined by how far the player drags the joystick. When the player drags the joystick at the maximum distance, the asset will walk at maximum speed.

Run Acceleration Enter a numeric value to determine how quickly the asset transitions from walking to running.
Max Run Speed Enter a numeric value to determine the quickest possible running speed for the asset.
Set Facing Direction Select the checkbox to make the asset rotate so that its front side is always facing the direction it’s moving in.
Preserve Momentum Select this checkbox to make the asset keep its current momentum while moving. For example, this will allow a character to stand on a moving platform without falling off.
Jump Force Enter a numeric value in any of the axis values to specify the amount of units the asset will travel before falling into the direction of gravity.

Brainbox Node Group

After you add this Brainbox to an asset, several custom nodes appear in the node map along with several Keyframe Animation nodes and a Sub Scene node.