
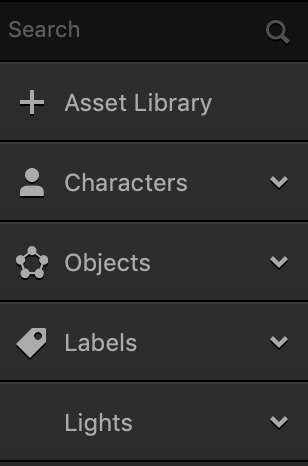
3D World Asset Panel
This is the panel on the far left side of the World workspace. It lists all assets available for adding to the scenes of the selected world and allows you to add new ones from the Asset Library.
- To add an asset to the game, select it in the Asset panel and drag it to the Scene Editor, and it will be automatically placed in the center.
You can then use the Scene Editor tools to position each asset as needed.To add multiple assets to a scene, hold SHIFT and select all desired assets, then drag them to the scene. - To view or edit the properties of an object or character in the Asset panel, click the object or character name and the Options panel is displayed. From here, you can set the collision group for the asset, define its shape and other attributes.
- To delete an asset from the Asset panel, hover your mouse over it and click x.
- To extend the panel vertically, if needed, close the Helper.
| Panel Item | Description |
| Search | Enter the name of an asset you want to search for in the Asset panel. |
| Asset Library | Click to open the Asset Library where you can preview and choose 3D basic shapes and advanced assets for your game.
To close the library, click Asset Library again.
|
| Characters | Assets that the camera can follow in the game and which the player can control. For details on how to make an asset a character in the game, see Creating Characters.
To add a character to the scene, drag the object you want to make a character from the Objects list below and drop it on this button. To delete a character, hover your mouse over it and click x. |
| Objects | Assets used in the game World. The player can control objects, but the game camera cannot follow them.
You can add as many objects as you need from the Asset Library. You can make these objects characters, enemies, for example, by choosing the appropriate collision group for them in their Options panel. To delete an object, hover your mouse over it and click x. |
| Labels | Fonts with predefined settings that you can add using the Font Editor.
Drag a font to the Scene Editor to add text to be displayed on the screen or use it to display the game score for the user by choosing the respective option in the Function field of the Options panel on the right. See also Adding Game Score. |
| Lights | If you need additional light sources in the selected scene, you can add two more types of lights, Point Light and Spot Light
Drag a light to the Scene Editor and position it as desired using the tools. If more light is needed, duplicate the light. See also the Point Light and Spot Light attributes that you can define in their respective Options panels. A scene can only have a maximum of 7 lights.
|
Right-Click Menu
The right-click menu in the Asset panel offers To access this menu, right-click an asset in the Asset panel and select one of the following options.
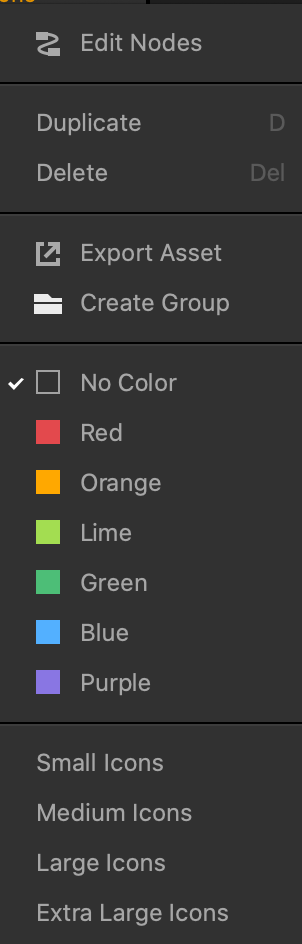
| Option | Description |
| Edit Nodes | Opens the asset’s node map. |
| Duplicate | Creates a copy of the asset in the Asset panel. |
| Delete | Removes the asset from Buildbox entirely. |
| Export Asset | Exports the asset as a BBASSET file to your computer. |
| Create Group | Creates a group folder with the selected asset. |
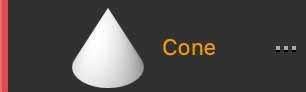
| Colors | Color codes the asset in the Asset panel. For example, if you select red in the right-click menu, a red line appears to the left of the icon:
|
| Icon sizes | Changes the size of the asset icons in the Asset panel. |
Group Folders
Group folders allow you organize and locate assets more efficiently in the Asset Panel.
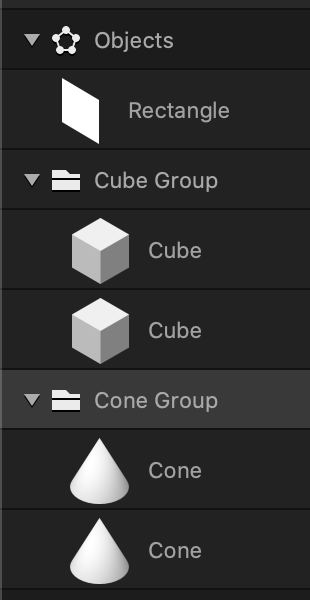
- To create a group folder, right-click an asset in the Asset panel and select Create Group.
The asset is now in a group folder. - To rename a group folder, select it in the Asset panel and in the Options panel, in the Name attribute, type a new name.
- To move the Group Folder, simply click and drag it along the Asset panel.


