General Workspace Overview

Most Buildbox workspace screens have the same predictable layout and functionality, with some parts present in all screens and others being specific to certain workspaces.

Regardless of the workspace you may have currently selected, a typical workflow starts on the left across the vertical panels.

  1. You select an asset or node in the Asset (Node) panel and drag it to the Editor or Map.
  2. All added items get listed in the Outliner, if it’s present in the selected workspace.
  3. When you select an object in the Asset (Node) panel, the Outliner, or the Editor or Map, its default attributes are displayed in the respective Options panel, where you can modify them, if needed.

Buildbox menu bar

A The Buildbox menu bar allows you to save and open projects, align and randomize scenes, change your workspace display view, access the Atlas Editor, and remove unused audio objects. For individual menu descriptions, see Buildbox Menu Bar.

Project bar

B The project bar displays the name of the selected template or your project. You can change it in the Full Game Name field in the General Project Settings.

Navigation bar

C The Navigation bar allows you to do the following:

  • Navigate between different workspaces as well as know your current located highlighted in orange.
  • Preview your game.
  • Select fonts for text labels in the Font Editor.
  • Customize your project settings.
  • Return to the Mind Map from any other screen.

For details, see Navigation bar.

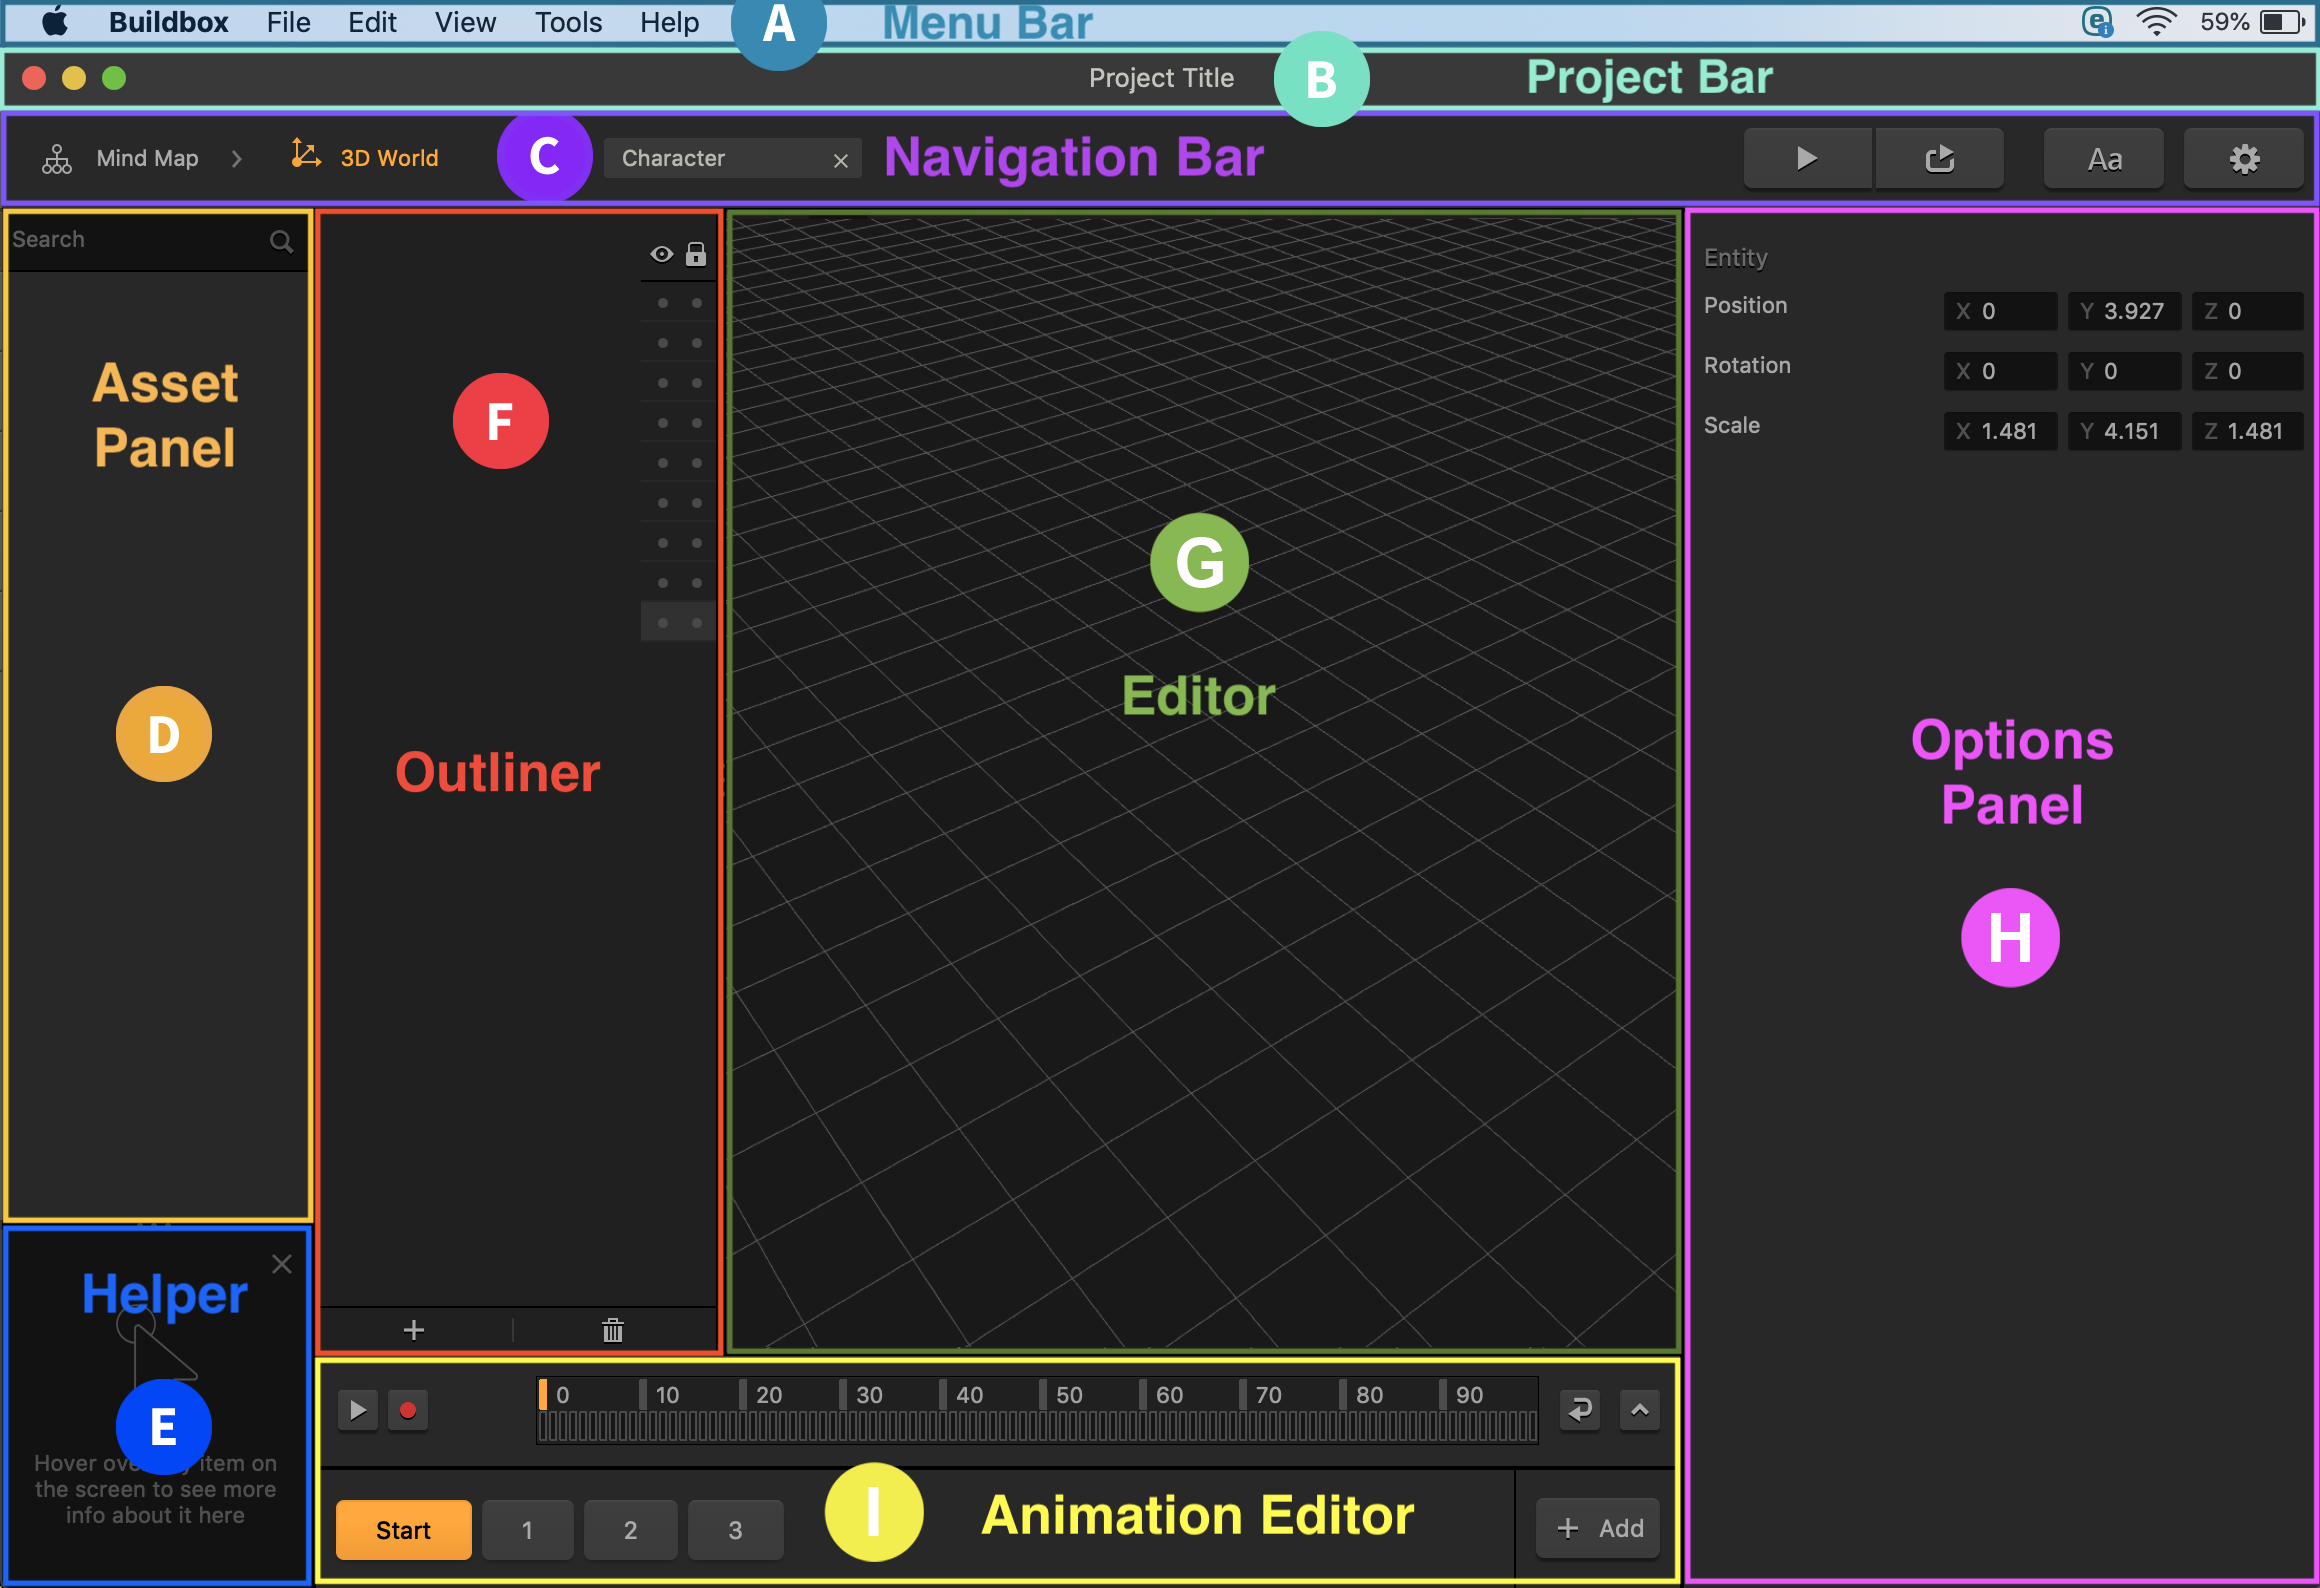
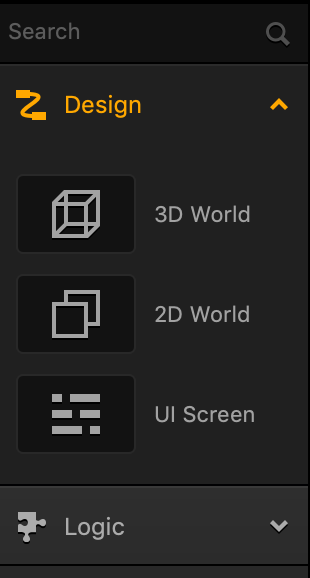
Asset or Node panels

D Depending on the selected workspace, the Asset panel or Node panel displays the World or UI screen assets or nodes available for selection. This can be also the Node panel in the Node Workspace.

  • This is where you’d select the assets or nodes you want to use and drag them to the main editing space, typically a Map or Editor with a grid.
  • Depending on the currently selected workspace, assets may include shapes, characters, buttons, fonts, images, text labels, and so on. They are typically organized into groups that you can collapse/expand to facilitate your navigation in the panel.
  • If needed, you can use the Search field at the top to find the necessary item in the long list of assets or nodes.
  • In the World workspace, you can select each item in the Asset panel and view its attributes in the Options panel on the right.
  • You can also double-click assets here to view their node map.
Helper

E The Helper tool displays context-sensitive help that dynamically changes based on the current location of your cursor on the screen.

  • Hover your mouse over a panel, button, or attribute field, and the Helper displays its brief description.
  • You can minimize or close this tool as needed. Just click the x in the corner or the ? when the Helper is minimized. Alternatively,  use the View > Helper menu option on the Buildbox Menu Bar.
    You may also watch the Helper Tool video, which demonstrates how you can use it to learn about the product features and their intended use.
Outliner

F The Outliner lists all the assets added to the selected World scene or UI screen in the respective Editor.

In the Outliner, you can do the following:

  • Lock or hide the individual items, if needed. Just click the respective option next to the item.
  • Drag the items to change their order.
  • Collapse and expand the items that are organized hierarchically.
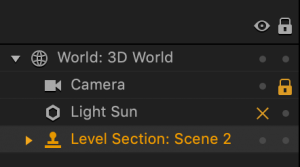
  • Delete the added objects from the Editor, except for the camera and light source. Just click the object in the Outliner and press Delete on the keyboard.
    See also World Outliner and UI Outliner.

    You may also watch the Outliner video, which demonstrates the use and functionality of the Outliner in the World workspace.
Editor or Map grid

G This is the main editing area, such as Mind Map, Scene Editor, Font Editor, UI Editor, Node Map, and so on. Depending on the selected workspace, you can do the following on the grid:

  • Select objects and modify their attributes in their respective Options panel.
  • Position, resize, and rotate the assets or connect nodes to each other.
  • Use your trackpad or keyboard to change your view as needed, for example:
    • To zoom in or out, use the Command–Plus sign (+) or Command–Minus sign (-) shortcut keys respectively.
    • To drag the grid with all the items on it, hold Spacebar–Click and drag the grid.
    • To change the angle of the 3D view in the Scene Editor, hold Spacebar–Right-Click and drag the grid to rotate or otherwise change the view of the scene.

To set the desired display in an Editor or Map, you may also use the View options on the Buildbox Menu Bar. Most standard keyboard shortcuts, such as delete, undo, and redo operations, also work in Buildbox. For a list of all the keyboard commands, see Buildbox 3 Keyboard Commands.

Options panel

H The Options panel displays the attributes of the selected object in the Editor or Map, which you can modify to achieve the desired effects and functionality. For details, see Options panel.

Animation Editor

I The Animation Editor is present in the World and UI workspaces where you can animate the selected objects.  For details, see Animation Editor. The World workspace also includes the Scene Selector underneath.