
Mind Map
The Mind Map is the very first screen you see when you open a game project or a template.
As its name suggests, the Mind Map allows you to map and organize the flow of your game. It is a graphical representation of the game with visual connections between its nodes, such as UI screens and 3D Worlds, indicating their relationships.
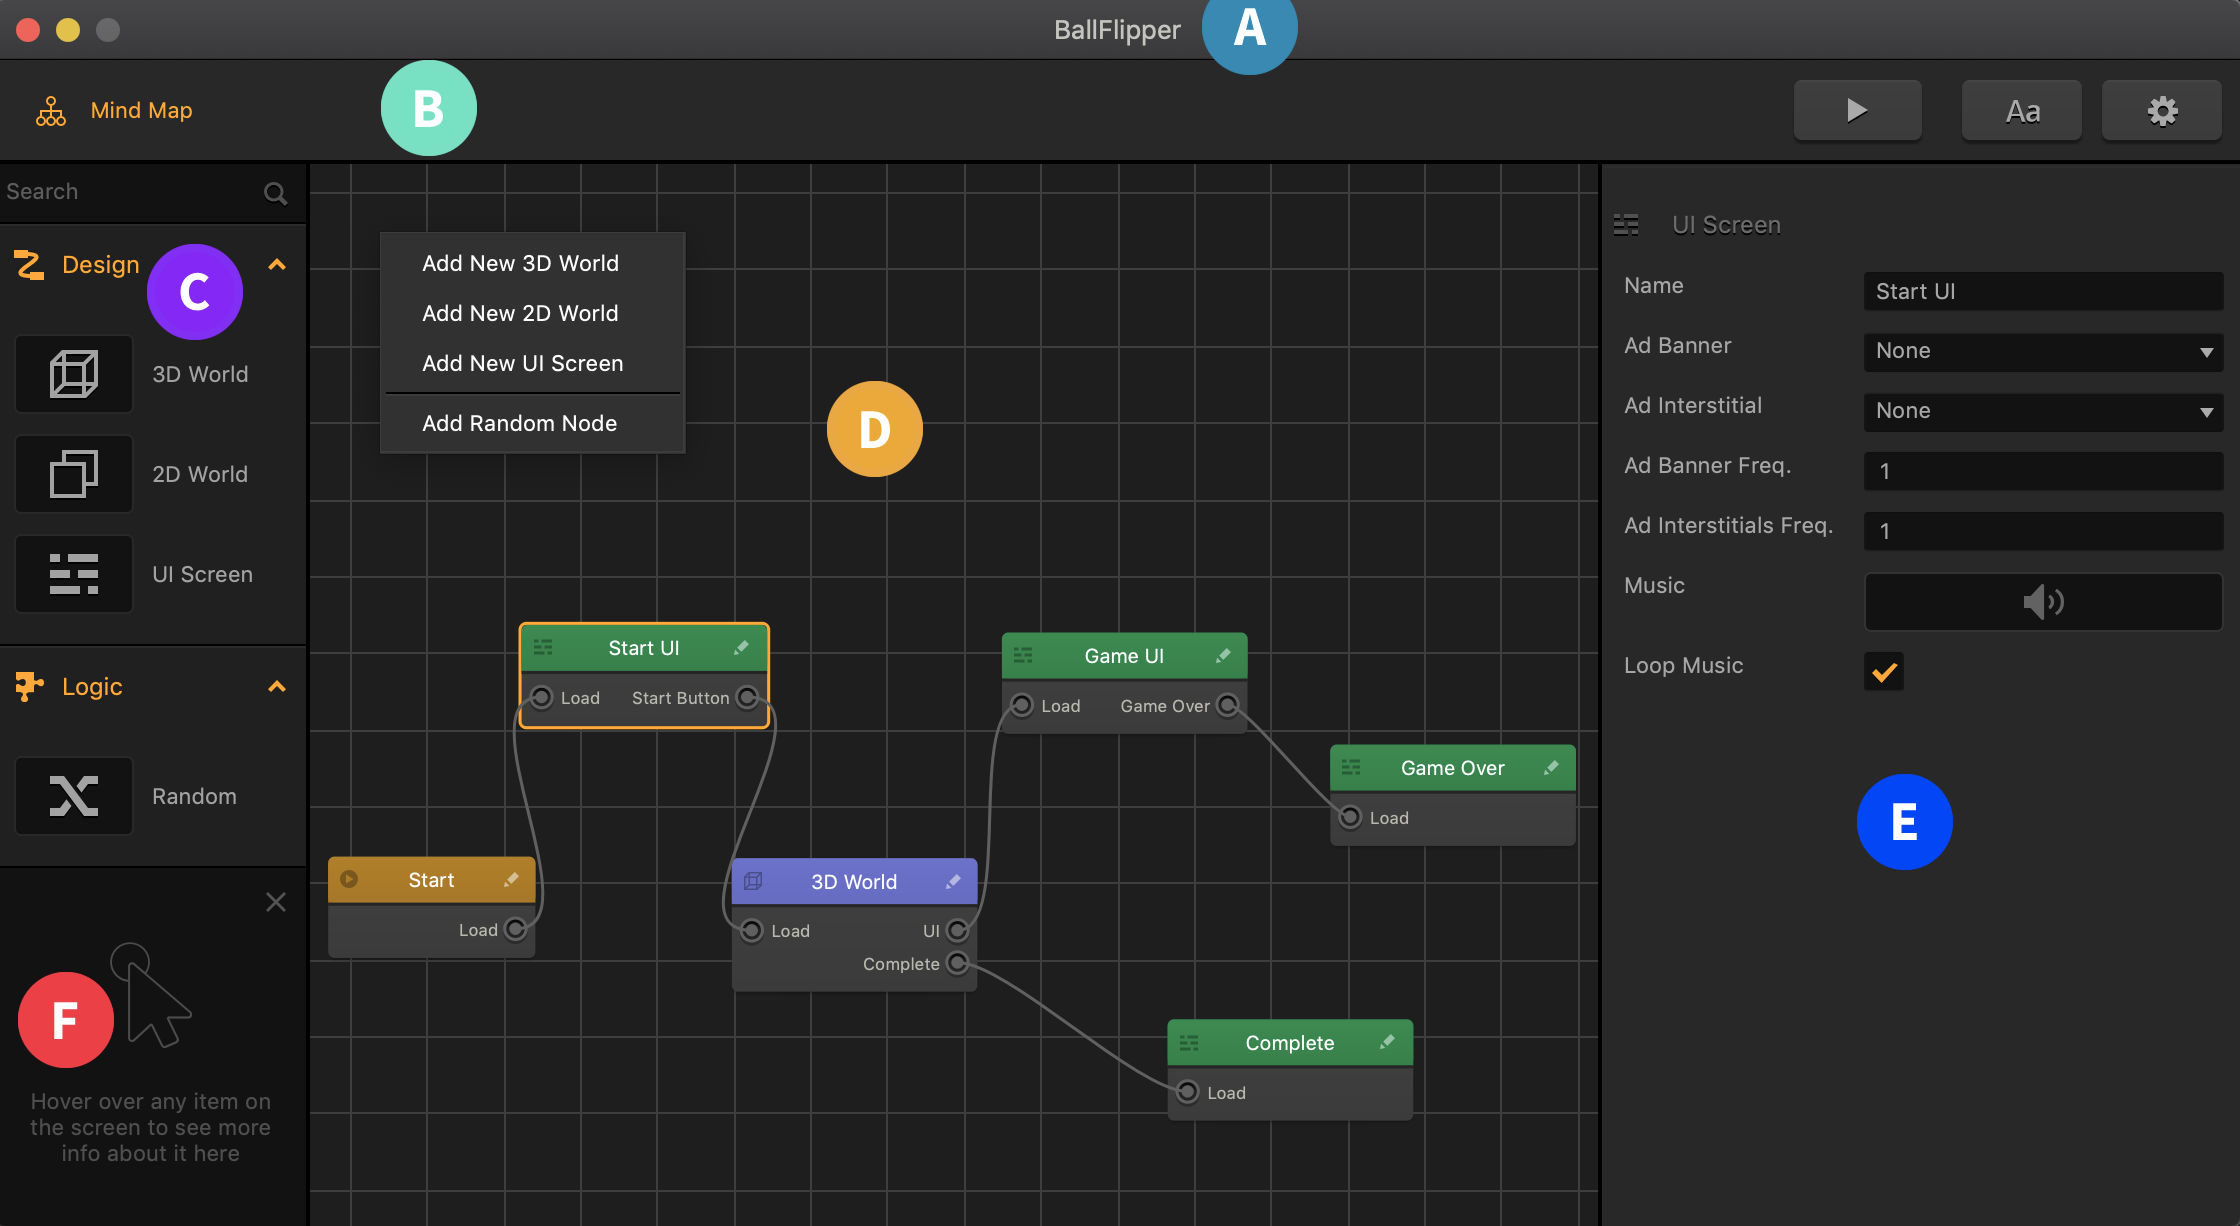
The Mind Map screen consists of the following parts:
- A The name of the selected template or your project.
- B The Navigation bar.
- C The Node panel from which you can drag new nodes to add to the Mind Map.
- D The Mind Map grid with the game nodes.
- E The Options panel on the right that displays the properties of the selected node.
- F The Helper with context-sensitive help.
For details on individual parts and how to work with the Mind Map UI, such as zooming or dragging the grid, see General Workspace Overview.
Mind Map Nodes
At the very least, any game in Buildbox must have two nodes:
- A Start node, which is basically the root node that will load your game.
- You can define some of its attributes, such as background music, in its Options panel on the Mind Map. See also Add Music and Sound Effects.
- To modify the splash screen, for example, to add your own logo or a loading bar, double-click the node make the desired changes in its UI Editor.
- A 3D World node that consists of a series of scenes and represents a game level.
Similarly, you can define some of the key attributes for you game level, such as gravity and game speed, in the Options panel on the Mind Map. To create scenes, however, you need to go inside the World node. For details, see World Workspace.
Optionally, you can also add and use the following types of nodes:
- UI nodes, which allow you to add a user interface or score-keeping game screen overlays.
- Random node, which you can use to randomize your game flow.
Adding, Deleting, and Editing Nodes
To add more nodes to your game on the Mind Map, do one of the following:
- Drag the type of node you need from the Node panel to the Mind Map.
- Right-click anywhere on the Mind Map grid and select Add New World or Add New UI respectively.
- Duplicate and existing node—select the node and press D on your keyboard.
See also Add a Game Level.
To edit the node attributes on the Mind Map, select the node and update the values in the Options panel on the right.
To go inside a node to edit it:
- Double-click the node.
- Click the Edit icon in the top right corner of the node.
The corresponding node Editor is displayed, where you can make the necessary modifications.
To delete a node, select the node and press Delete on the keyboard.


