Animated Platformer Brainbox
This Advanced Platformer Brainbox provides the asset with a set of 3D animations that play depending on player actions and a set of movement restrictions which include how high the asset can jump.
Before you add this Brainbox to an asset, check the asset Node Map for additional Sub Scenes.
- If the asset contains additional Sub Scenes, all associated meshes will display.
- If you only want the mesh associated with this Brainbox to show, delete any additional Sub Scene nodes.
- There are some situations where having additional Sub Scenes can be useful. For example, attaching a weapon or shield mesh that requires animations.
After you add this Brainbox to an asset, you need to specify the skeleton and animations you want to play by doing the following:
- To assign a skeleton:
- In the Scene attribute, click the Edit button
 .
. - In the Sub Scene Manager window, click the name of the skeleton you want to use on the right.
- Click Save.
- In the Scene attribute, click the Edit button
- To add an animation to any of the animation attributes, click any of the following Animation drop-down lists and select the name of your animation:
- Idle—plays when the asset is not moving or jumping.
- Walk—plays when the player uses a control to make the asset run.
- Run—plays when the player uses a control to make the asset run.
- Falling—plays when the asset is falling along the Y axis.
- Jumping—plays when the player uses a control to make the asset run.
- Dying—plays when something causes the asset to become defeated. See also Manage Health, Damage, and Defeat.
You can leave an Animation attribute as None if you do not have an animation for the respective attribute.
Brainbox Attributes
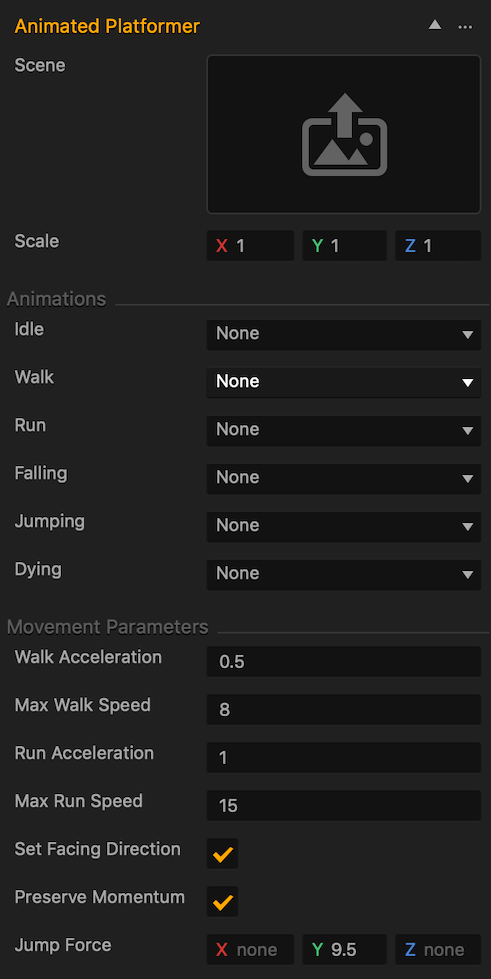
| Attribute | Description |
| Scene |
|
| Scale | Enter a numeric value in any of the axis fields to change the size of the mesh. |
| Animations | Click the drop-down to assign an animation to the respective attribute. |
| Looped | Select the checkbox to make the animation play continuously. |
| Max Walk Speed | Enter a numeric value to determine the quickest possible walking speed for the asset.
If a joystick control is assigned to this asset, its movement speed is determined by how far the player drags the joystick. When the player drags the joystick at the maximum distance, the asset will walk at maximum speed. |
| Run Acceleration | Enter a numeric value to determine how quickly the asset transitions from walking to running. |
| Max Run Speed | Enter a numeric value to determine the quickest possible running speed for the asset. |
| Set Facing Direction | Select the checkbox to make the asset rotate so that its front side is always facing the direction it’s moving in. |
| Preserve Momentum | Select this checkbox to make the asset keep its current momentum while moving. For example, this will allow a character to stand on a moving platform without falling off. |
| Jump Force | Enter a numeric value in any of the axis values to specify the amount of units the asset will travel before falling into the direction of gravity. |
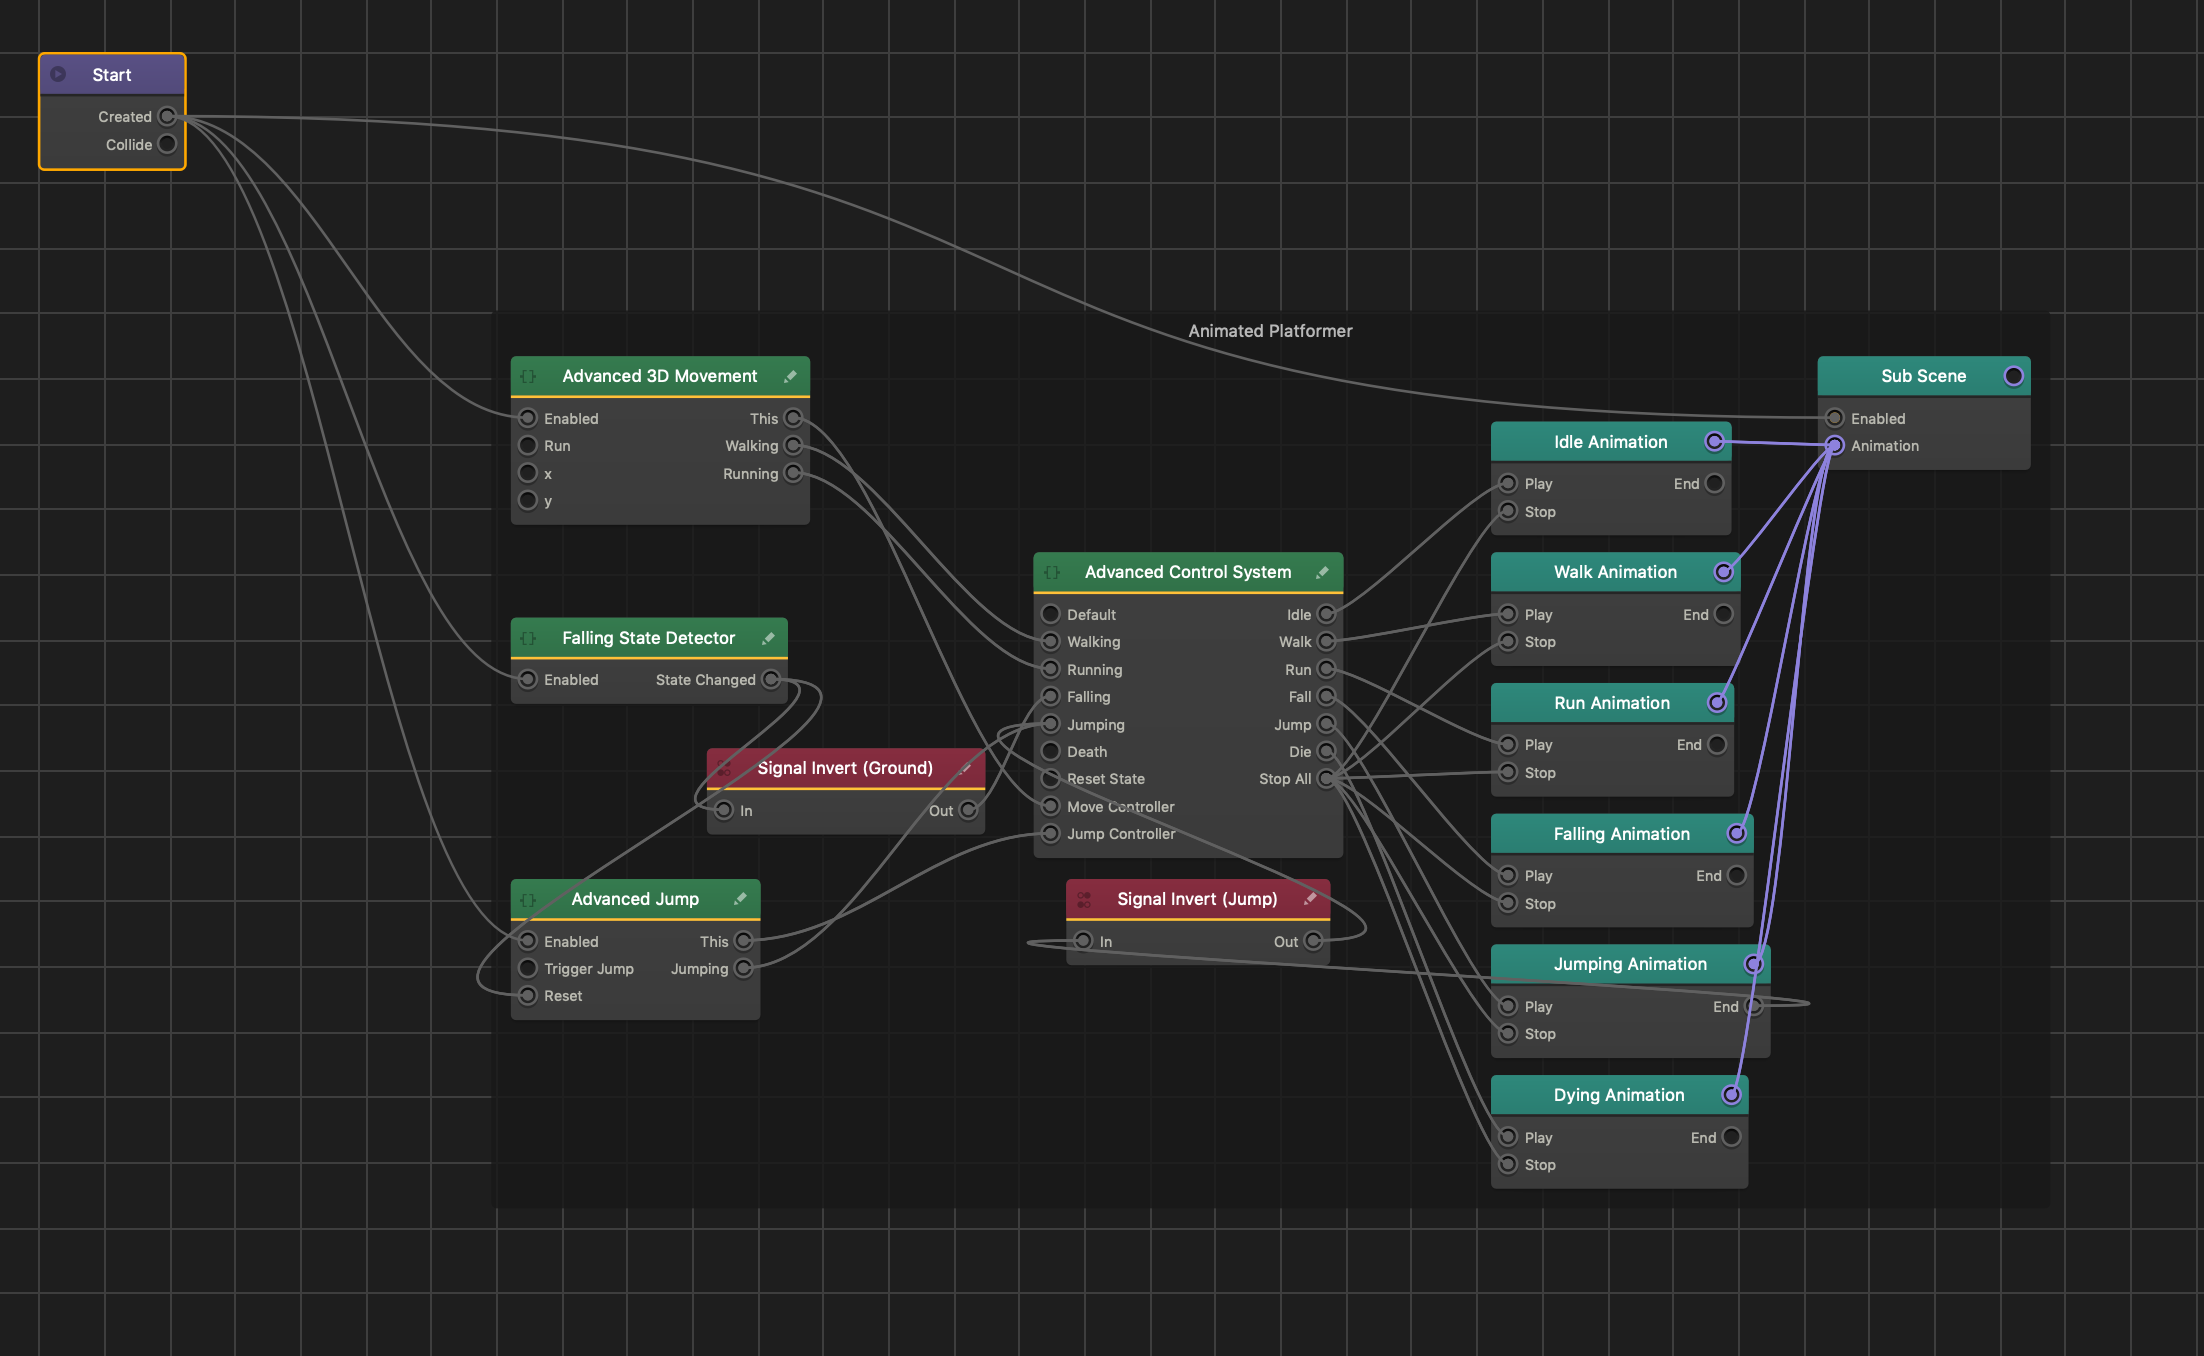
Brainbox Node Group
After you add this Brainbox to an asset, several custom nodes appear in the node map along with several Keyframe Animation nodes and a Sub Scene node.