
Creating a 3D Animated Character
An Animated Character is a 3D model with a skeleton that can perform movements such as run, walk and jump. To create an Animated Character, you need to have multiple FBX files that contain a model, skeleton, and animation. If you want to apply multiple animations to a single character, each FBX file must have the same model and skeleton.
To make an animated character react and move to the the players movement controls, you need to have FBX files that contain an idle, walk, run, and jump animation.
Set Up Your Character
The following walks you through how to setup a 3D animated character with multiple animations and allow the player to control it in the game.
To import the animation FBX files:
- Drag all the FBX files you want to use from your computer into the scene and on the dropdown wheel, drop them on Character.
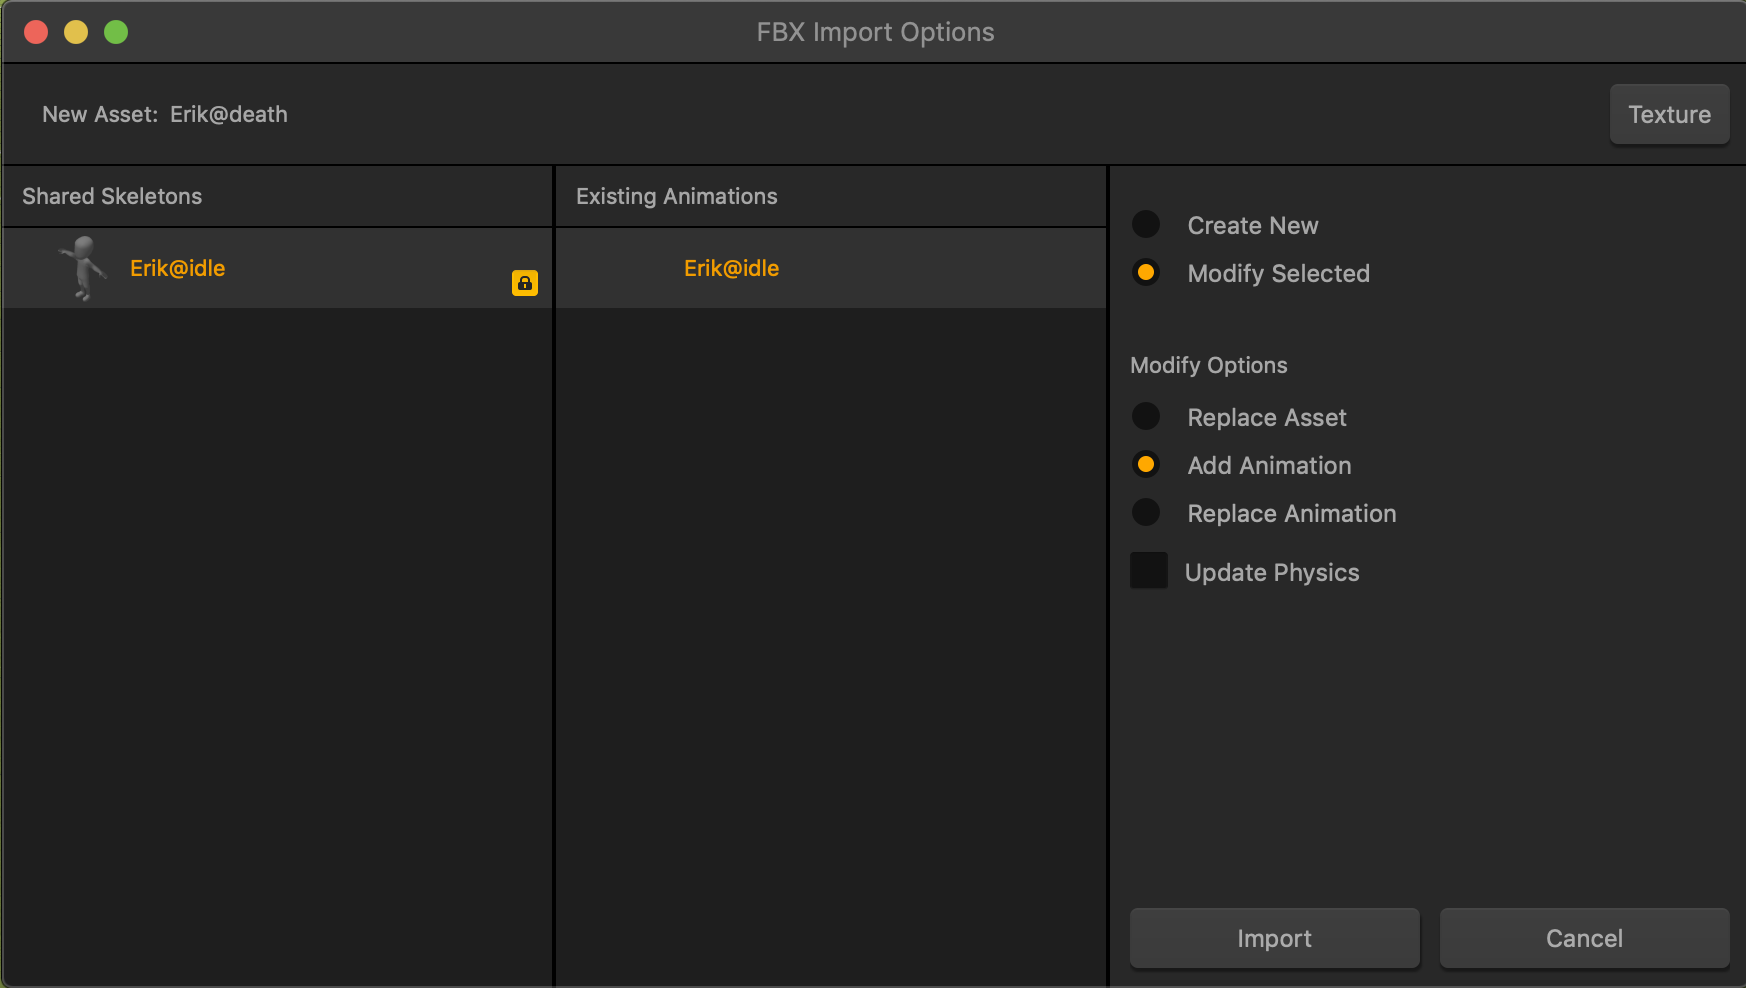
When you import multiple FBX files, the FBX Import Options window appears where you can add all your animations to a single asset.
- In the FBX Import Options window, make sure that the Modify Selected and Add Animation options are selected, then click Import.
To set up the animations of the character:
- In the World workspace and in the Asset panel on the left, click the name of the character asset.
- In the Options panel on the right and on the bottom, click Add Brainbox.
- At the top, select Animated Platformer. Multiple attributes appear in the options panel.
- In the Scene attribute field, click the Edit button
 .
. - In the Sub Scene Manager window and on the right, select the name of your idle animation or skeleton and click Save.
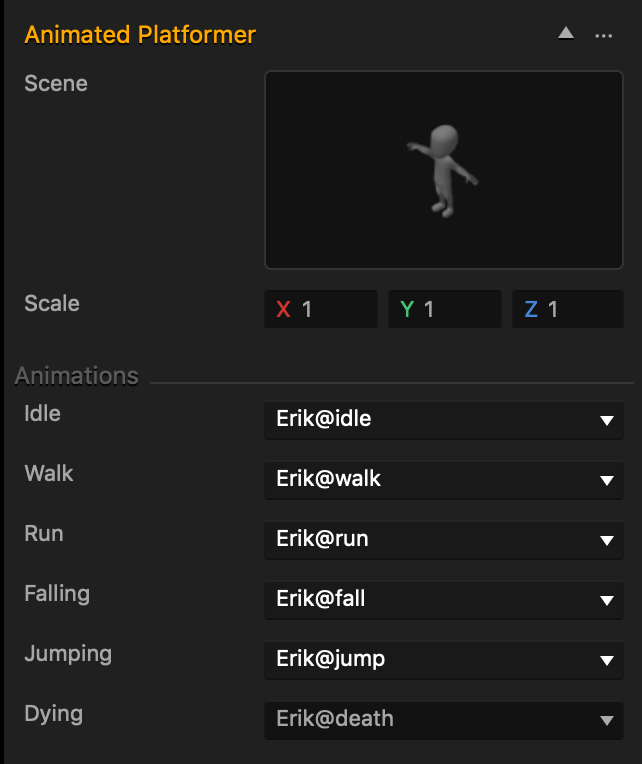
- In the Options panel and in each of the Animations attributes, click the dropdown and select the respective animation names.
The example below displays the attributes with the appropriate Erik Animations.
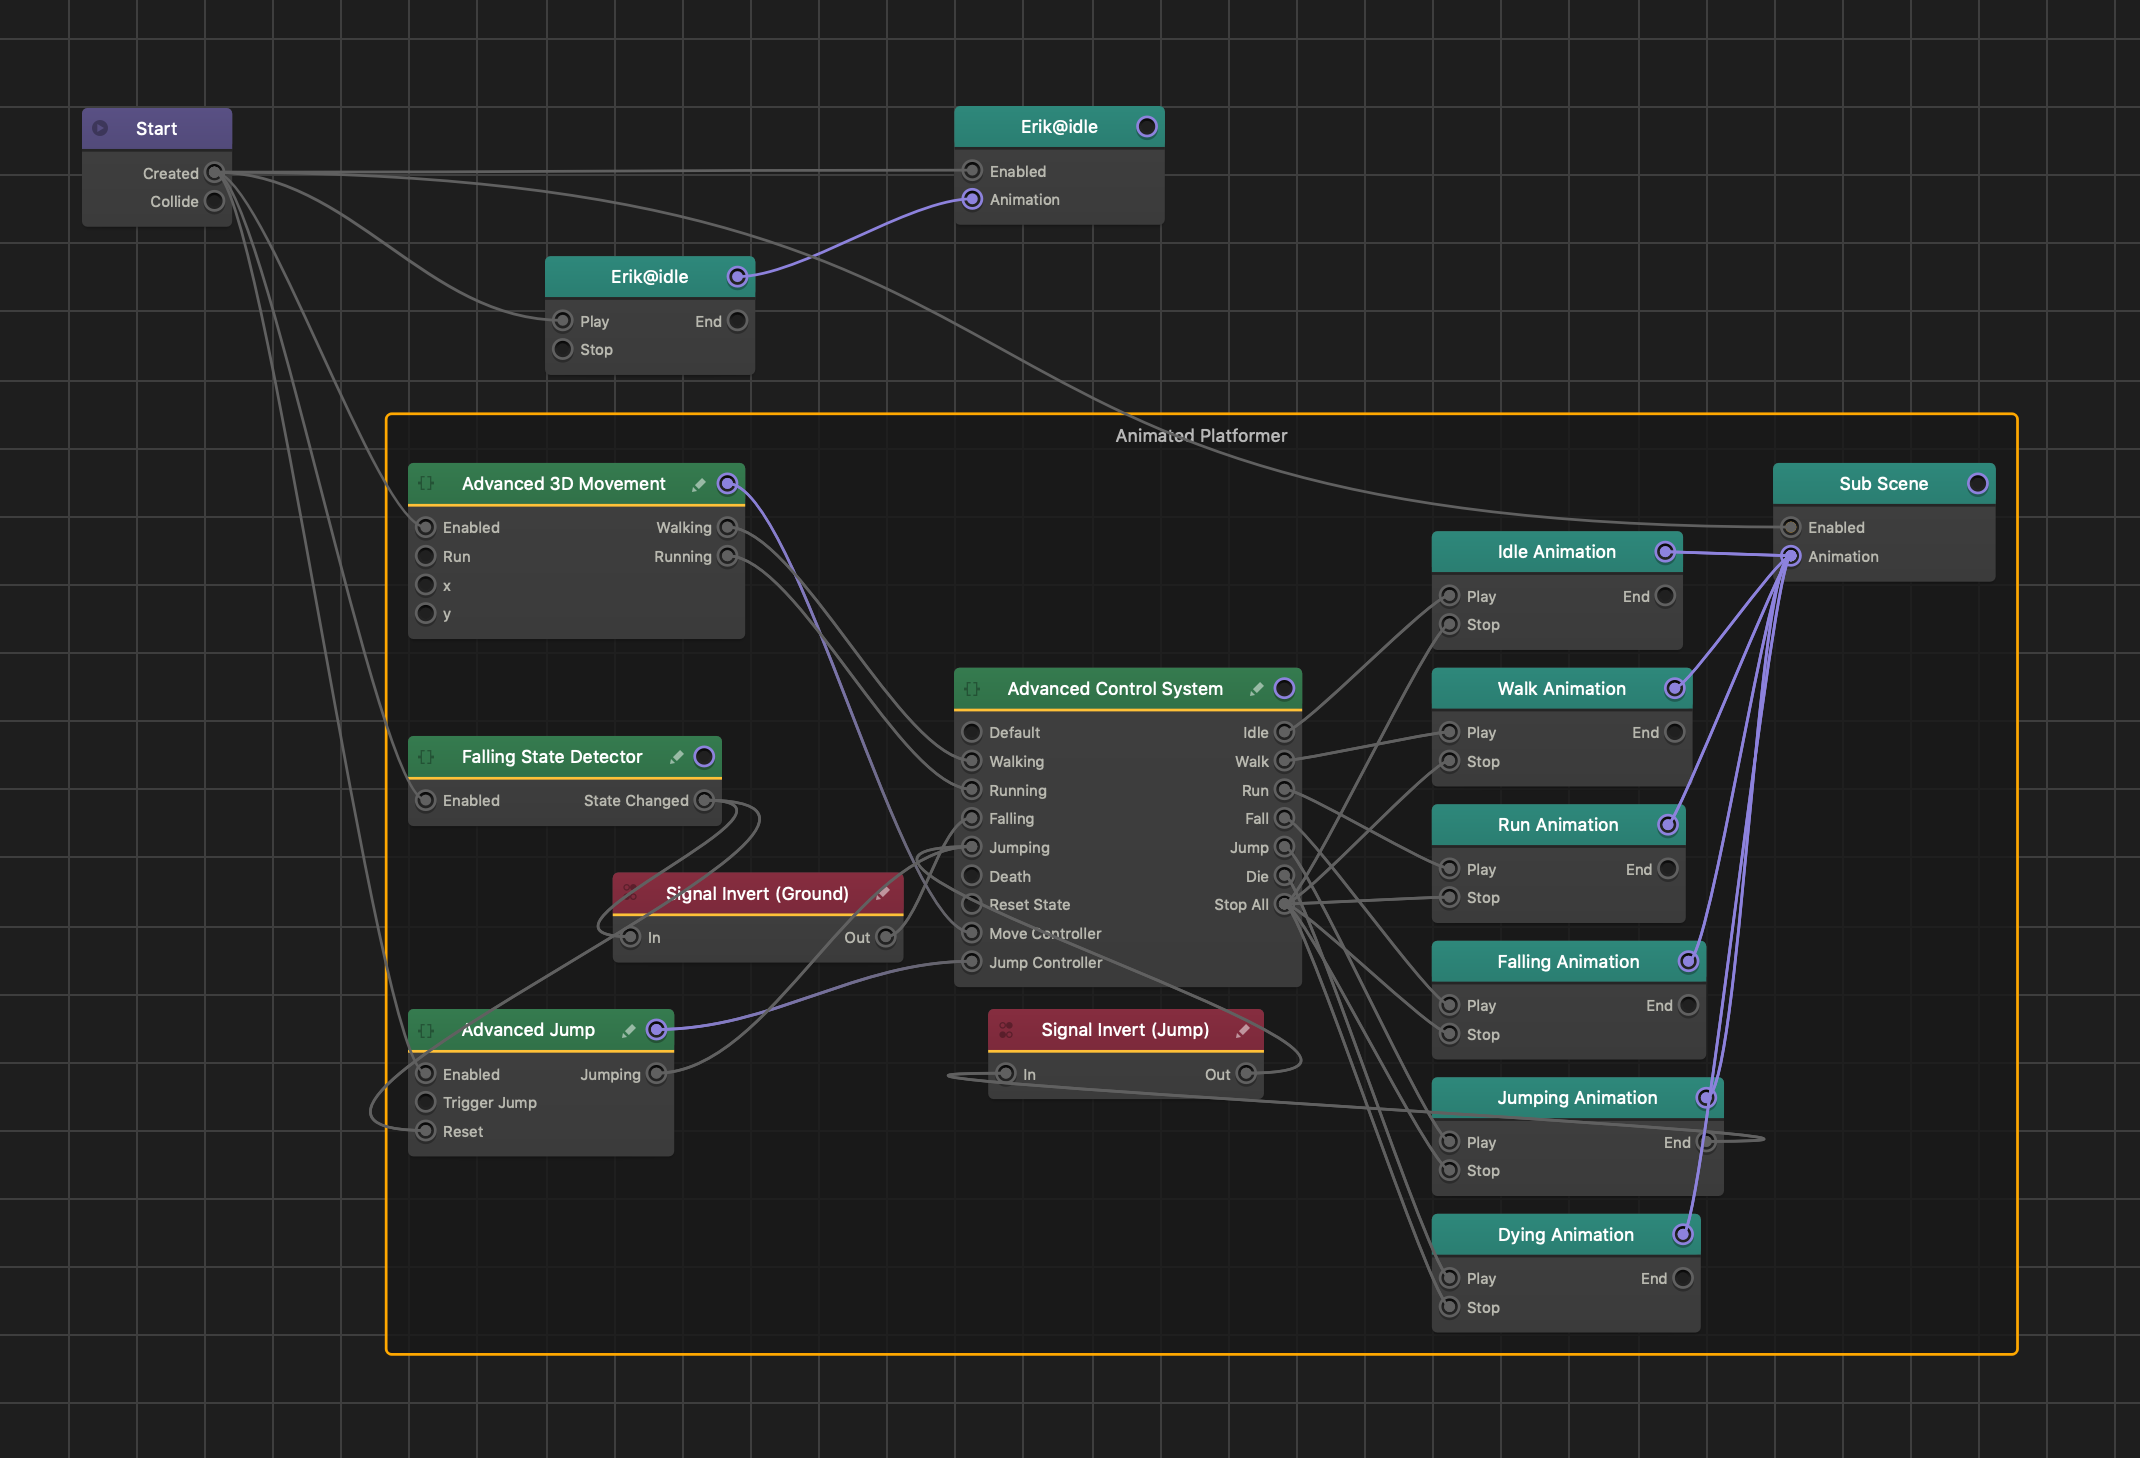
- In the Asset panel, double-click the character to open its Node Map.
- If there are any Sub Scene and Keyframe Animation nodes outside the Animated Platformer.
- Select any Sub Scene and Keyframe Animation nodes that are not in the Animated Platformer group and press DELETE.
In the example below you would delete both the Sub Scene and Keyframe Animation nodes labeled as Erik@idle.
 If you do not delete the Sub Scene outside the Brainbox group, you will see two models attached to the character when you preview your game.
 - On the Navigation bar at the top, click the name of your 3D World to go back to the Scene Editor.
Add Movement Controls
To add a mobile joystick control:
- On the Mind Map, drag a UI Node to the grid and connect the Load input to the UI output of a 3D World.
- Double-click the UI Node to open the UI editor.
- In the Asset Panel, click Asset Library and double-click the Joystick to add it to the Asset panel.
- Click Asset Library to go back to the UI Editor.
- From the Asset Panel, drag the Joystick to the grid and resize and position it as desired.
- In the Options panel, scroll to the bottom and in the EventName field, delete the default text and type Joystick.

- On the Navigation bar at the top, click 3D World or click the Mind Map icon and on the Mind Map, double-click the 3D World node.
- In the Asset panel, click the character asset.
- In the Options Panel, click Add Brainbox and select Mobile Controls. Its attributes now appear in the Options panel.
- In the Event Group delete the default text.
- In the Event Name delete the default text and type Joystick.
- Preview your game and use your mouse to drag the Joystick in any direction.


