
Node Map Workspace
To define the behavior of an asset in the game in response to the player’s actions, enable physics, as well as modify the associated game flow logic, you may need to add a few nodes on its Node Map.
To access the Node Map of a character or object:
- On the Mind Map, double-click the 3D World node where you want to modify an asset.
- Inside the 3D World, on the Asset panel, double-click the asset, for example, the character asset in your game.
The corresponding Node Map appears with the selected asset’s name added to the Navigation bar as a highlighted tab.
The Node Map workspace consists of the following parts:
- A The name of the selected template or project.
- B The Navigation bar.
- C The Node Panel on left.
- D The Helper with context-sensitive help.
- E The Node Map grid.
- F The JavaScript panel if you prefer customizing certain nodes using code. See Adding, Editing, and Deleting Nodes below.
- G The Options panel on the far right.
- H The Preview Mesh.
For details on how to work with the Node Map, such as zooming or dragging the grid, see Workspace Overview.
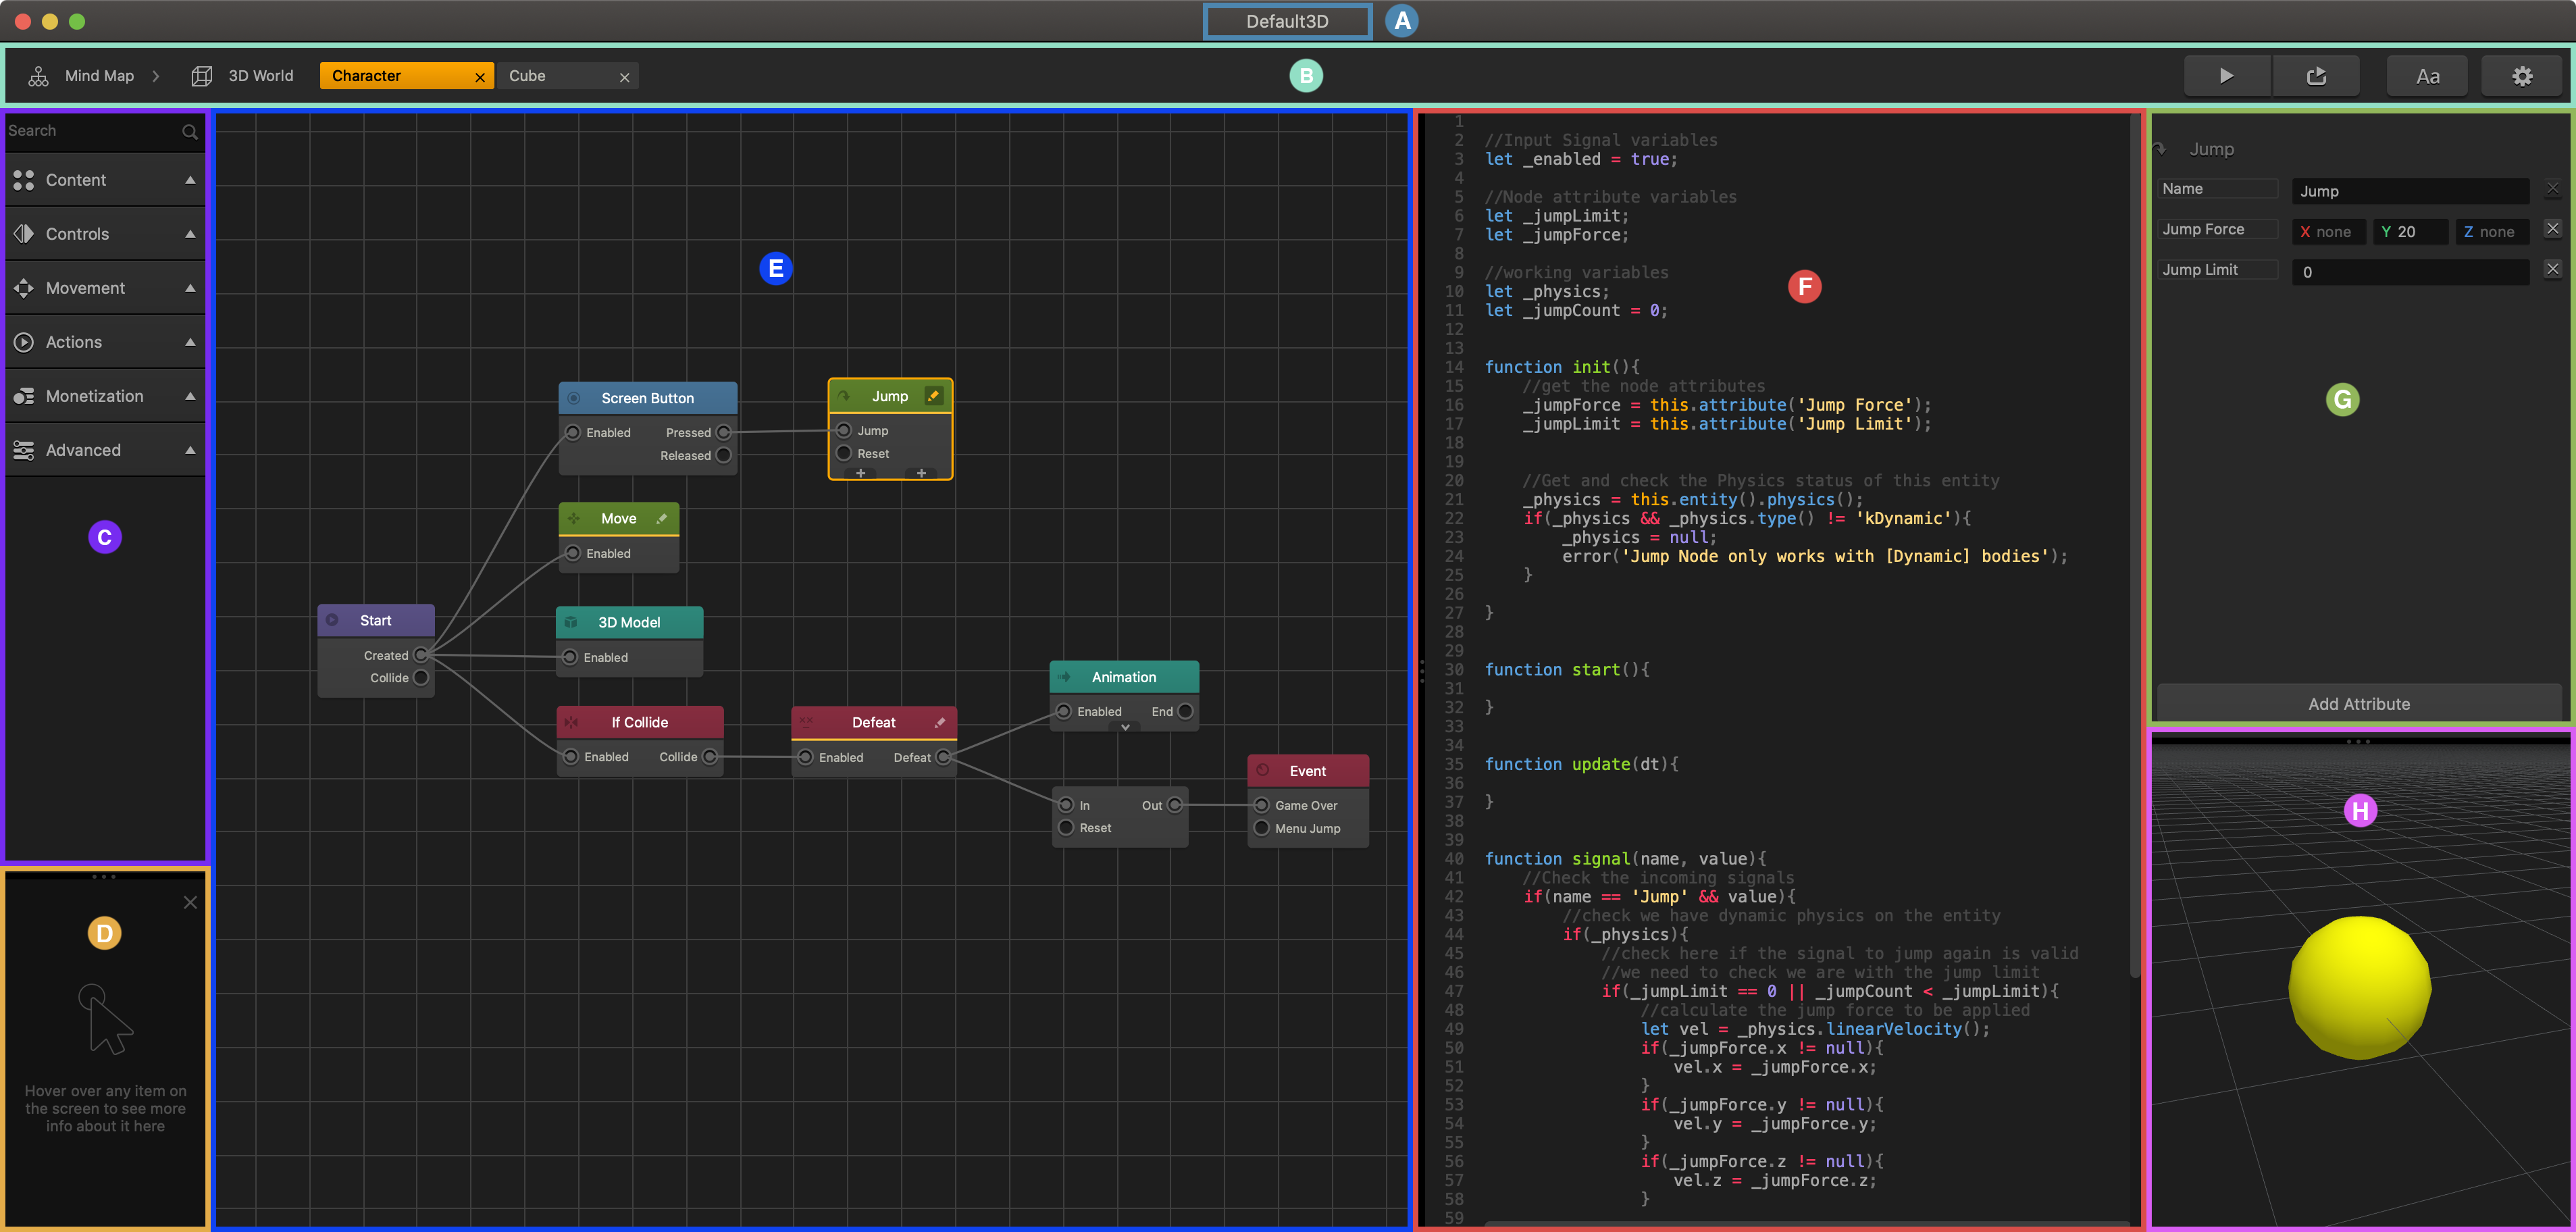
At the very least, any object or character in Buildbox must have two nodes on the Node Map:
- A Start node, which creates the character or object and enables its physics.
- A 3D Model node, which defines the shape of the asset.
Adding, Editing, and Deleting Nodes for an Asset
To add a node to the Node Map:
- On the Mind Map, double-click the 3D World node where you want to modify an asset.
- Inside the 3D World, on the Asset panel, double-click the asset, for example, the character asset in your game.
The Node Map is displayed, with the name of the selected asset highlighted on the navigation bar. - In the Node panel on the left, expand the node category from which you want to add a node.
If you don’t know the category, type the name of the node in the Search field.
- Drag the node you need from the Node panel to the Node Map.
- Define the node attributes in its Options panel.
- Customize the node, if needed, and connect it to the other nodes.
To remove or create a duplicate of a node, right-click the grid and select an option:
| Option | Keyboard Shortcut |
| Duplicate | W, A, S, or D |
| Copy | Ctrl/CMD + C |
| Paste | Ctrl/CMD + V |
| Delete | Delete, Backspace |
To edit the attributes of a node:
- Click the node and make the necessary updates in the respective Options panel.
- If the node has an Edit icon in the top right corner, you can customize the node by editing its JavaScript code and modifying its inputs and outputs. In this case, either click the Edit icon or simply double-click the node. For details, see Customizing Nodes.
To see the Buildbox JavaScript API documentation, on the Buildbox menu bar, go to Help > JS API Reference.
To delete a node with its connectors, select the node and press Delete on the keyboard.
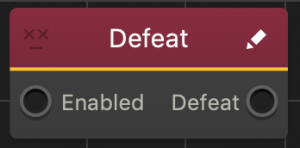
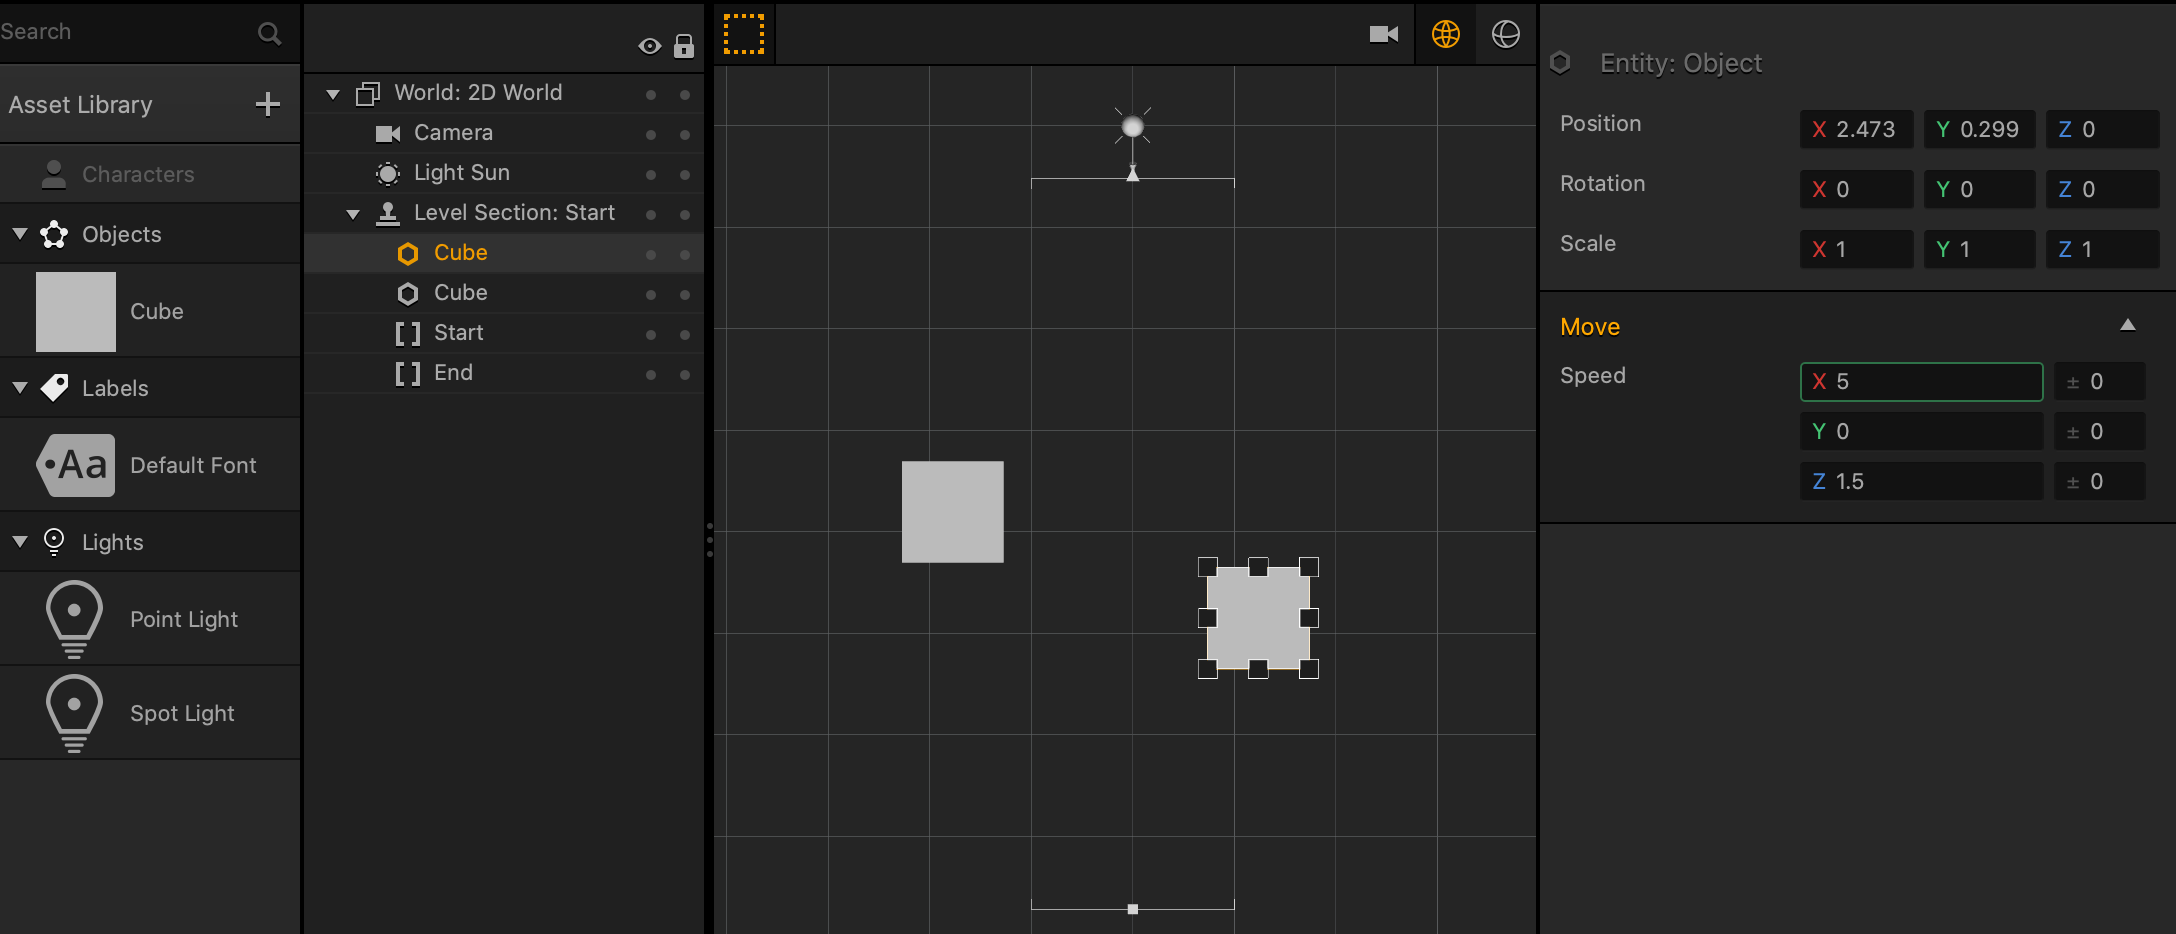
Pinned Node Attributes
Some attributes contain the button ![]() that allows you to make the attribute value unique per instance in the Scene Editor. This allows you to set a different value for each instance of the asset in a scene. The following walks you through how to pin the Speed attribute of the Move node:
that allows you to make the attribute value unique per instance in the Scene Editor. This allows you to set a different value for each instance of the asset in a scene. The following walks you through how to pin the Speed attribute of the Move node:
- On the Asset’s node map, select the Move node then hover your mouse over the Speed attribute and click the pin icon that appears.
- Click the World tab to go back to the World Editor.
- Drag the asset from the asset panel to the Scene Editor multiple times to create multiple instances of the asset in the Scene.
- Select an instance of the asset in the Scene Editor, and in the Options panel, enter a numeric value in the desired Speed attribute field. Repeat this step for each instance in the Scene Editor.
When you preview your game, you will notice that even though the same asset is present in multiple instances, each instance will move at a different speed.
Grouping Nodes
A Node Group contains multiple nodes that in a single colored rectangle.
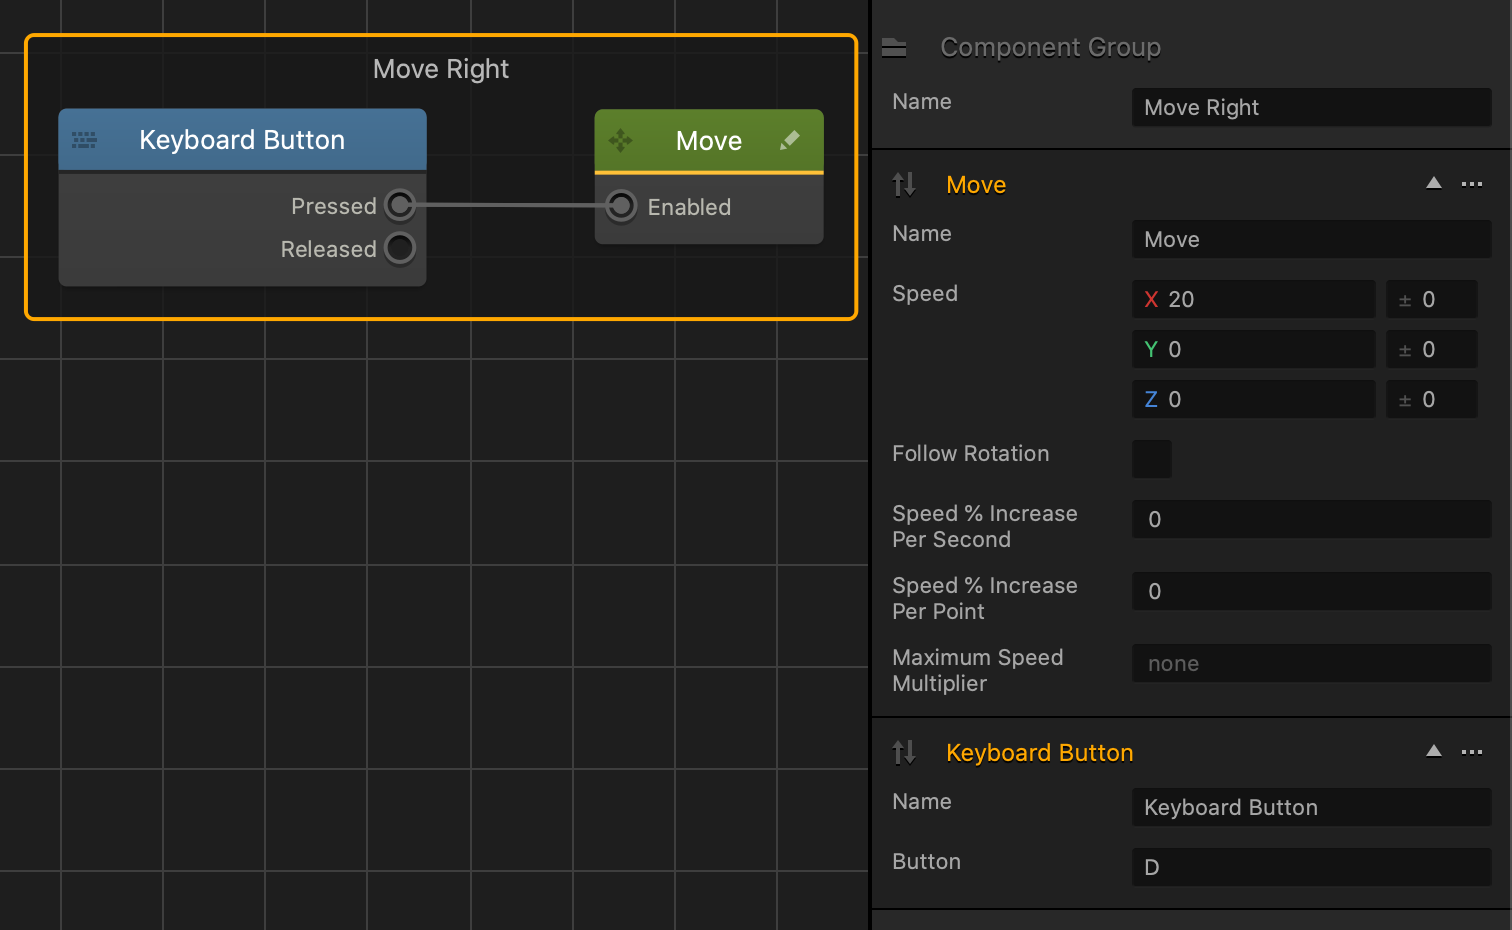
- To create a Node Group, click and drag a bounding box over each desired node, then right-click and select Group Nodes.
The nodes are now contained with a black rectangle. - To select the group, click anywhere in the colored area of the group. All of the associated node attributes appear in the Options panel.
- To rename the group, select it and in the Options panel on the right, in the Name attribute, enter a new name.
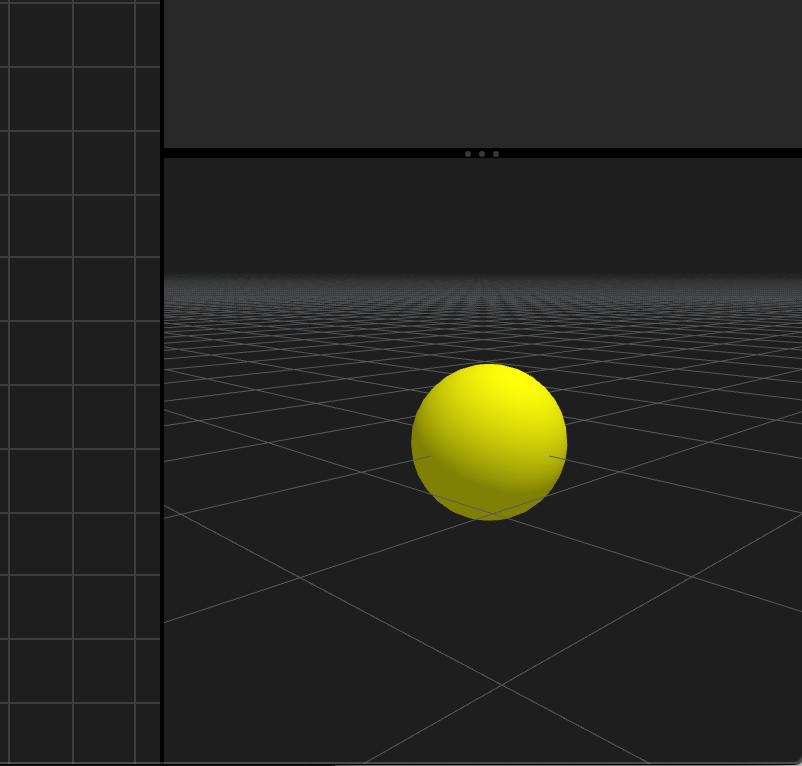
Previewing Mesh
When you open the Node Map of an asset, the preview of its mesh appears at the bottom of the Options panel. It displays what your asset will look like when you drag it into a scene.
Use the following controls to change the view of the preview mesh:
| Control | Description |
| Click + drag,
Space + Right-click and drag |
Rotate the view. |
| Middle Mouse click + drag
Space + click and drag |
Change the position of the view. |
| Scroll up | Zoom the view in. |
| Scroll down | Zoom the view out. |


