
Step 1: Enroll in the App Developer Program
This tutorial will take you through the final steps of taking your Buildbox game and putting it onto the App Store. This tutorial will assume that your Buildbox game is already polished, bug free, and ready for the world to see.
Before you submit your game to the App Store, you must first enroll in the App Developer Program. To do this go to the Apple Developer Program Page and click the blue Enroll button in the top right to start your enrollment. You will have to fill out your user information and Entity type, agree to the license agreement, and pay $99. Note that this is an annual $99 payment and must be maintained each year to keep your game on the App Store.
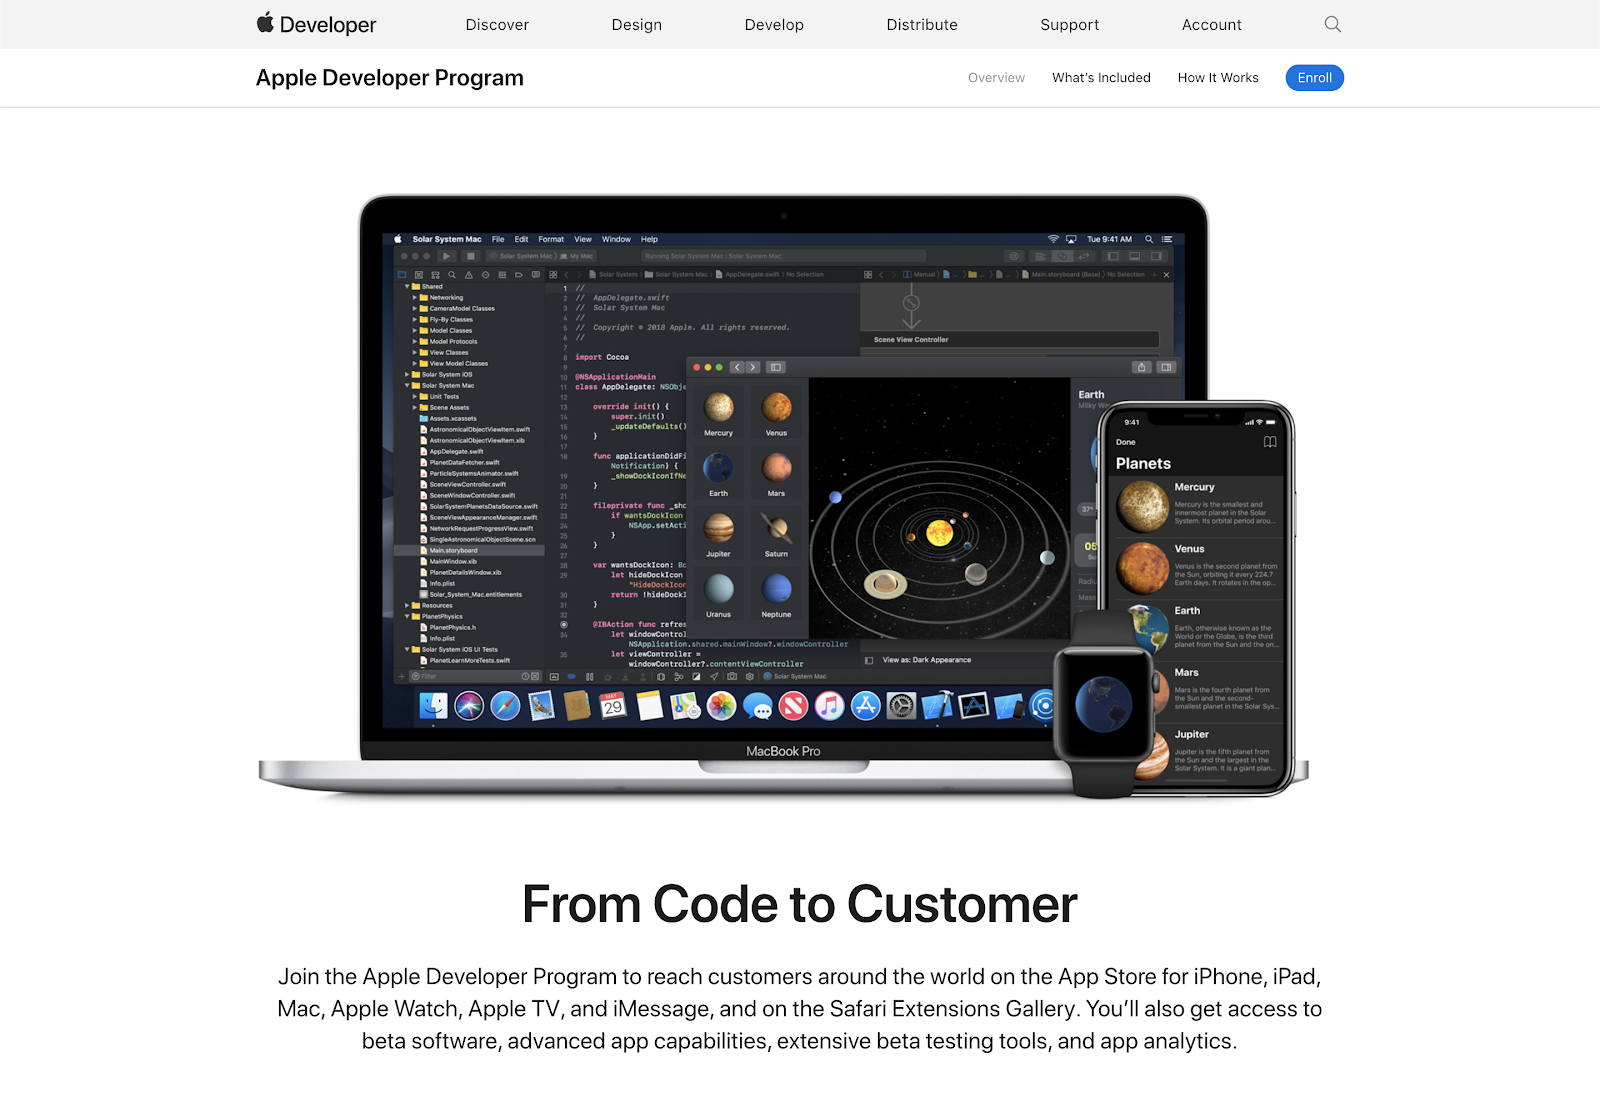
Apple Developer Program
Enrolling in the Apple Developer Program gives you access to the App Store Connect dashboard, which is where you will go to submit and update your game and manage the analytics and data for it.
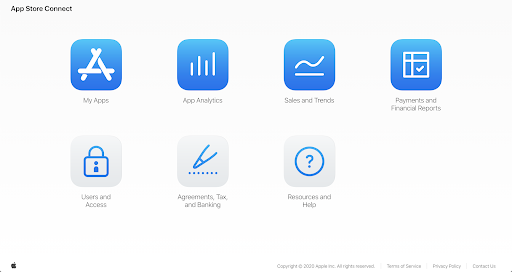
App Store Connect – Dashboard
One more tool you are going to need is Xcode, which will have to be installed on a Mac computer. Xcode is the tool that professional Apple Developers use to design, code, test, and debug applications for Apple products. Xcode requires that you update it with the newest version often and sometimes requires the newest Mac OS, which often takes time to update so make sure this is up to date as soon as possible.
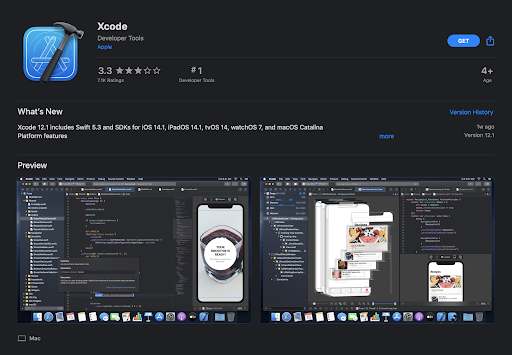
App Store – Xcode
Step 2: Export your Game
If you are using Buildbox 2, then please use Step 2a. If you are using Buildbox 3, then please jump to Step 2b.
Step 2a: For Buildbox 2 Users
Once you are enrolled in the Apple Developer Program, have Xcode installed, and your Buildbox game is completed, it’s time to export. To start, open your game in Buildbox 2.
Before exporting, you will need to fill out some app info on the Project Settings page. To get to the Project Settings Page, click on the gear in the top right of Buildbox 2.
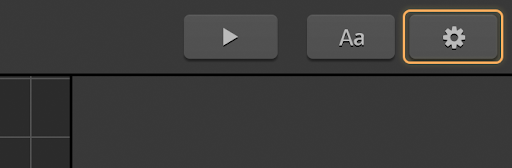 Buildbox – Project Settings Button
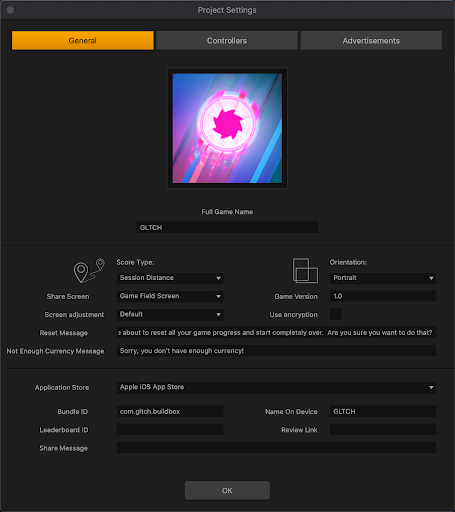
The App info you need to fill out is under the General tab. Make sure you import an Icon Image and Full Game Name. Remember whether Use Encryption is checked because Apple will ask whether your game is encrypted during the submission process. For Application Store, select Apple iOS App Store. Make sure you fill out Bundle ID and Name On Device as they are required for submission. The Bundle ID is a unique identifier that Apple requires for every App on the App Store. As long as it is unique, you may set this to whatever you choose. The Name On Device is the name of your game that will appear on the device. You only have to fill out Leaderboard ID, Review Link, and Share Message if they apply.
 Buildbox – Project Settings Page
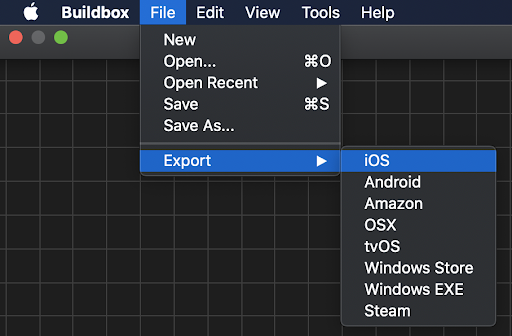
Now that all the important information is filled in, it is time to export. In the Menu Bar, go to File > Export > iOS. In the popup, fill out Save As and select the file location on your computer. This will create a set of files on your computer to be used with Xcode to be put onto the App Store.
 Buildbox – iOS Export
Step 2b: For Buildbox 3 Users
Once you are enrolled in the Apple Developer Program, have Xcode installed, and your Buildbox game is completed, it’s time to export. To start, open your game in Buildbox 3.
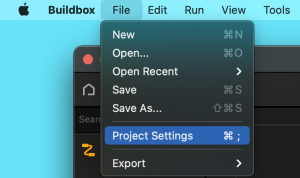
Before exporting, you will need to fill out some app info on the Project Settings page. To get to the Project Settings Page, go up to File –> Project Settings or you can use the (Ctrl/Cmd + ;) hotkey as well.
 Buildbox – Project Settings Button
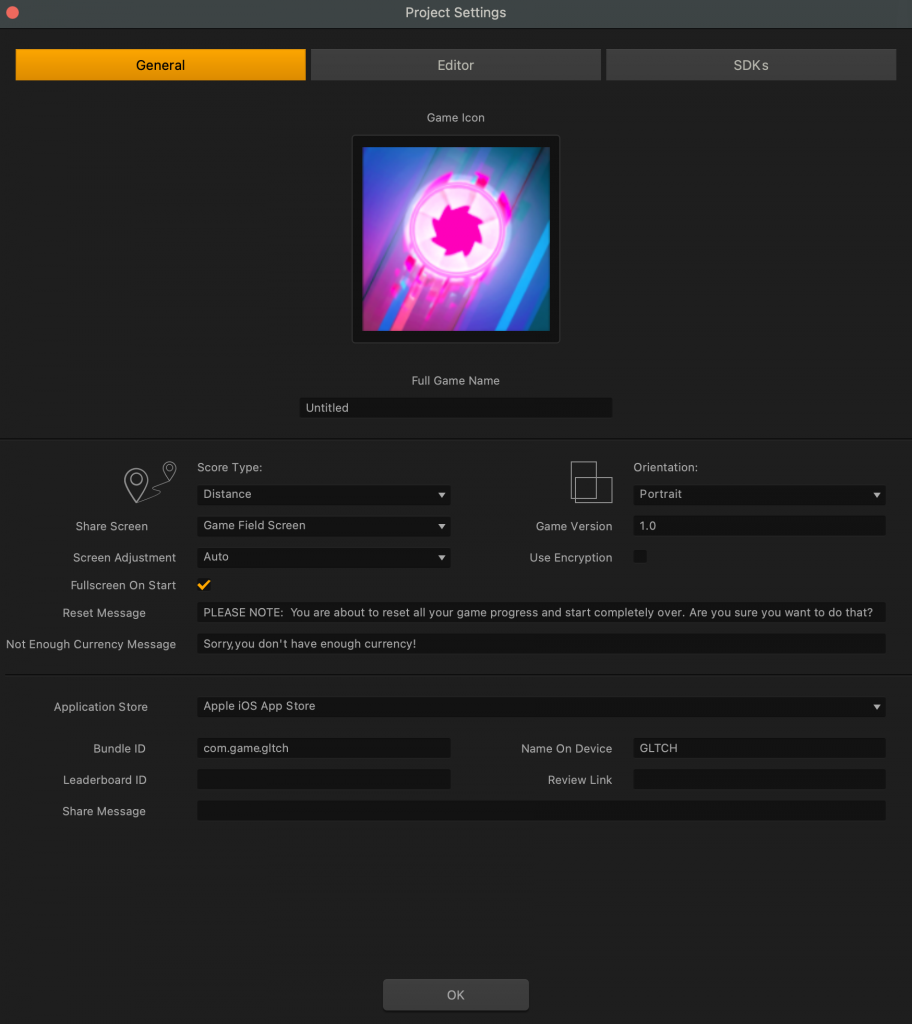
The App info you need to fill out is under the General tab. Make sure you import an Icon Image and Full Game Name. Remember whether Use Encryption is checked because Apple will ask whether your game is encrypted during the submission process. For Application Store, select Apple iOS App Store. Make sure you fill out Bundle ID and Name On Device as they are required for submission. The Bundle ID is a unique identifier that Apple requires for every App on the App Store. As long as it is unique, you may set this to whatever you choose. The Name On Device is the name of your game that will appear on the device. You only have to fill out Leaderboard ID, Review Link, and Share Message if they apply.
 Buildbox – Project Settings Page
Now that all the important information is filled in, it is time to export. In the Menu Bar, go to File > Export > iOS. In the popup, fill out Save As and select the file location on your computer. This will create a set of files on your computer to be used with Xcode to be put onto the App Store.
Buildbox – iOS Export
Step 3: Setup your Xcode Project
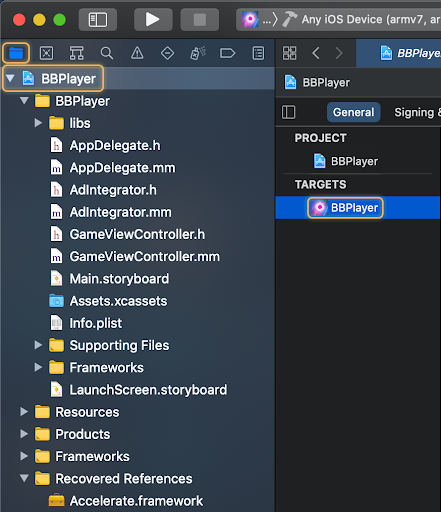
Now, you are going to have to set up your game using Xcode. First, make sure you have Xcode installed and up to date. Next, go to your exported buildbox game in Step 2, open the folder and open the iOS folder then double click on BBPlayer.xcodeproj to open the project with Xcode. Xcode is where you will set up your game to prepare it for the App Store. You can adjust settings, assign your Team, fix errors, test on a device, and archive it for upload.
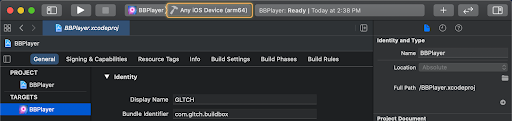
First, let’s make sure your workspace is working on the correct build. First, on the left tab, select the folder icon to display the folder structure for your project. Next, still on the left tab, select BBPlayer at the top to display your game in the workspace. Finally, to the right, select the BBPlayer under Targets to display the iOS build for your game. Now your workspace is working on the correct build for your game, which is what will be uploaded to the App Store. All the changes you make in Xcode should be within this build. If you get lost while working in Xcode repeat these steps and you should be back in the correct workspace.
Xcode – Workspace
To review the General Settings for your game select the General tab at the top. Most of the information should be automatically filled by Buildbox based on your Project Settings, but double check it is all correct.
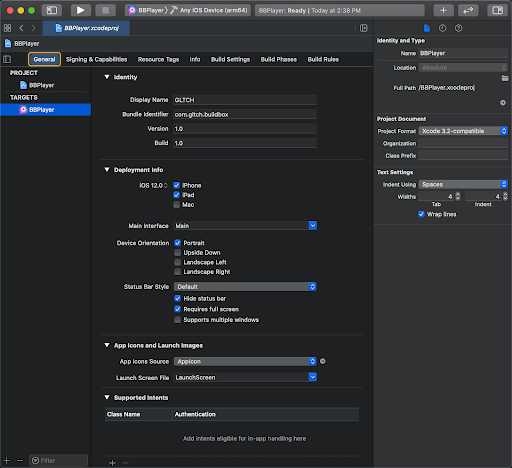
Xcode – General Tab
To review your Signing Certificate and other features for your game, Select the Signing & Capabilities tab at the top. For Team, select the Apple Development Team, which should be tied to your Apple account. If you do not have a Team set up yet, select Add Account. This will create a Signing Certificate, which ensures that it is you that is uploading your game. Once your team is selected it will add the selected Bundle Identifier to your pool of Bundle Identifiers later when creating your App Store Listing.
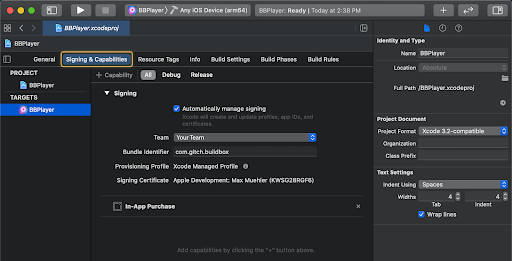
Xcode – Signing & Capabilities Tab
If you want to test your game on an iPhone before uploading it to the App Store, you can do that here. To do so, you will need an iPhone, plug it into your computer, and make sure the phone trusts the computer. Next, in the Scheme Menu, select your plugged in iPhone, which should show up at the top. This tells Xcode to build your game onto the plugged in iPhone. Finally, click the Run Button. It will take a moment to build, you may have to fix some errors, and you will have to make sure the iPhone is not asleep. When the build is done your game should open on the iPhone. This will also create an icon on the iPhone to run it anytime. This will be your last chance to test your game on a device before it is on the App Store.
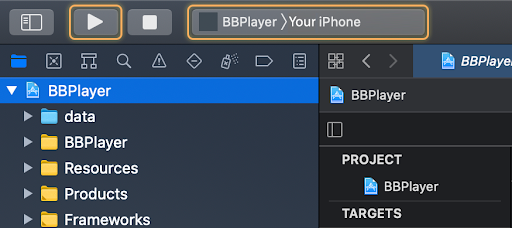
Xcode – Test on Device
Before moving to the next step, make sure Any iOS Device is selected in the Scheme Menu. This ensures that your build will work for all devices that your customers might be using.
Xcode – Any iOS Device
You will also want to make sure there are no errors. If there are errors, they will be shown in the Build time feed on the left and a little red icon will be displayed at the top. Some errors can be fixed with an automatic update, others require manual changes. If you do not have any error messages and only a few warning messages are showing, your xcode project should still run successfully.

Xcode – Errors
Step 4: Archive your Xcode Project
Once your Xcode project is set up, it is time to archive your build. This archived build is what you will upload to the App Store and what your players will download and play.
To archive your build go to the Menu Bar > Product > Archive. If Archive is greyed out and cannot be selected, go back to Step 3 and make sure all of your settings are correct.
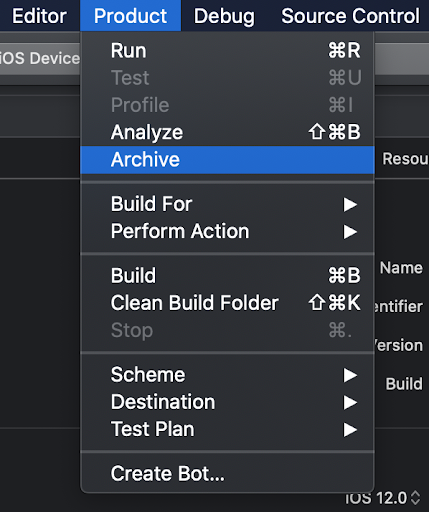
Xcode – Archive Button
Wait for the Xcode to build the archive. You may have to put in your computer password a few times and fix a few errors. Once your build is archived, you will get a notification and the organizer will popup, showing your new archived build.
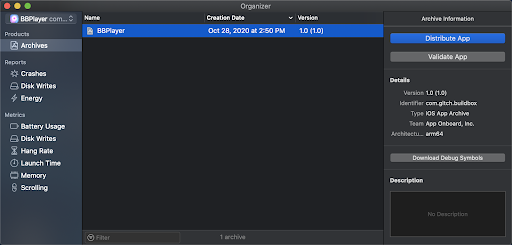
Xcode – Organizer
Step 5: Create your App Store Listing
Now it is time to create your App Store Listing within App Store Connect. To do so, go to the App Store Connect dashboard and click My Apps. This is where you will find all of your apps, whether they are being prepared to be added to the App Store or are already on the App Store. At the top, next to Apps, click the blue + button and select New App.
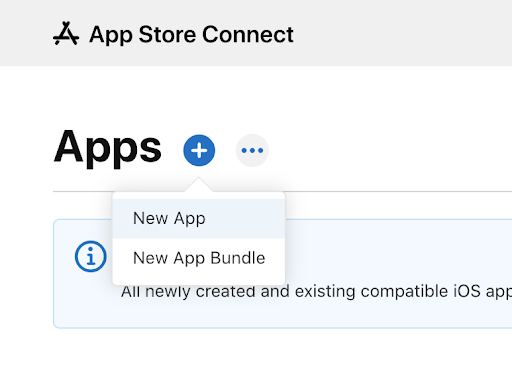
App Store Connect – New App Button
This will open a popup to fill out your initial App information. For Bundle ID, select the one you created in the project settings page inside Buildbox and autofilled inside XCode. If your Bundle ID does not appear, you may have to go back into Xcode and fix your Bundle ID or Signing Team. When finished, click Create.
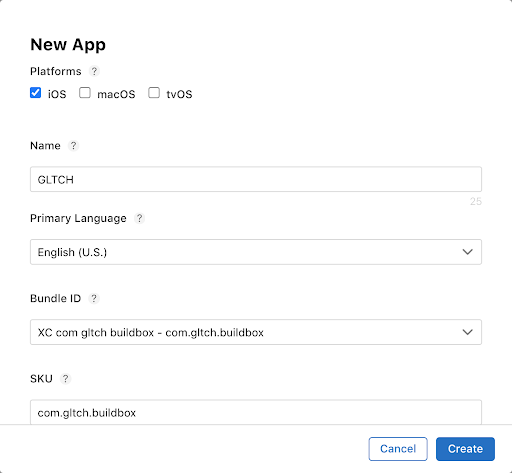
App Store Connect – New App
Step 6: Update App Information
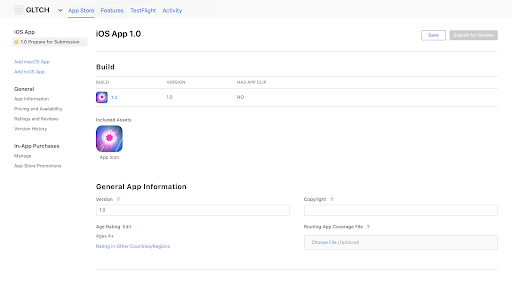
You have just created your App Listing but your game is not on the App Store yet, you will still have to add more information and upload the Build for your game before submitting to Apple for review. Currently your status should be Prepare for Submission, which can be seen from the top left of your App Listing page.
App Store Connect – App Listing
From the App Listing page, there is a long list of fields that you are required to fill out in order to submit to the App Store. If there is anything you don’t understand, you can click the ? button next to anything and you will get an explanation. Make sure that all the changes you make are saved by clicking the Save button at the top right.
On the left tab (or as a dropdown menu depending on how wide your window is) you will find a link to all of the different pages for your App Listing that you will have to access in order to make all the necessary changes.
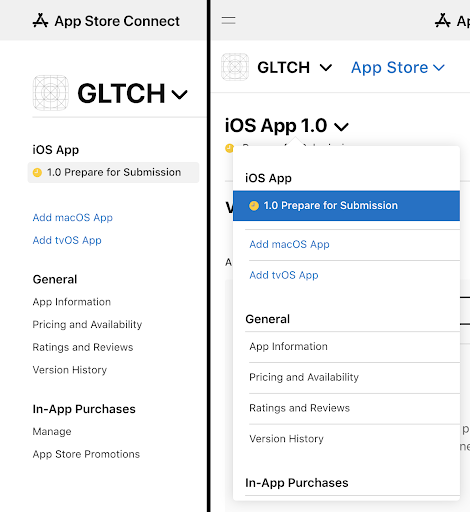
App Store Connect – Link Menu
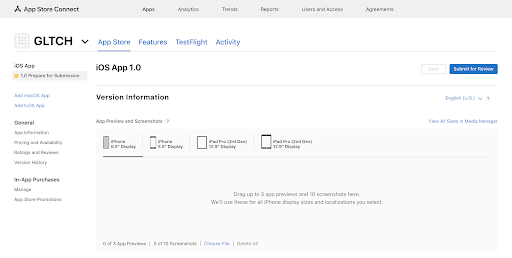
Go to the iOS App page by selecting the 1.0 Prepare for Submission button. The Version Information section is where you provide the information that everyone will see on the App Store. The required fields are:
- App Preview and Screenshots – you will have to provide images and videos of your game in various resolutions for different phone types. The minimum requirement is one screenshot, but we recommend more to show off your gameplay. You may drag media onto this box. Once you add the media you will have to wait for it to be uploaded and processed.
- Description – use this section to tell potential customers about your game.
- Keywords – which is used to help potential customers find your game.
- Support URL – you must provide a website to help your customers.
Under the Builds section is where you will find your uploaded builds which will be covered in Step 7.
- Under General App Information the required fields are Age Rating and Content Rights. For Age Rating, select the Edit button, which brings up a popup form to fill out. For Content Rights, select Set Up Content Rights Information which opens a popup. If your game contains Ads or any other 3rd party content then the answer is yes, otherwise the answer is no.
- The App Review Information section is where you will provide Apple with everything they need to successfully review your submission. Uncheck Sign-in required (or provide the username and password for a login you will have to provide) and fill out the contact information.
- Under Version Release, select how and when your game will be put onto the App Store after Apple accepts your submission.
Go to the App Information page from the link menu.
- Under Localization Information the required field is name (which should already be filled out from when you created the App Listing).
- Under General Information, the required fields are Bundle ID (which should be filled out already, but you can select a new one if you create a new one through Xcode) and Category.
Go to the Pricing and Availability page from the link menu. Under Price Schedule you must select a price for your game. You can even add multiple prices on a schedule if you want to change it after a certain date.
Go to the App Privacy page from the link menu to fill in information about the data being collected from your users. There is certain data that all Buildbox games collect for our own analytics, so make sure to fill this information correctly. This is very basic user data to determine the size and retention of our users games to improve the Buildbox Softwares for our customers.
- Next to Privacy Policy, select Edit to open a popup. Under Privacy Policy URL, add a URL for your privacy policy. You will have to create a webpage for your privacy policy.
- Under Data Types, click Get Started to open a popup, select Yes, we collect data from this app then click Next. Here is where you select all the data being collected. Under Usage Data select Product Interaction. If your game has ads, select Advertising Data. If you are using any other 3rd party applications, you may have to select any other data being collected by those. Finally click Save. This will update the App Privacy page with the Usage Data you have selected.
- Next, under Usage Data which has just been added, select Set Up Product Interactions to open a popup. Select Analytics then click Next. Select No, product interaction data collection from this app is not linked to the user’s identity then click Next. Click Next a few times then select No, we do not use product interaction data for tracking purposes. This is everything you need to do for the data collected specifically by Buildbox, but if any other data is collected you will have to set up that data information.
Once your App Privacy information is finished, select Publish at the top right to add the privacy policy information to your App Store page. Before publishing, make sure the information is correct.
Step 7: Upload your App Build
Now that your App Listing is created, go back into Xcode to upload your build. To do this, go back to your Xcode project and go to your archived build, which can be found in the Organizer by going to the Menu Bar > Window > Organizer. Select your Archive and click Distribute App.
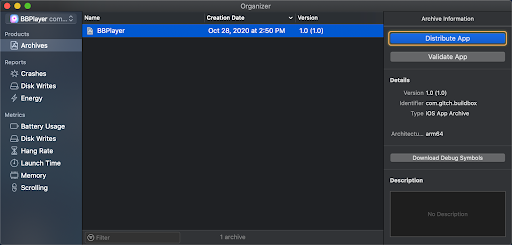
Xcode – Organizer
Go through the series of prompts to upload your app. Select App Store Connect > Upload > Check Upload your app’s symbolicated to receive symbolicated reports from Apple > Automatically manage signing > Upload. Wait for your game to be uploaded. You may have to fix some errors. Once it is uploaded you should get a green check.
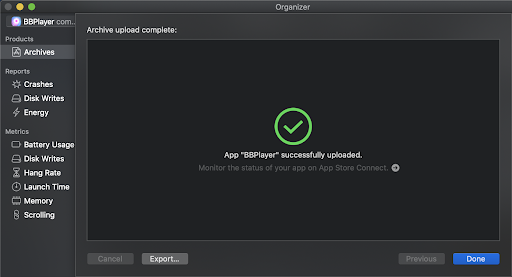
XCode – Completed Archive Upload
Once your archive is uploaded, go back to App Store Connect > iOS App > Build. If the Bundle Identifiers match then you should see the Select a build before you submit your app button. If you do not see your build, you may have to give it some time and refresh the page.
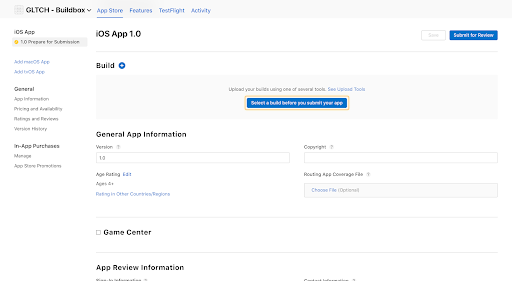
App Store Connect – Build
When you click the button you should get an Add Build popup with the archived build you just uploaded. Select it and click Done.
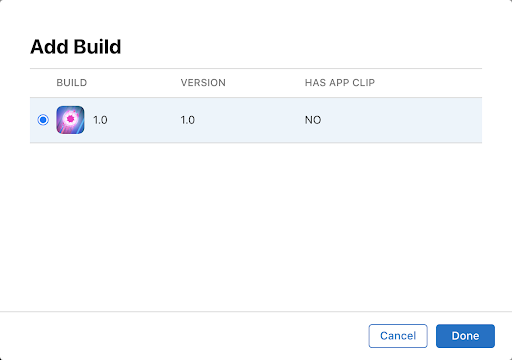
App Store Connect – Add Build
You will then be asked whether your game uses encryption. In the Project Settings page for your Buildbox project, there is a Use Encryption checkbox. If you checked that checkbox before exporting your project then select Yes, otherwise select No. Then click Done when finished.
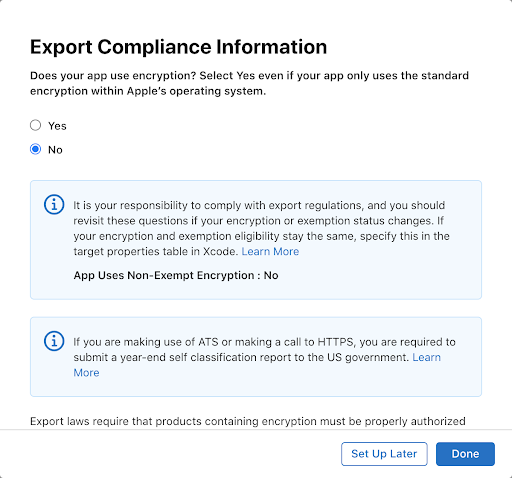
App Store Connect – Export Compliance Information
Now your App Store Listing has your Buildbox game attached.
App Store Connect – Build
Step 8: Submit your Game for Review
Now it’s time to submit your game for review. If you have done everything correctly up until this point then inside your App Listing on App Store Connect, the Submit for Review button at the top right should be blue. Click it to submit your game to apple to review.
 App Store Connect – Submit for Review
You may get a warning telling you to make some changes, but once those changes are made you will just have to submit again. Once you submit for review you will get a notification and the status of the build will change to “Waiting for Review”.
This review process can take anywhere from a day to a week or longer. Apple may reject your submission with feedback on what needs to be changed, but you can always submit again. Once your submission is accepted, your app will be released based on the choice you made under Version Release.
Once your app is released, congratulations! You officially have your very own game on the App Store!


