
In this chapter, you will get a detailed tour of the software’s options and settings, which will help you become more familiar with the features and editing tools that you will be using.
We will cover the creator tool and how to use it to make a playable skeleton of your game ‘GLTCH.’ We will also cover how to use the scene editor to customize your game with different backgrounds, characters, menu screen graphics and more.
LET’S GET STARTED.
First, we start up Buildbox. We’ll be greeted by the welcome screen.
In the welcome screen you will find :
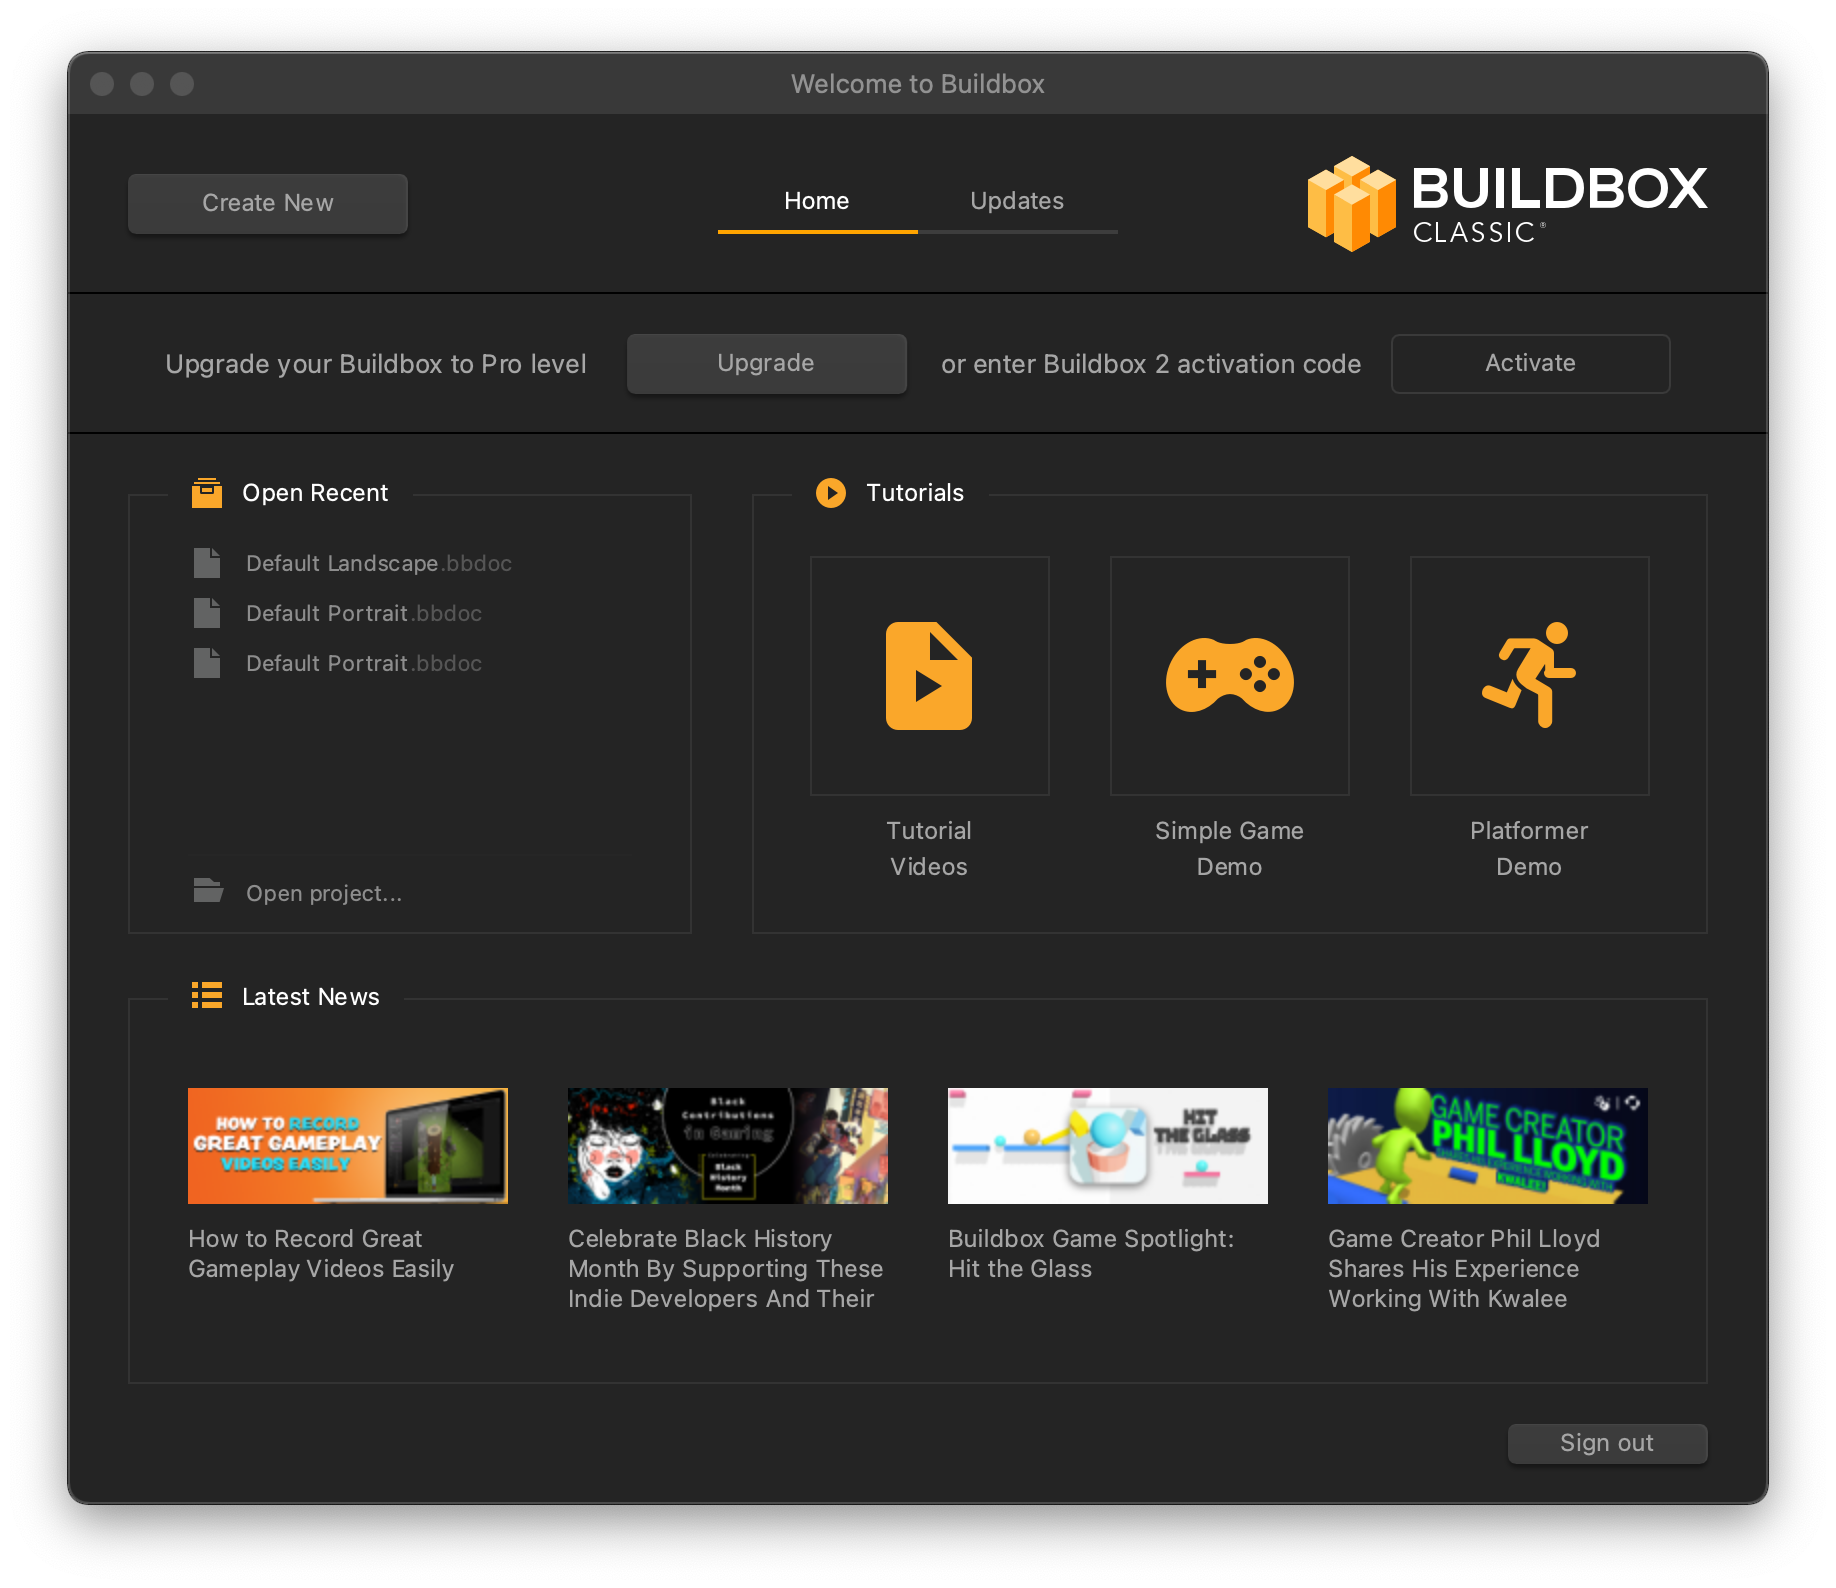
A list of previous projects we can open with one click. The last item brings up a dialog to browse to any project on your computer.
- Tutorial videos on Buildbox.com
- Demos to help you get a feel for Buildbox
- News related to Buildbox, its teams, and its developers
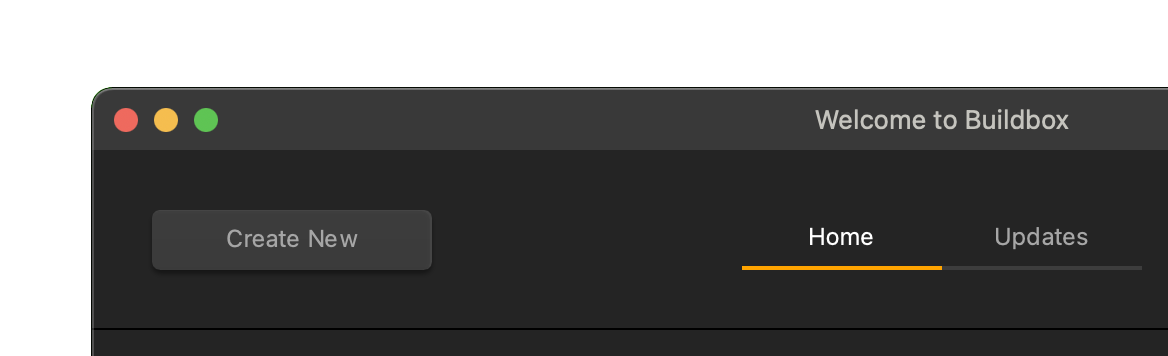
To start building our game, you will need to click the “Create New”button.
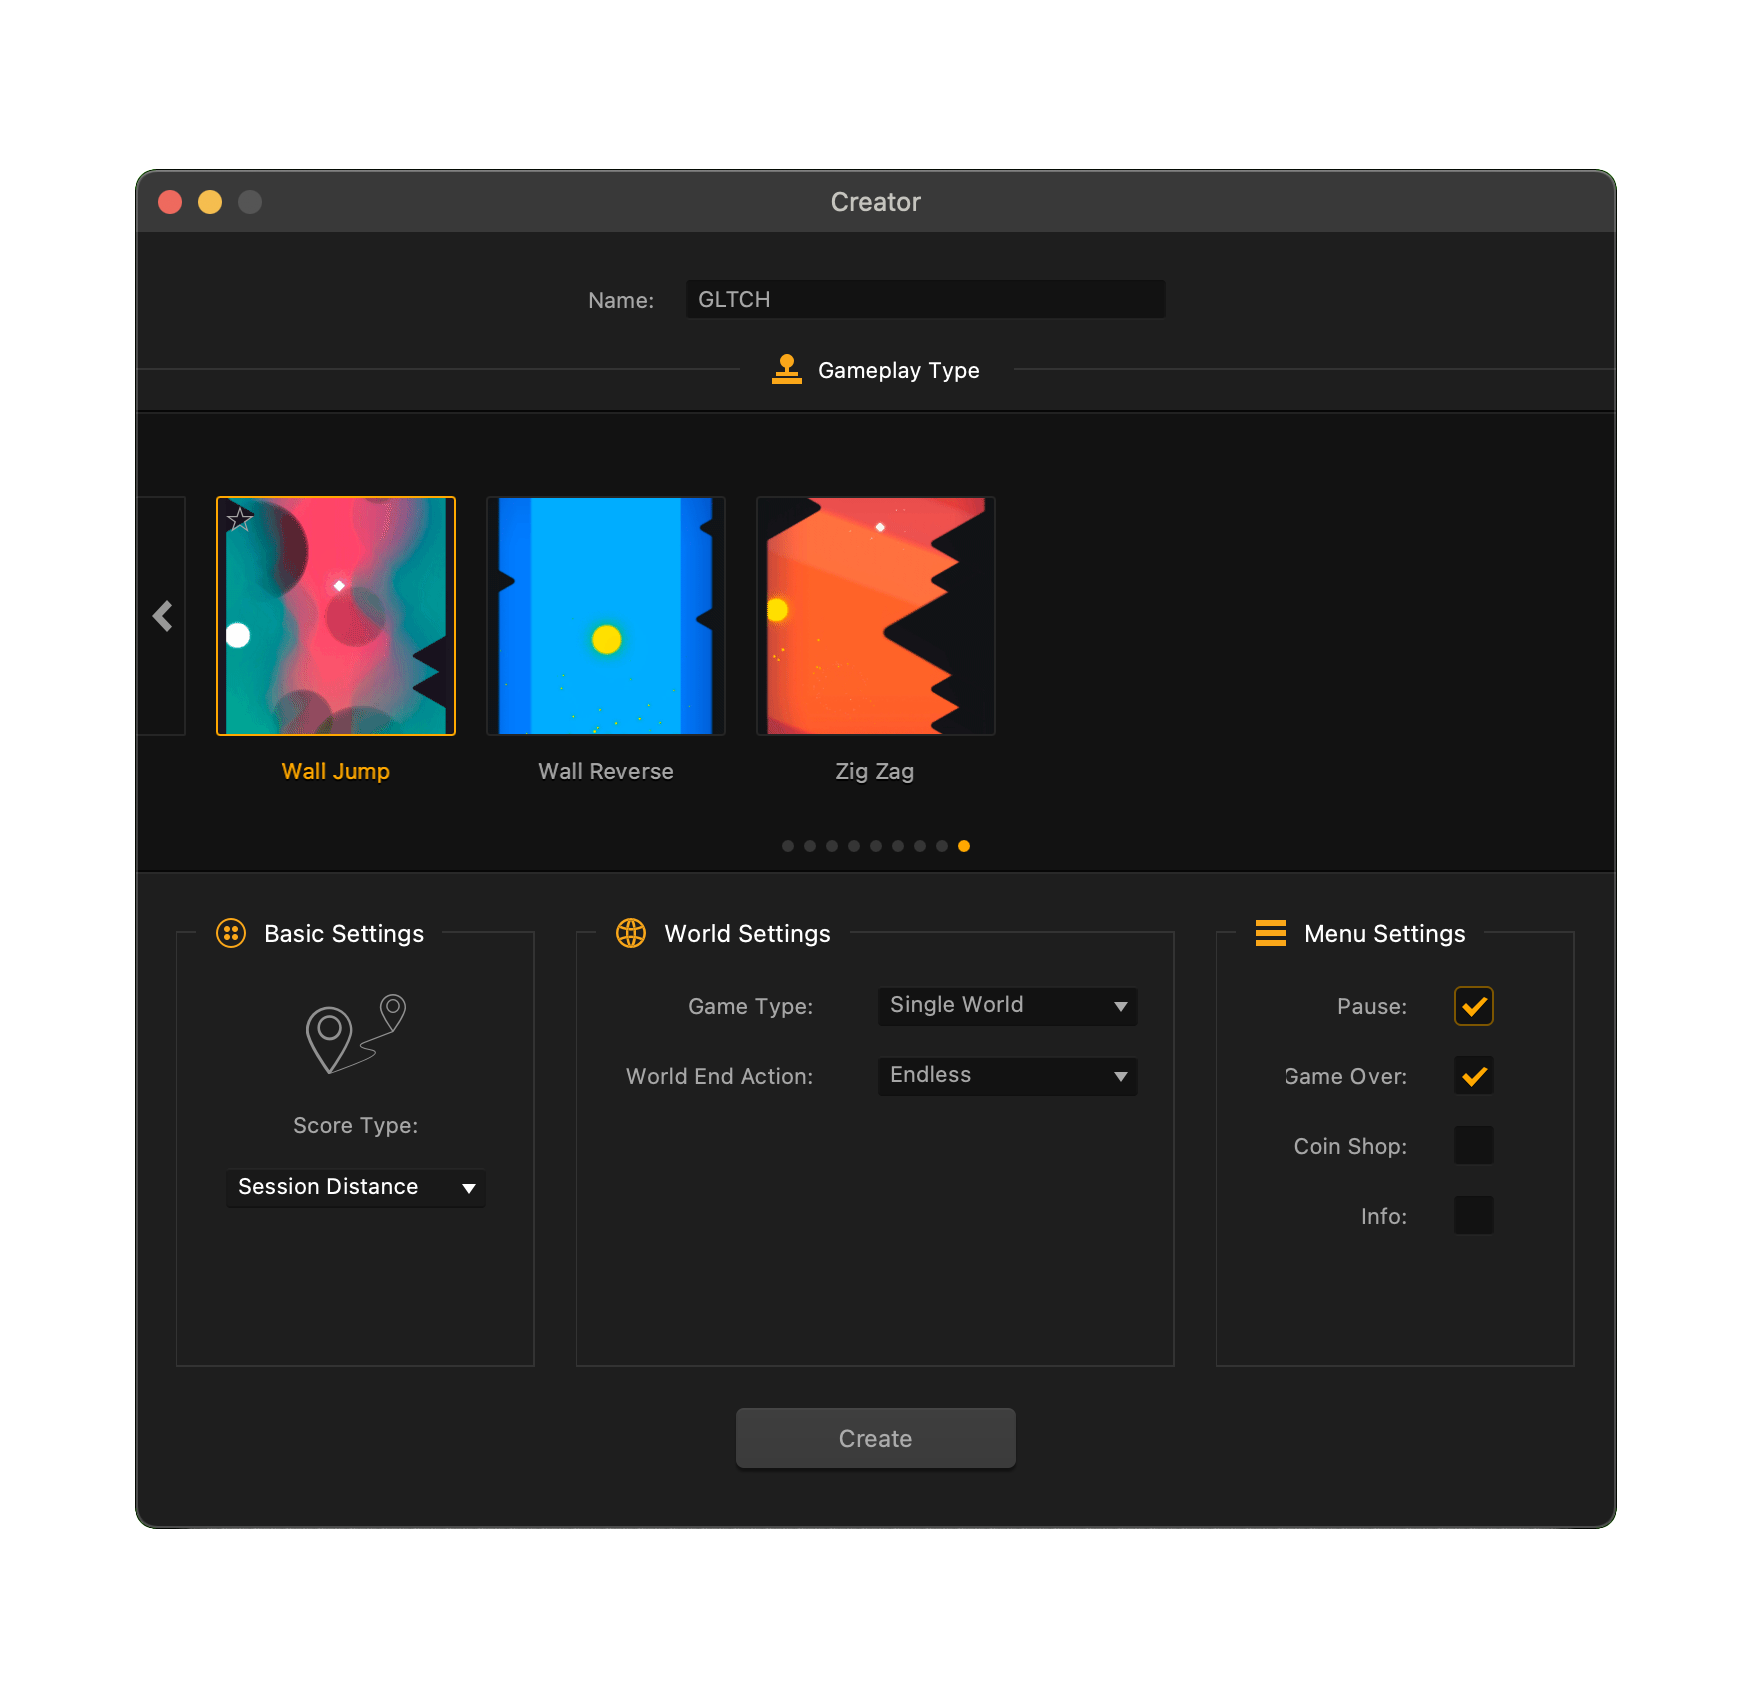
Clicking the “Create New” button will bring out the Creator Window. Write the title of your game on the “Name” field. In this case, write ‘GLTCH’.

Pay particular attention to the menu and world settings, as they set up a lot of elements automatically that you would otherwise have to set up by hand.
In the creator window, you can set the orientation of the game (which way is up), to either portrait or landscape. You can set up the score type to either distance-based, coin-based, or point-based. You can set single world or have multiple worlds. You can also decide on what happens for the world end action.
All of these can be changed later – they are however the fastest way of getting your base settings correct before you start.
The most exciting part about the Creator Window is the list of gameplay presets.
You can try them all out another time.
For now, let’s have these settings:
Name: GLTCH
Orientation: Portrait
Score Type: Distance
Game Type: Single World
World End Action: Endless
Gameplay Type: Wall Jump
Menu Settings: Has Pause Menu and Game Over Menu
Press the Create button once your settings are set up like this.
Clicking “create” will take you to the SCENE EDITOR.
The Scene Editor is the screen you will be spending most of your time in, while using Buildbox. It is where you edit the scenes that make up a world.
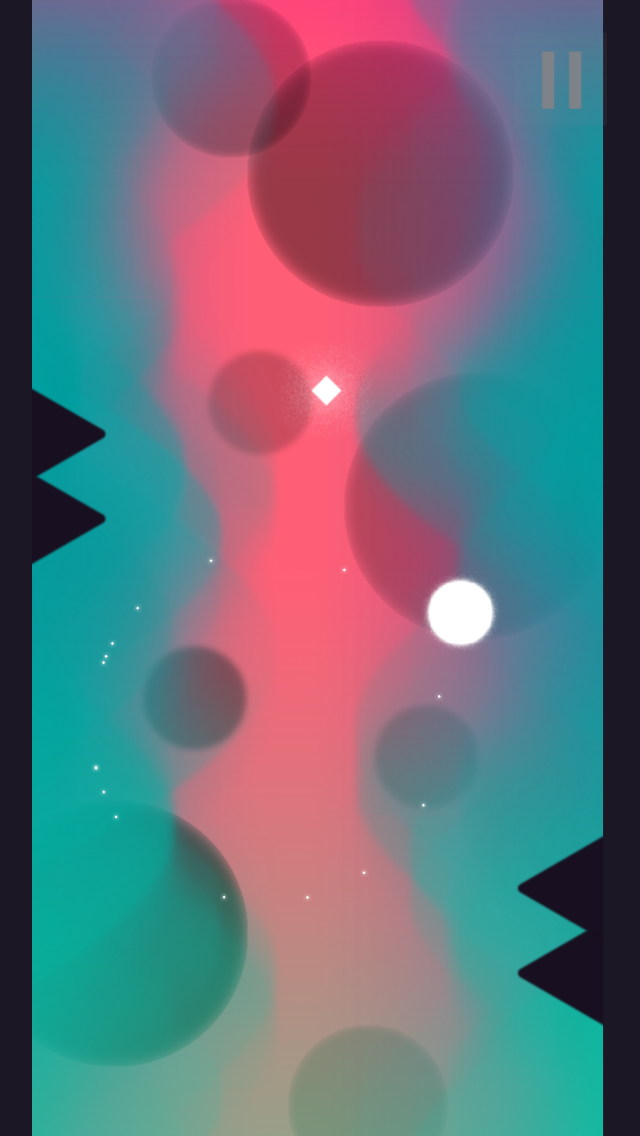
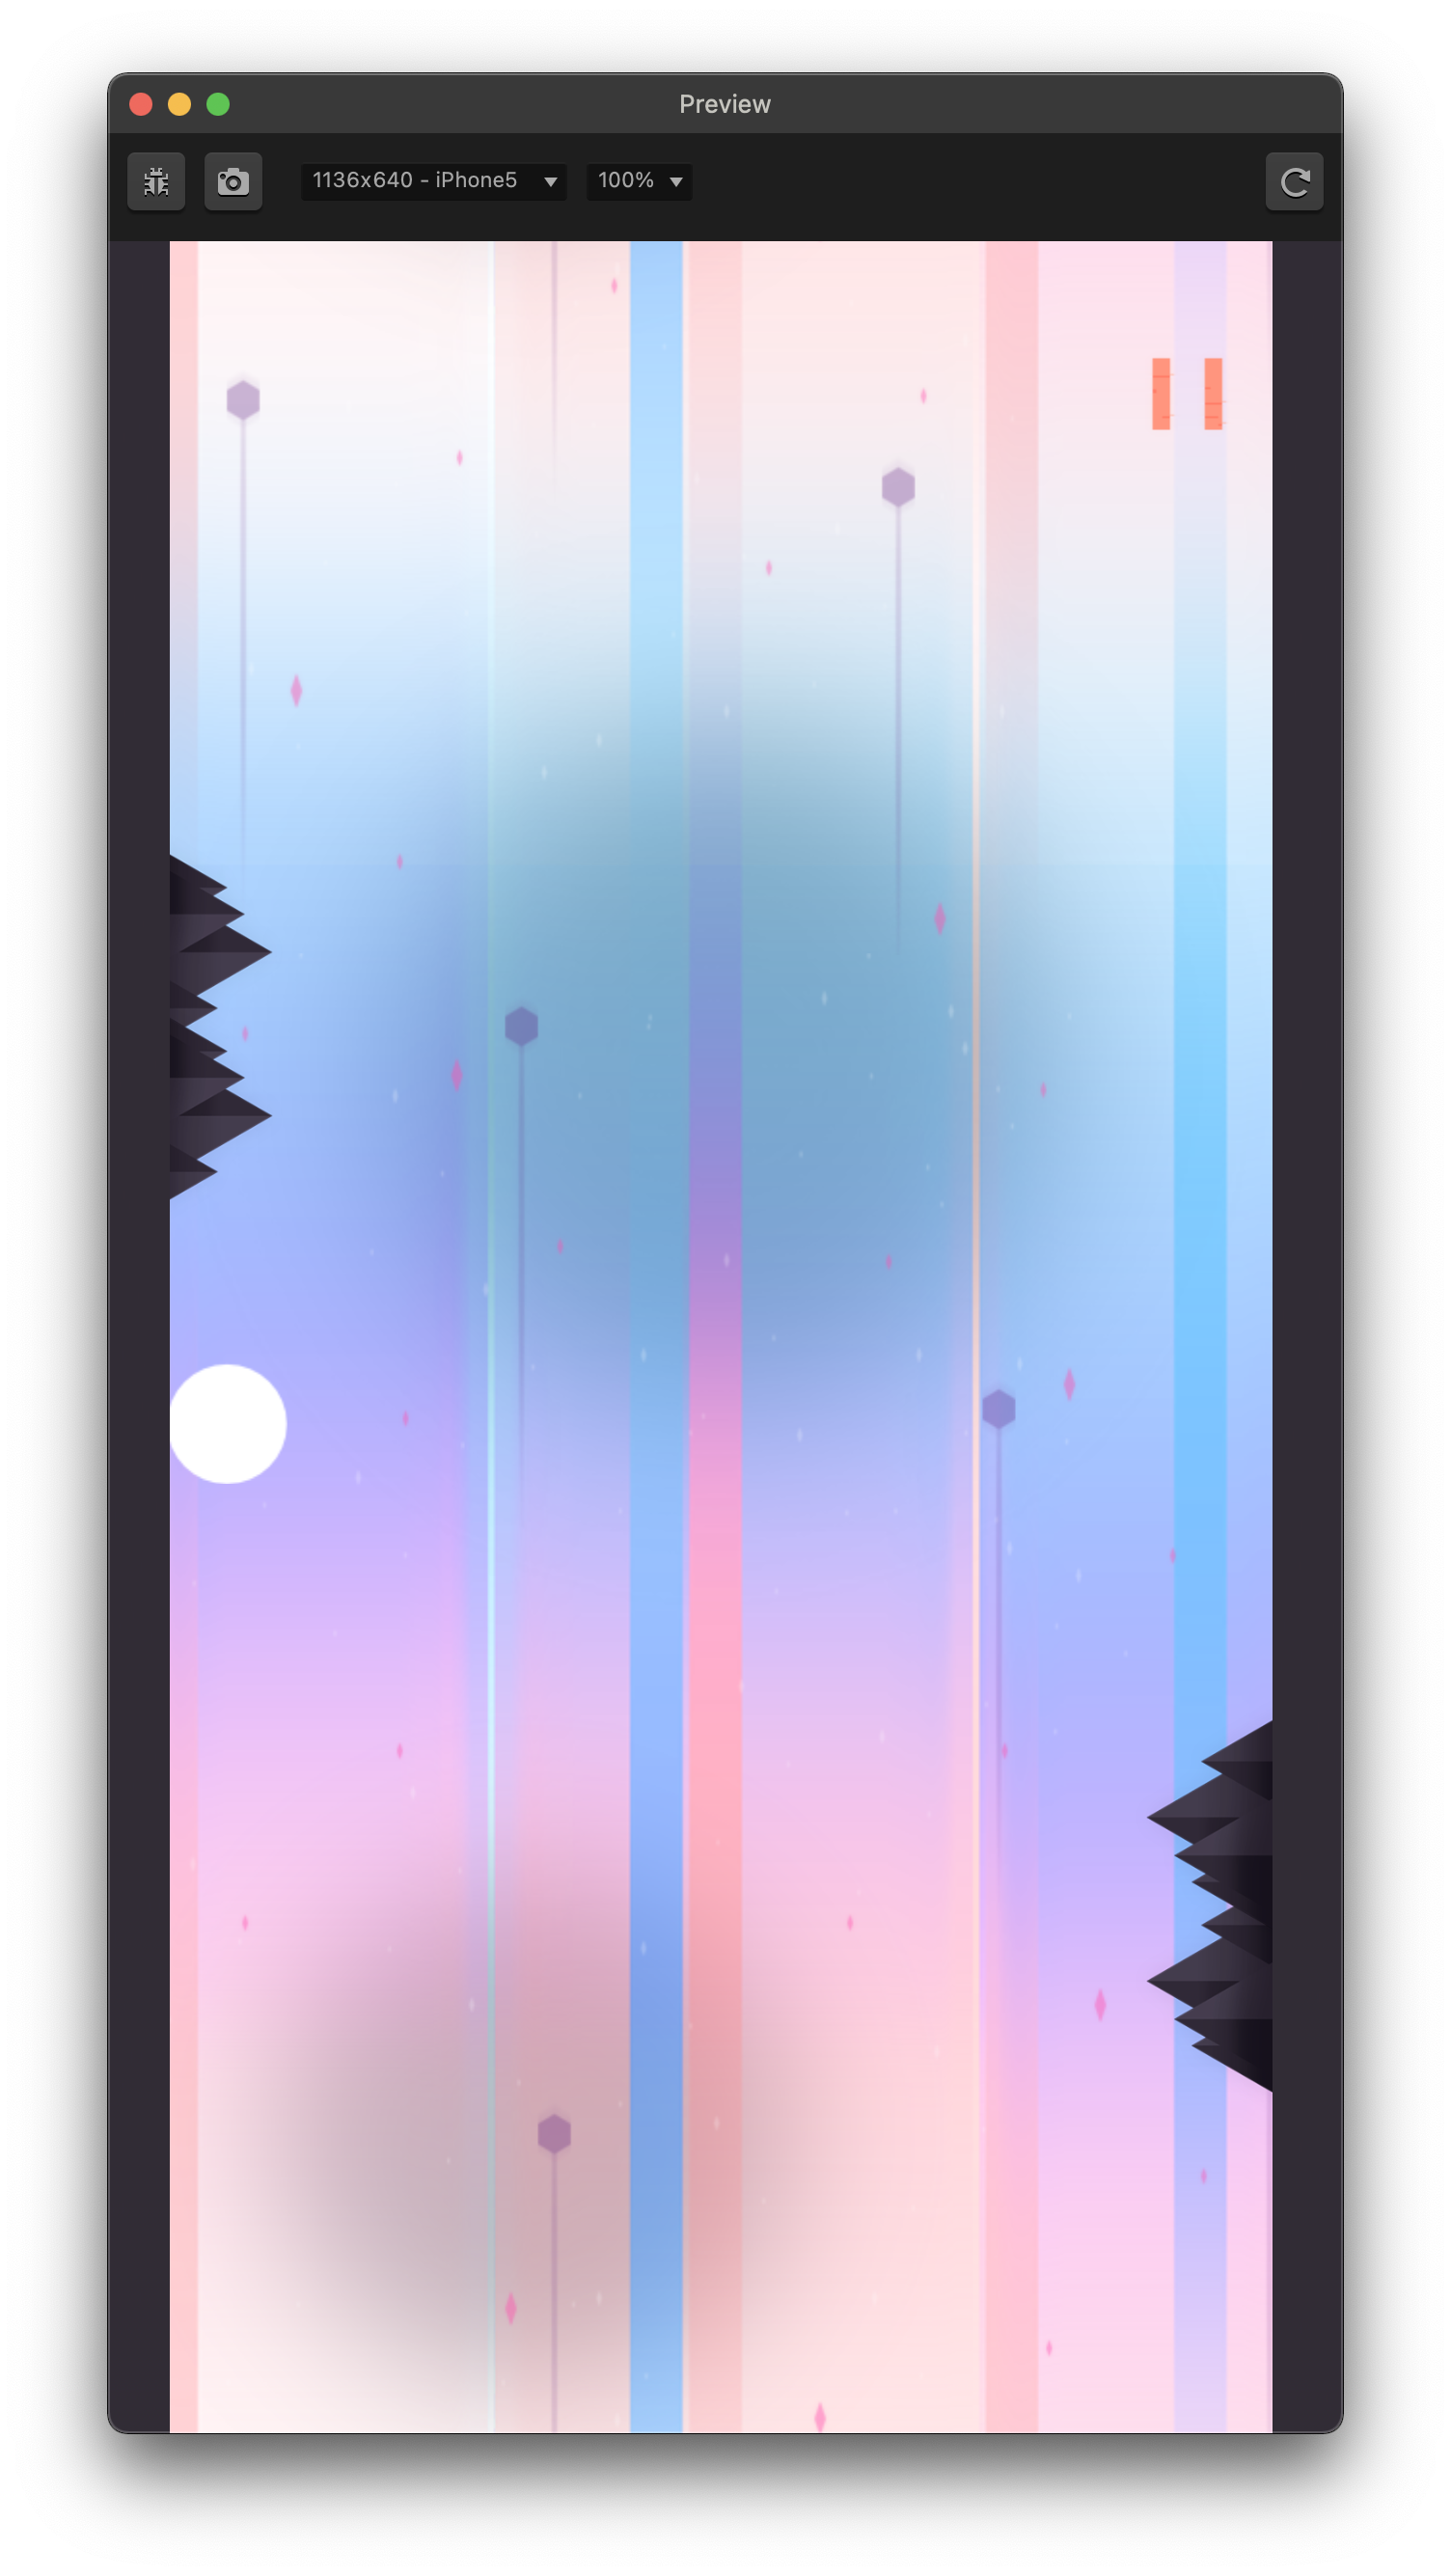
Click on the preview button in the upper-right hand corner to see that the Wall Jump preset has been generated for us.
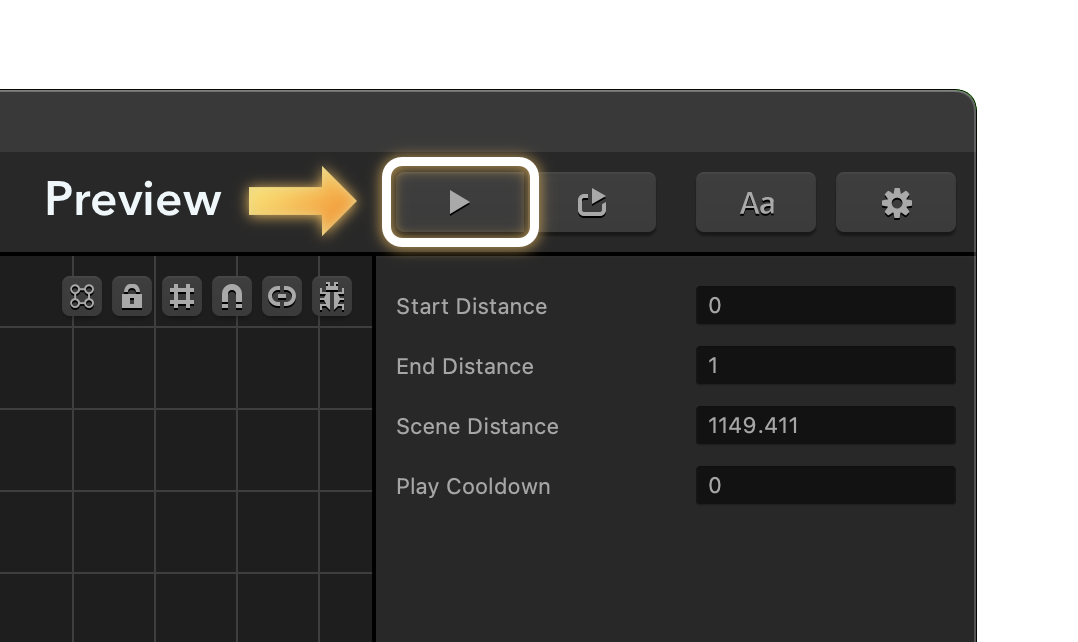
You will notice that the game is already playable! Buildbox has already generated the basic gameplay mechanics, as well as a few scenes to help you get started.
Before we make edits on the game, let’s talk about
THE ANATOMY OF THE SCENE EDITOR (P1)
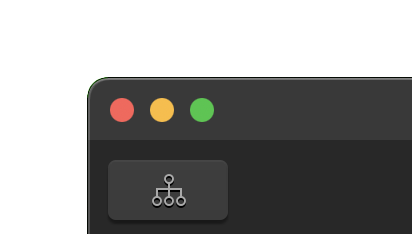
On the upper left-side of the Scene Editor is the Mind Map button.
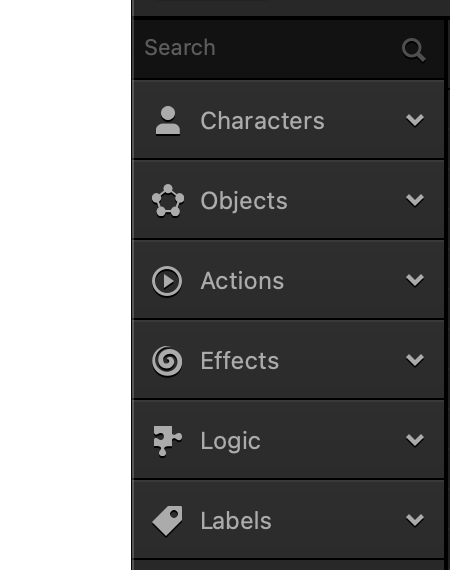
Underneath that is the Assets Panel. Assets panel is where all assets available for our game creation are listed, including any new ones we add. Assets are listed in expandable menus. We have menus for:
- Characters
- Game Objects
- Game Actions
- Power-ups
- Effects
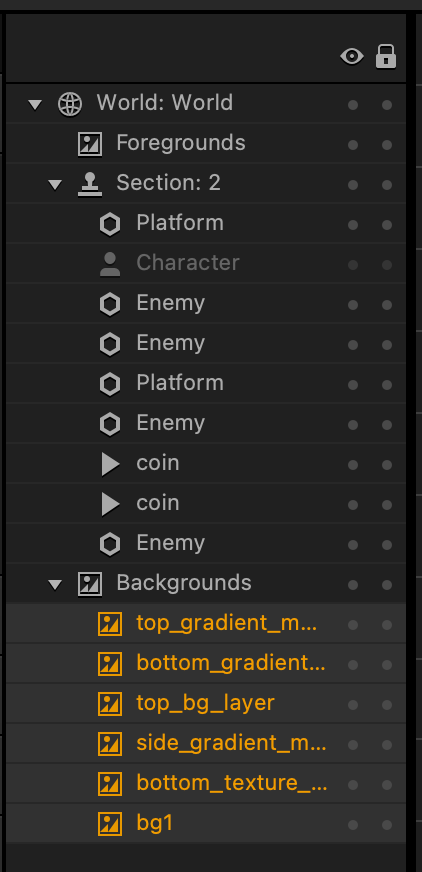
Next to the assets panel is the outliner. It shows a tree of all items in the scene. You can select any item in the scene by clicking on it in the tree. By default all items are listed in the order they were created. In the scene, items on top of the tree appears in front of other items below it. You can rearrange them by clicking and dragging an item. All non-background items are under Game Play Layer at the top. Press the trash icon down the bottom to delete the currently selected item.
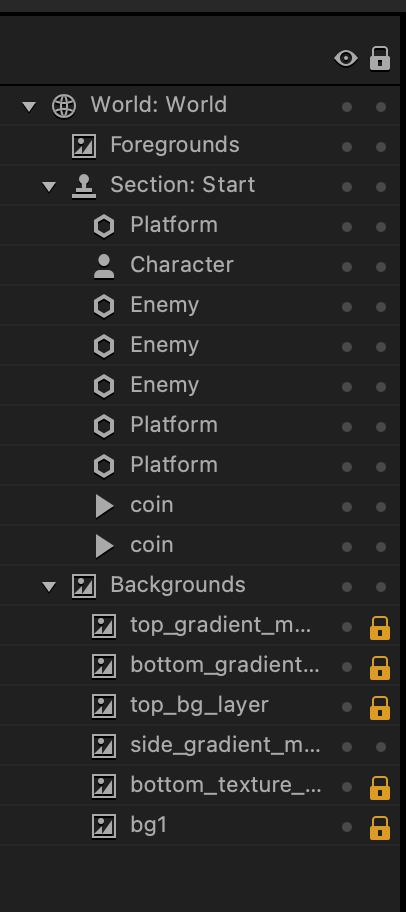
There are two columns to the right: one with an eye symbol, and the other with a lock symbol. Next to each item there are two dots – that line up with those symbols. Clicking those dots will toggle their setting. You can use the dots under the eye to suppress display of an item. The dots under the lock symbol will allow you to lock an item down so you can not accidentally move it.
Before we make edits on the game, let’s talk about
THE ANATOMY OF THE SCENE EDITOR (P2)
On the far right you will find the options panel. Clicking on an item will reveal the options for that item.
If an item is selected from the assets panel, options to modify that item’s global properties will appear in the options panel.
The play button at the top is used to preview the game. We will tackle the buttons next to it later on in another chapter.
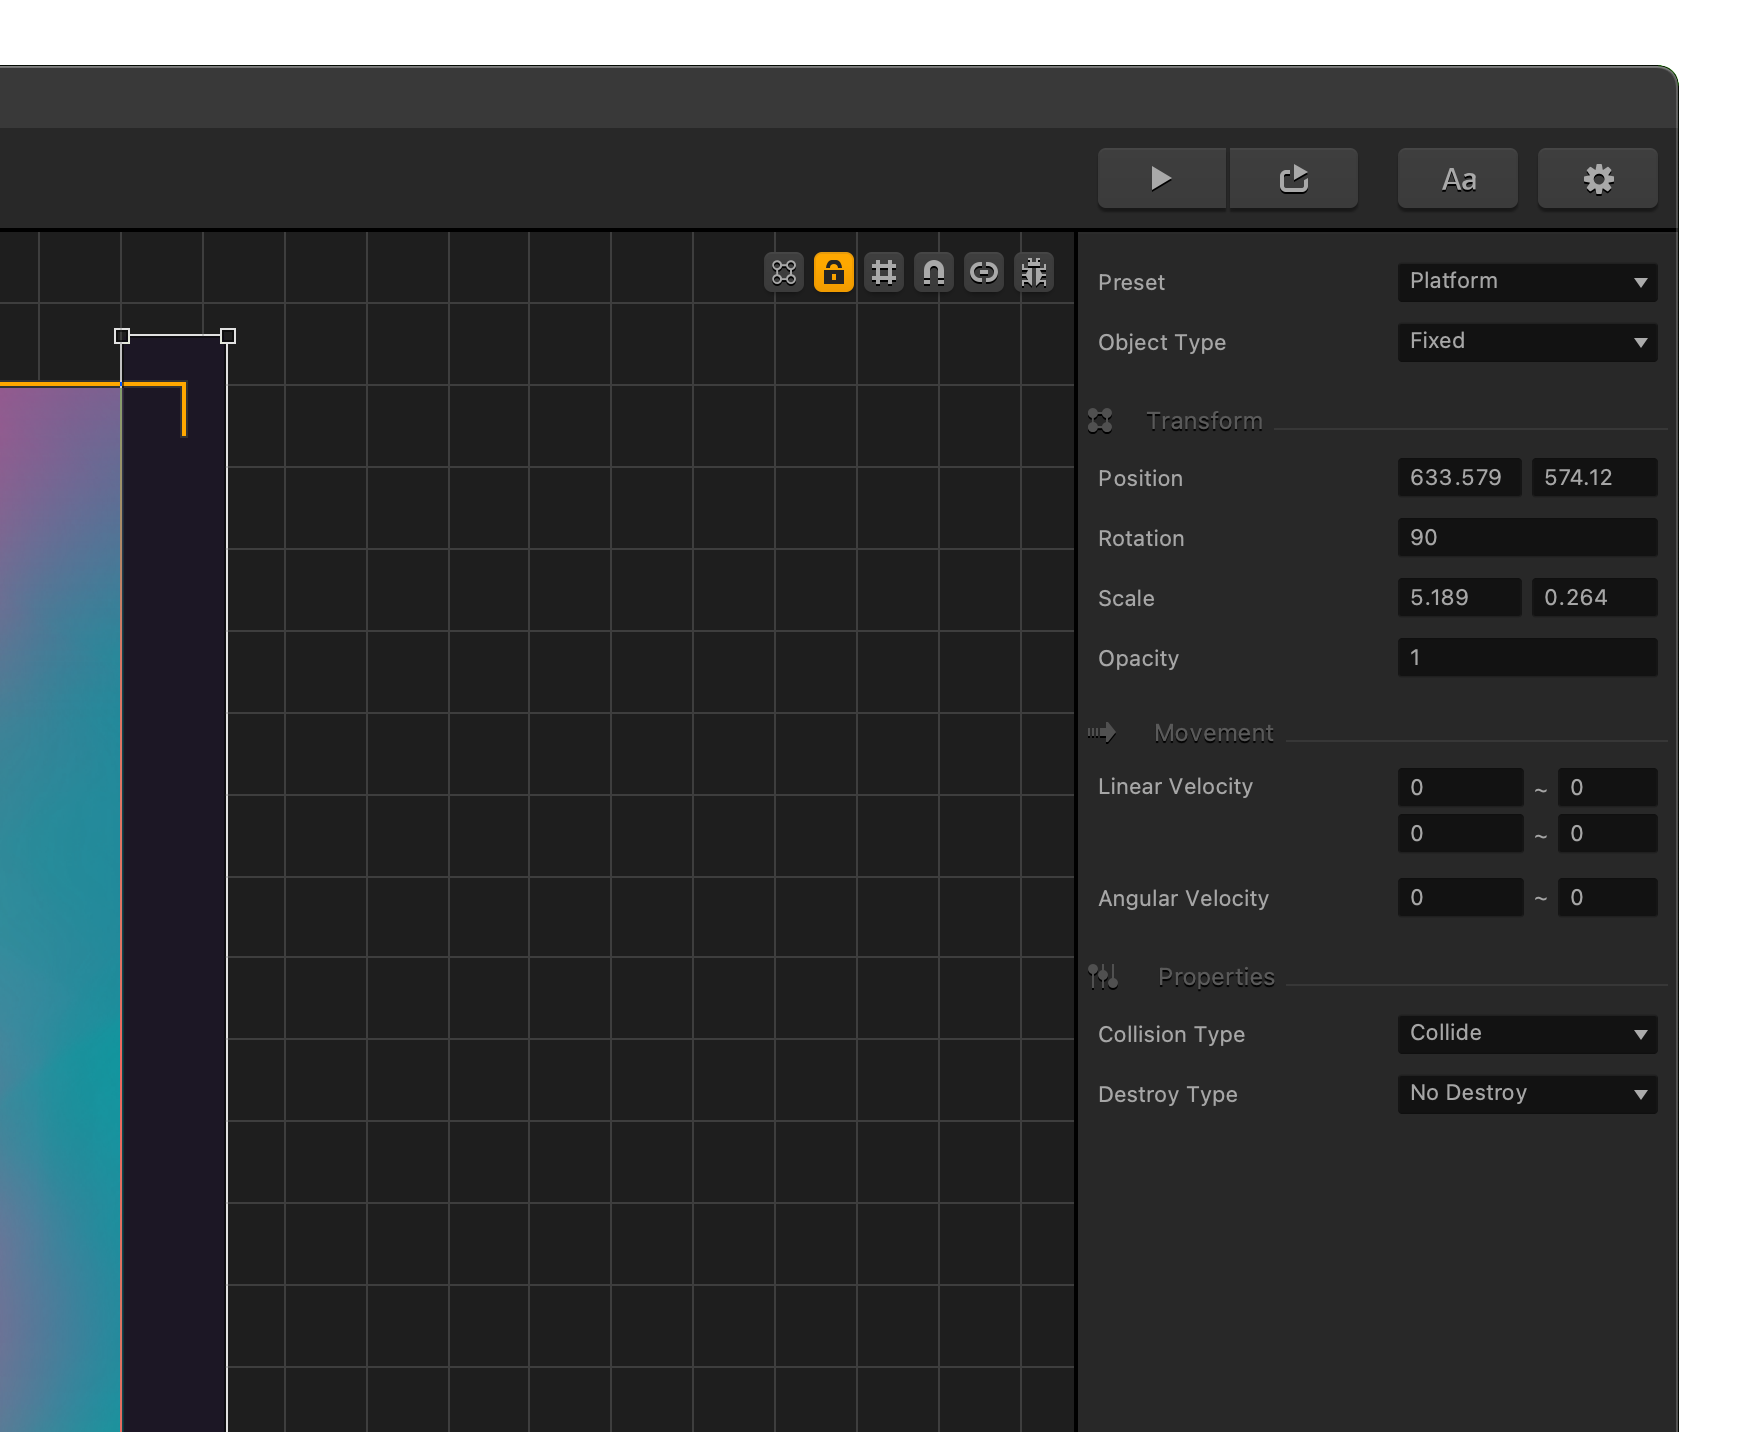
To the left column of the options panel, you will see the following six buttons:
Show Game Frame: overlay the game frame over the current Scene in yellow.
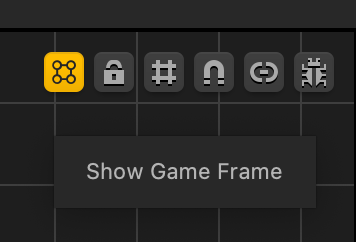
Lock Backgrounds: lock all background elements. Note: you can lock and unlock individual background elements though the outliner.
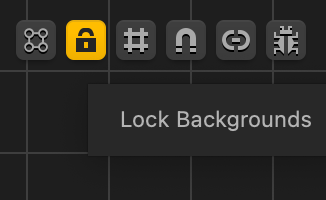
Grid on top: place grid above all objects in scene, to line up with the grid lines.
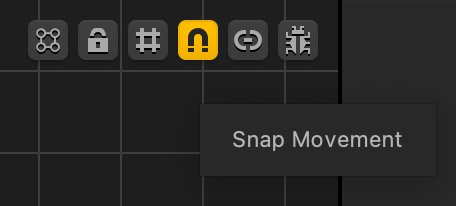
Snap Movement: snap to a grid on object placement, to make things easier to line-up objects.
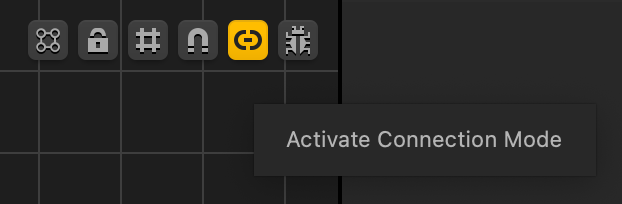
Activate Connection Mode: used for connecting items in the game.
Activate Debug Mode: this allows you to see the collision shapes of the objects on the screen.

Before we make edits on the game, let’s talk about
THE ANATOMY OF THE SCENE EDITOR (P3)
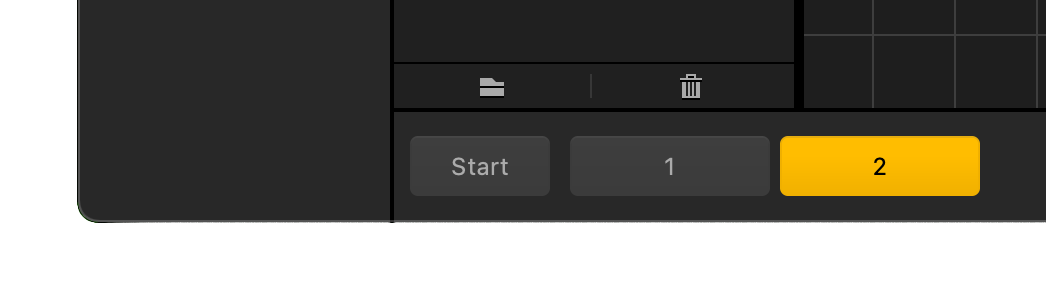
On the bottom part of the screen is where we will see “tabs” of the different scenes in the game. The scene showing in the scene editor will be highlighted in yellow

Pressing the “D” key will duplicate the highlighted scene.
And of course, the very thing that Buildbox is known for: the active scene and its drag and drop features.
We design by moving objects around in the active scene. We can zoom out if we like by using the mouse scroll button. We can also move the editor around by holding down the spacebar, left-clicking and dragging.
We use Ctrl Z or Cmd Z to undo and can keep things in a line if we hold shift while we are dragging.
We can also use the arrow keys for fine-tuning, The arrow keys will move things around by 1px or by 5px if the shift key + arrow key is used. We can duplicate objects using w, a, s, or d.
Feel free to play around with an item’s handles a little bit. You can enlarge, rotate, move, and do just about anything with an item on the scene.
We hope that by now you are excited to dig dip into editing your levels. First, let’s find out how to change the graphics of an object in the game.
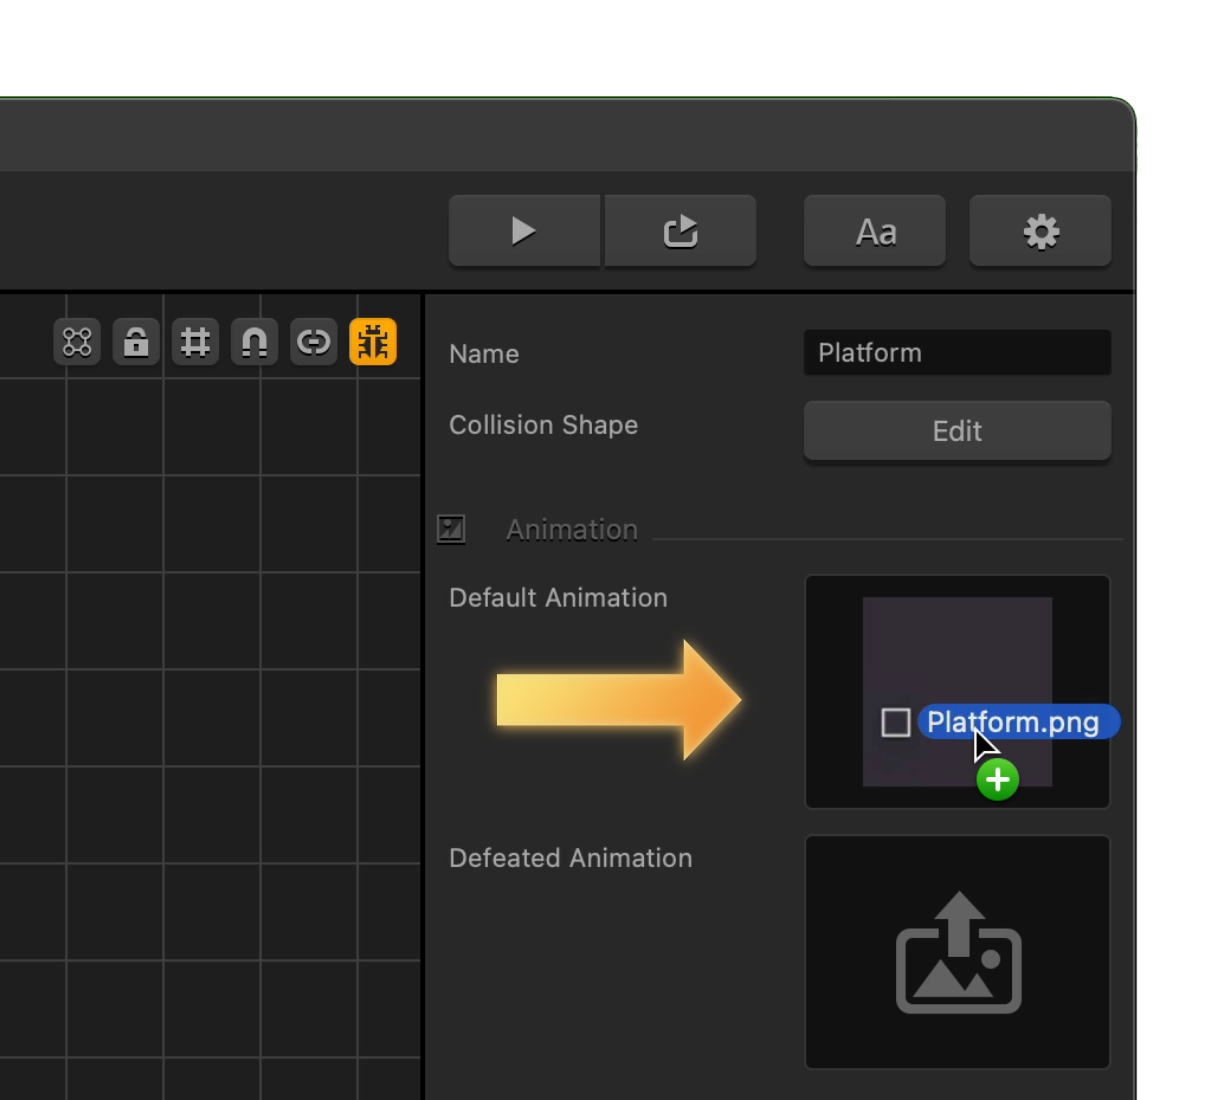
Click on the platform item on the assets panel. Its global options will appear on the options panel in the far right side of the scene editor.
From the “Make Your Own Game Graphics” folder you downloaded from the site, go to the Platforms folder and select the Platform.png file and drag it into the default animation slot in the options panel
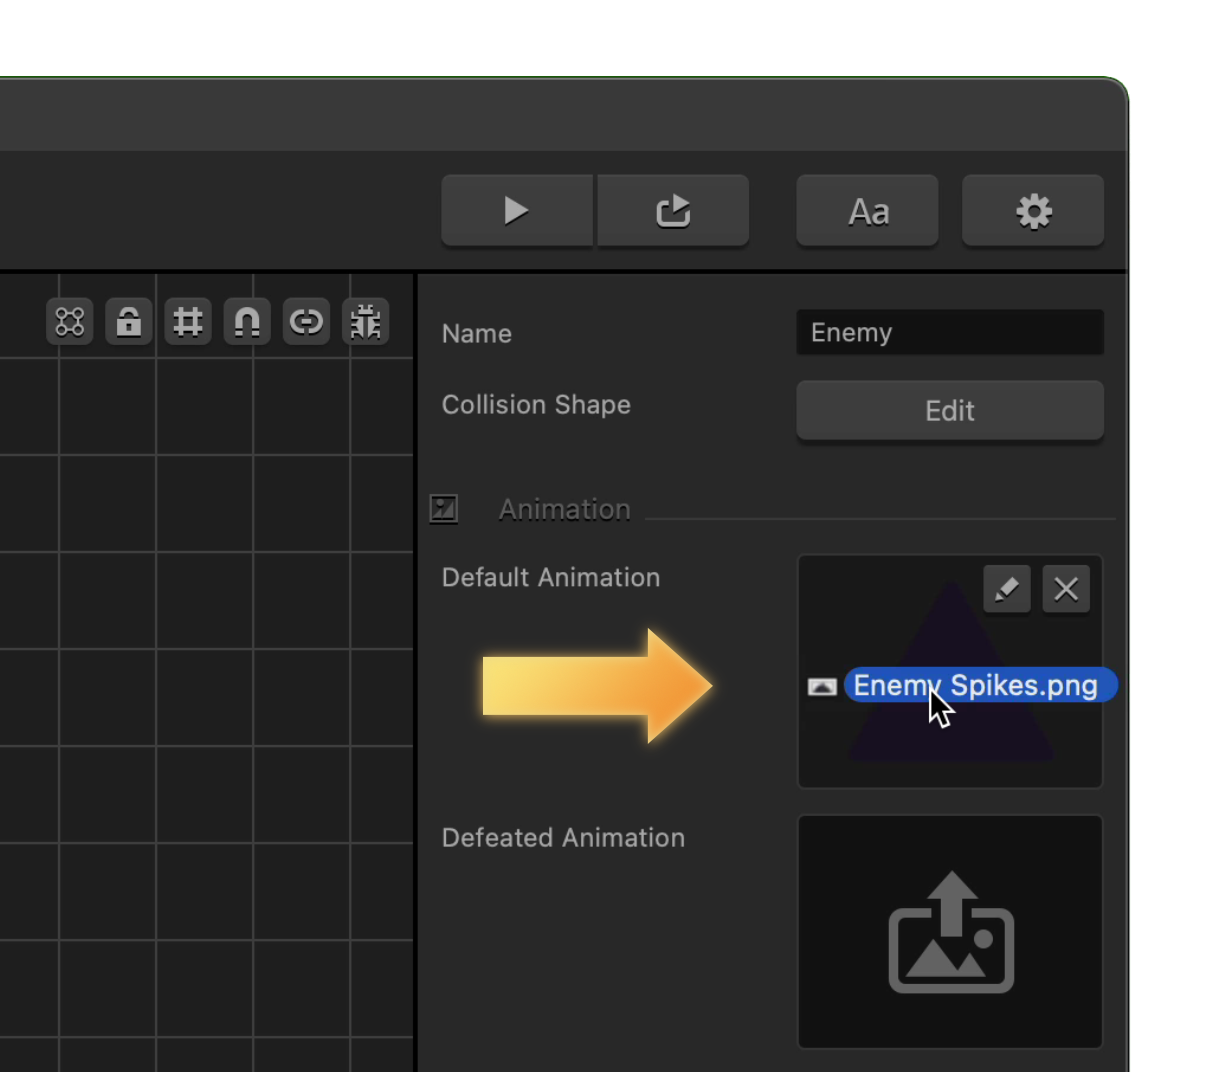
Let’s do the same process for the enemies. Click on the enemy item on the assets panel. From the “Make Your Own Game Graphics” folder, select the Enemy Spikes.png file and drag it into the default animation slot.
The next step is to edit the backgrounds. First, unlock the backgrounds so we can select them and delete them.

The easiest way to add character, objects, actions and backgrounds is to drag and drop a PNG file onto the scene editor. To add a background to our GLTCH game, we simply drag the Background1.png onto the scene editor.
As soon as the mouse is over the scene editor you will see the following overlay.
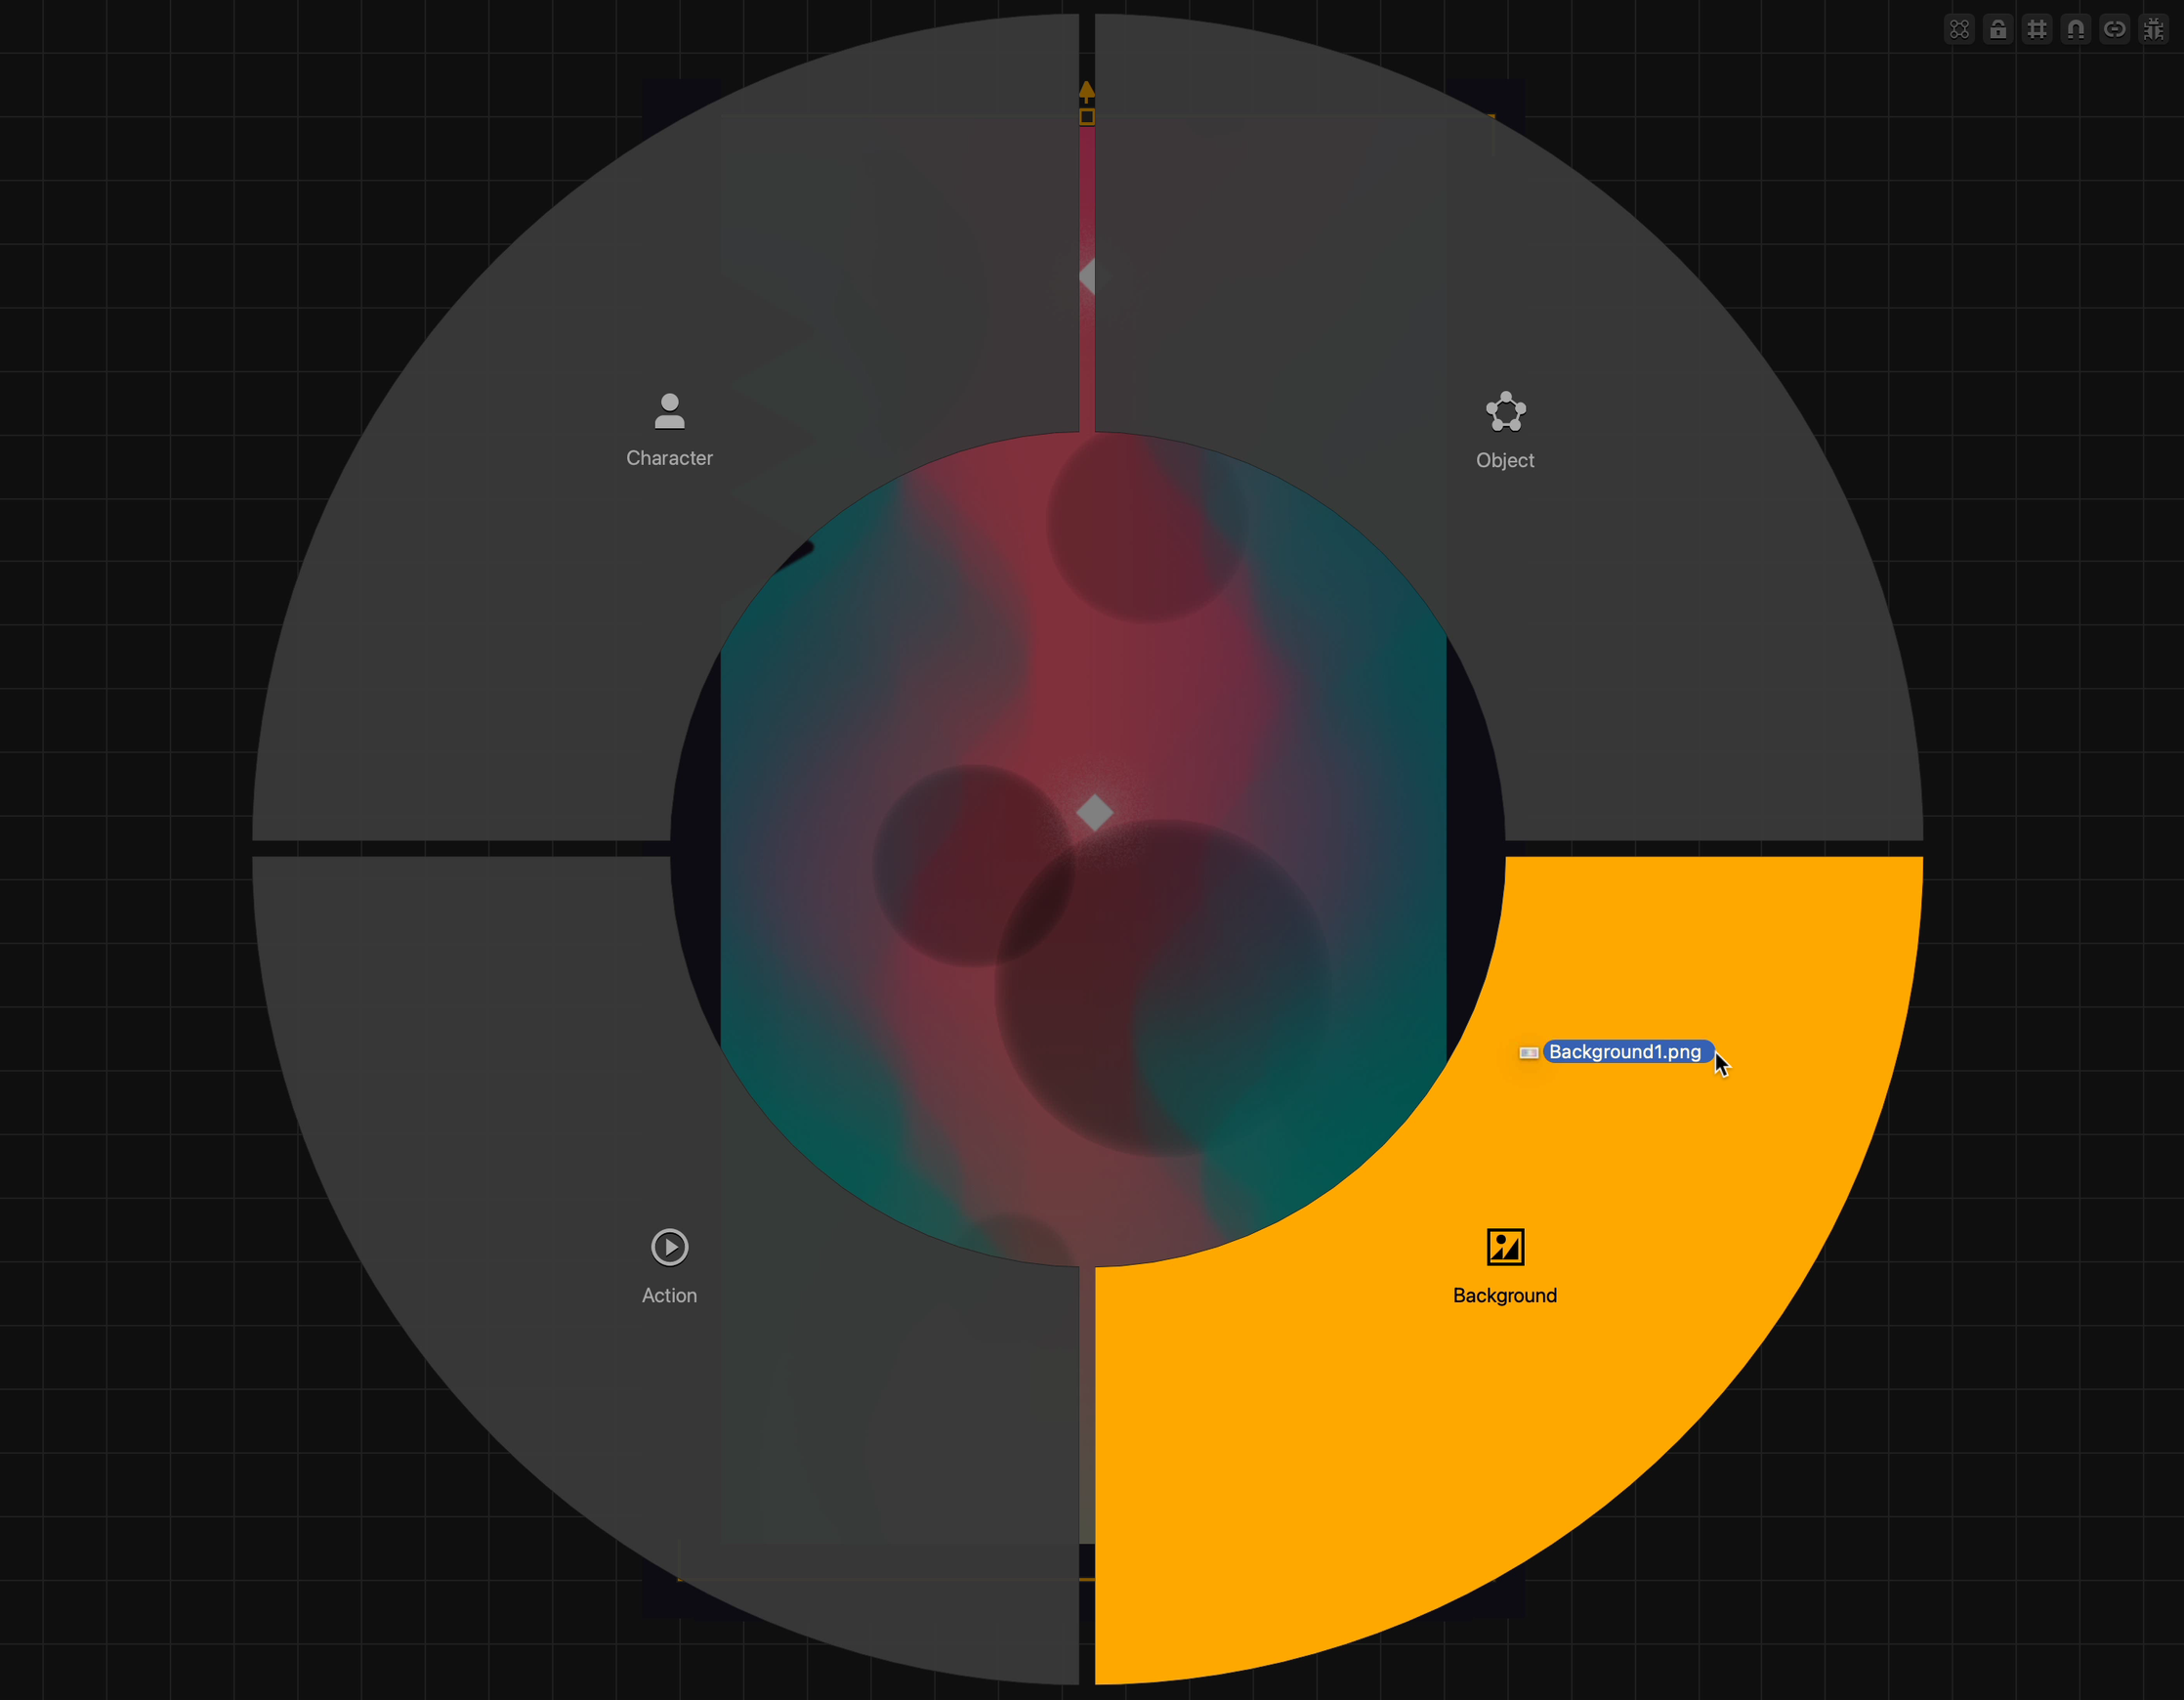
Drop the PNG file onto the relevant segment, which in this case is “Background”. You should see the item appear in the outliner, and in the current scene you are editing.
Now that our background is in the game, we want it behind everything else. In order to do that, you should either right-click on the background and select send to back, or drag it to the bottom of the outliner.
Elements at the top of the list appear in front of other elements and elements at the bottom of the list appear behind other elements.
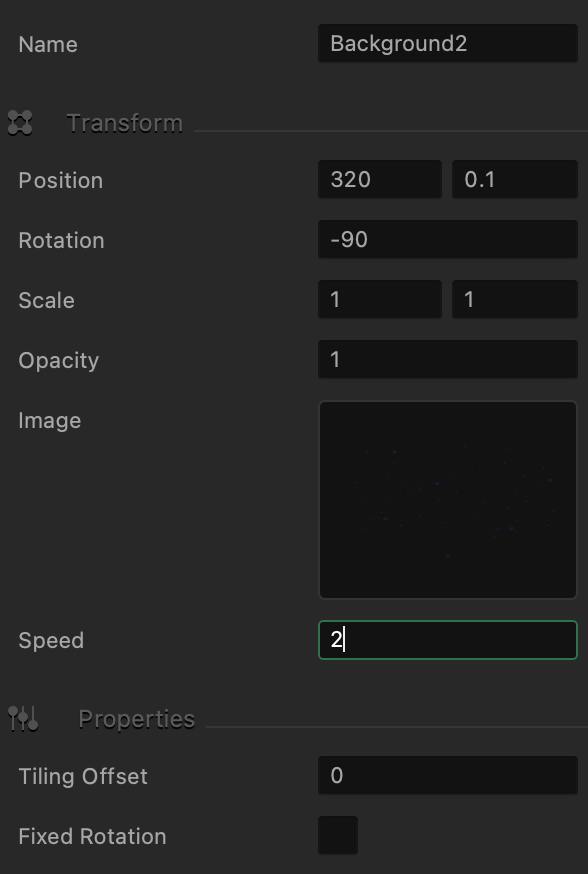
Repeat the steps for Background2.png.
We can also modify the speed of the background’s scrolling. Let’s try and make background1 scroll faster than background2.
We simply select a background, modify and assign its speed number on the options panel. The higher the number, the faster a background will scroll. Select Background2 and set the speed to 2.
Press the preview button to see how we’ve progressed so far.
It already looks amazing! The next step you will do is to change the graphics for the character.
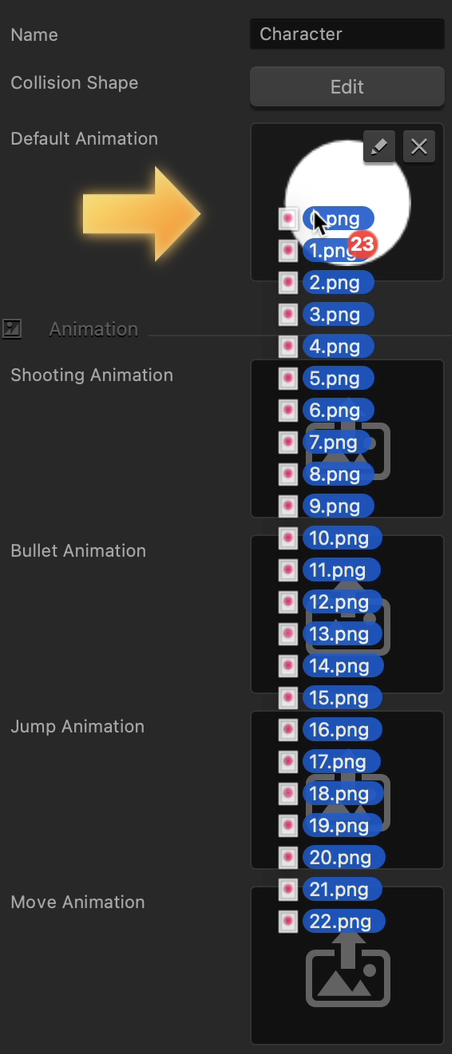
So far, we have been adding single image graphics into Buildbox. However Buildbox can also compose complete animations from sequential PNG images.
When we select our character, you’ll see in the options panel that Buildbox offers slots for different instances of our character. For example, we can have animations for when our character is shooting, jumping, moving, and dying. When the character is not doing any of those, the default animation will play.
For GLITCH, you will only need the default animation for the character. You can delete the other animations by hovering onto the animation slot and clicking on the “X” on the corner of the slot.
Select all the images in the character folder and drag the entire sequence into the default animation slot.
We are now going to change our menus to match our new graphics.
Clicking on the mind map button (the button in the upper-left), Buildbox takes us into the mind map. The mind map is where we would find all the user interfaces in the game and the game worlds themselves.
The blue nodes are world nodes and the green nodes are user interface nodes.

Double-click on the main menu so that we can replace the graphics inside that, just like we did for the platform, enemies, and character. Once inside the main menu, select the background and drag in the new image in a similar fashion.
Using the mouse scroll button, we can scroll out and also move the editor around by holding down the spacebar, left-clicking and dragging. It works the same way in the scene editor.
As we design our levels and menus, we can move things around, get a better look at things, and make a few adjustments using the image handles.
We are now going to replace the start button. Note that, if there are any issues selecting an asset, we can hide or lock things in the outliner.
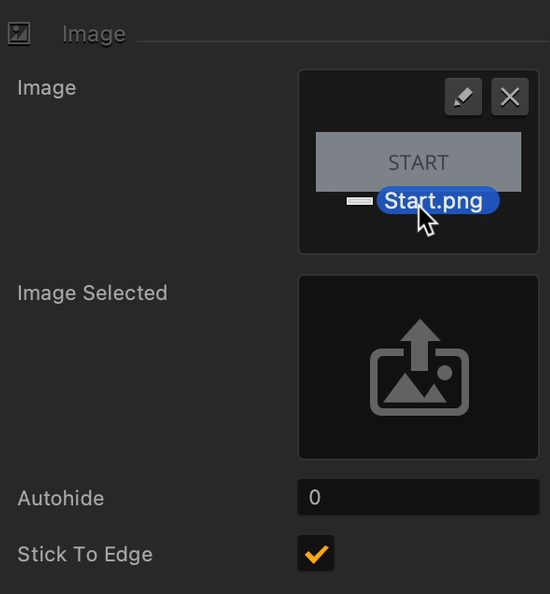
Drag the start.png file from the graphics folder into the image slot of the start button. You can do the same thing for other items in the main menu.
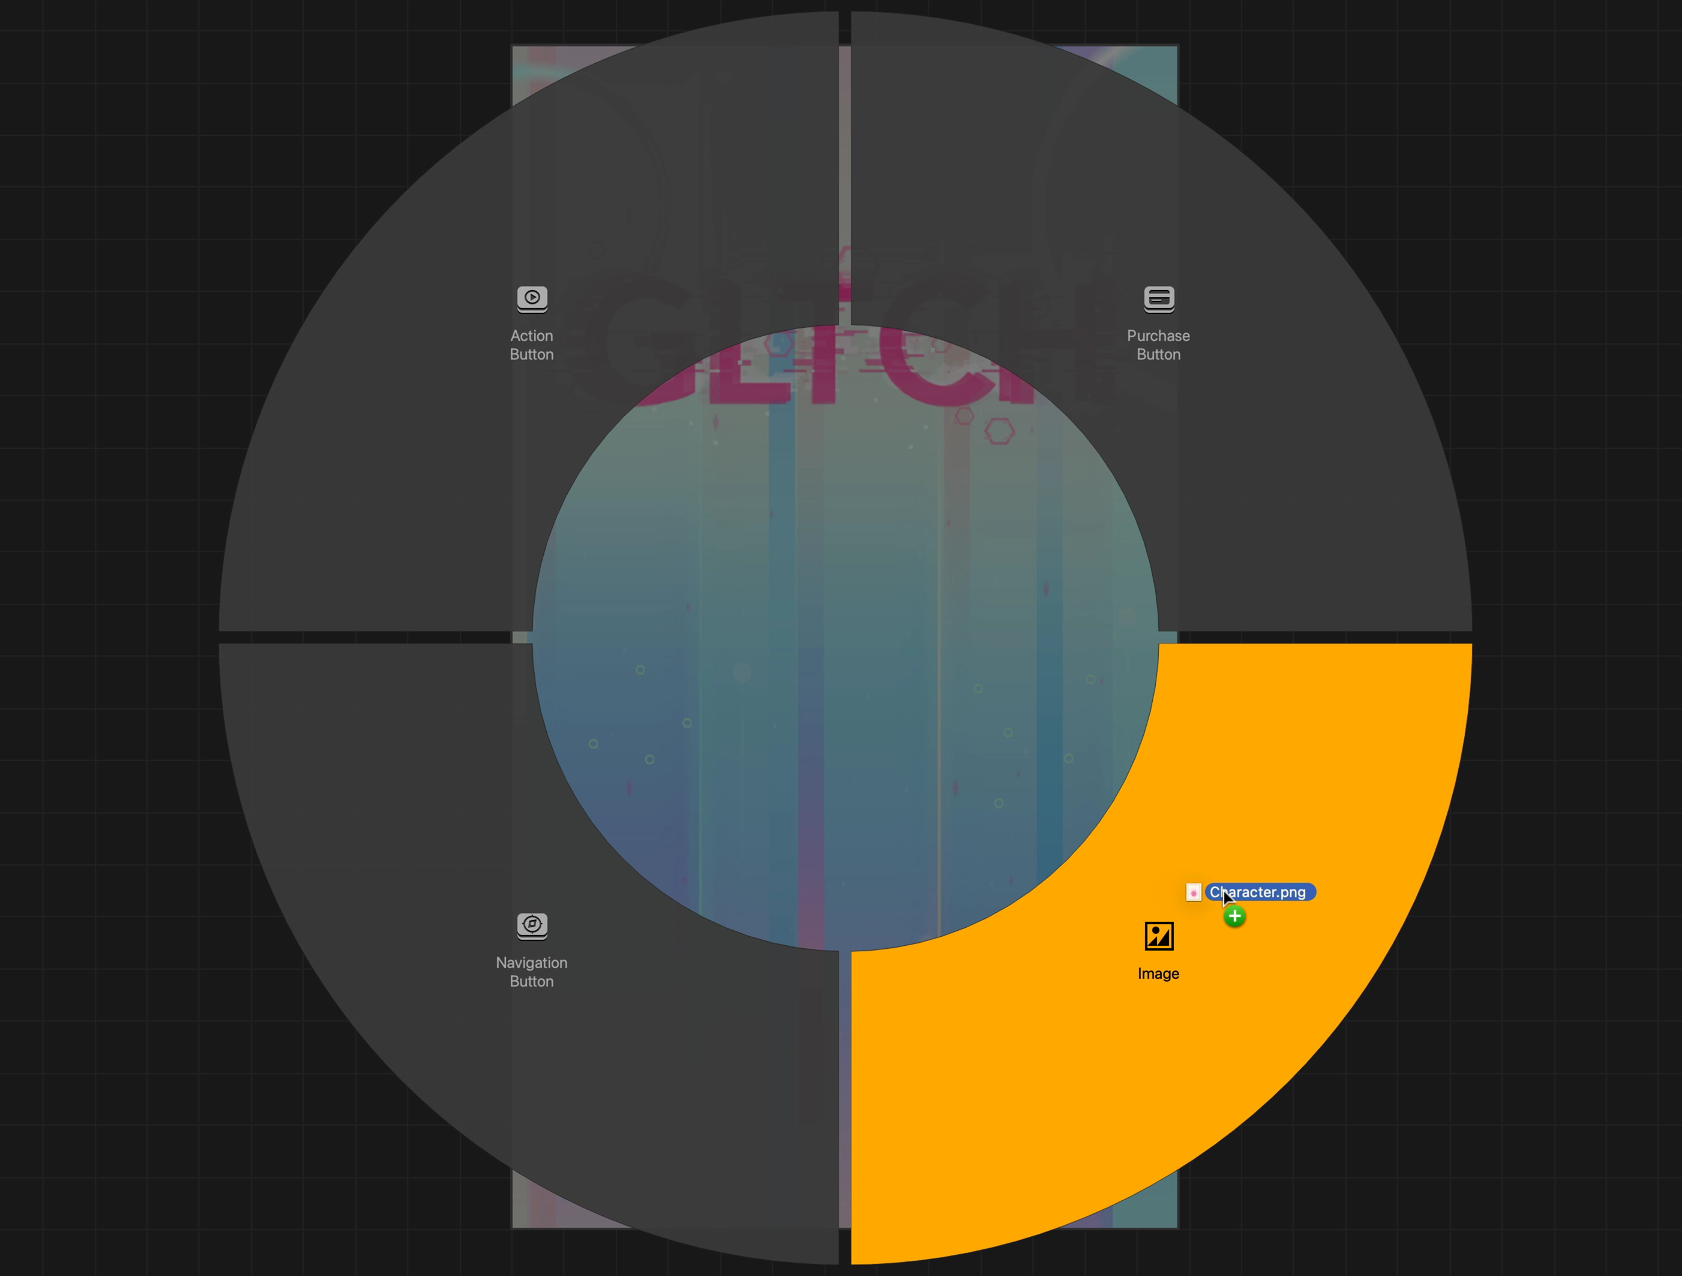
To enhance the look of our menu, let’s add a few images to it. Drag and drop the character image into Buildbox. When Buildbox gives us the drag-and-drop-wheel, drop the image on the image option.
Practice activity: Using the lessons you have learned and the graphics you downloaded, make your Main Menu, Game Over Menu, and Pause Menu look like the ones below:

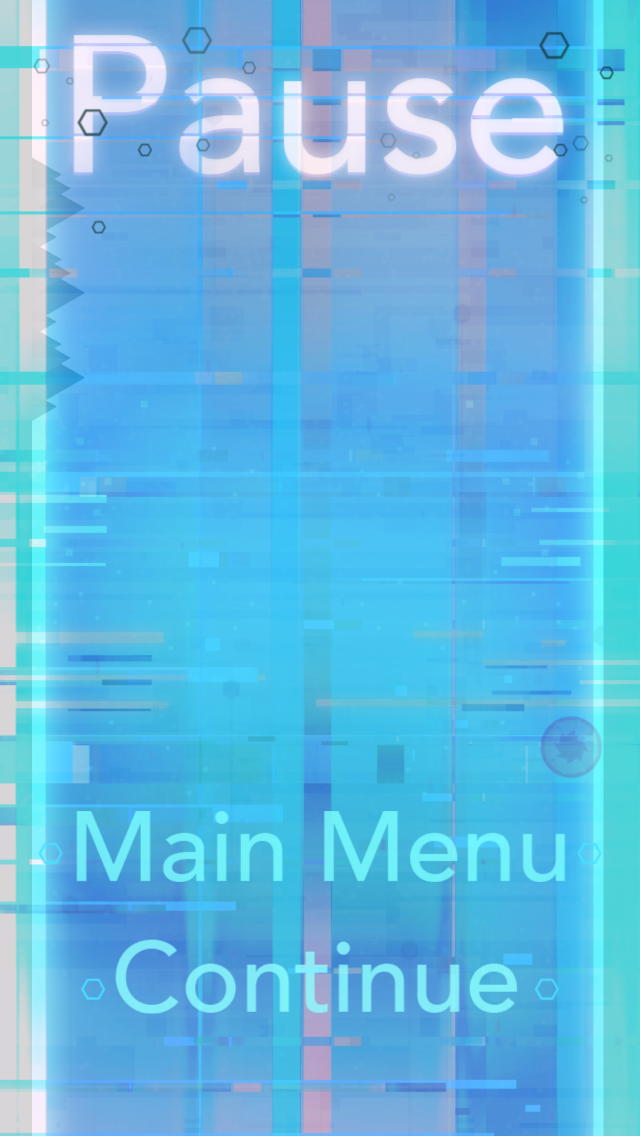
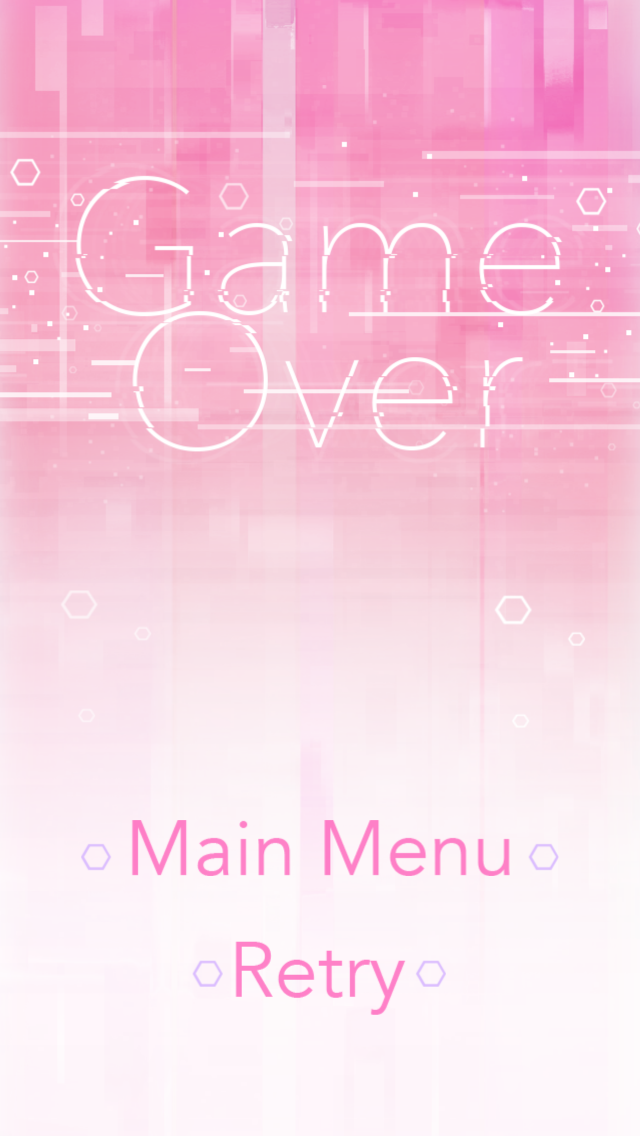
Remember that you can edit the graphics of the items and buttons already in the menus.
You can transform, rotate, resize, move, and transform items in the menu using the handles that appear when you click an item. It is not too different from the process you use in making levels in the scene editor.
You can drag in images and hover on to the image segment of the drag and drop wheel. Hiding and locking other items may prove useful in this exercise.
You should also replace the pause button in the World UI with the one from the graphics folder so that the overall imagery of the game is consistent.


