
Congratulations! If you’ve followed the steps right, you’re already finished with basic gameplay for GTLCH. It’s time to add in a “Turbo Mode” and a “Hard Mode” to increase user retention for the game.
Balance is crucial when you make a game app. You don’t want your game to be too easy but at the same time you don’t want to make it so hard right off the bat, that your players feel cheated. It’s important to find a balance. This can be easily managed when you implement multiple game modes.
In this chapter you’ll learn how to make a game with multiple game modes for your players to choose from. Watch and learn how to make an exciting turbo mode and a hard mode all within Buildbox.
You’ll also learn how to make multi-level menu navigation for ‘GLTCH’ that can be used to navigate players to the new game modes. We’ll show you how to add locked start buttons and share a few tips to make the entire process of adding multiple modes into your game super easy and quick.
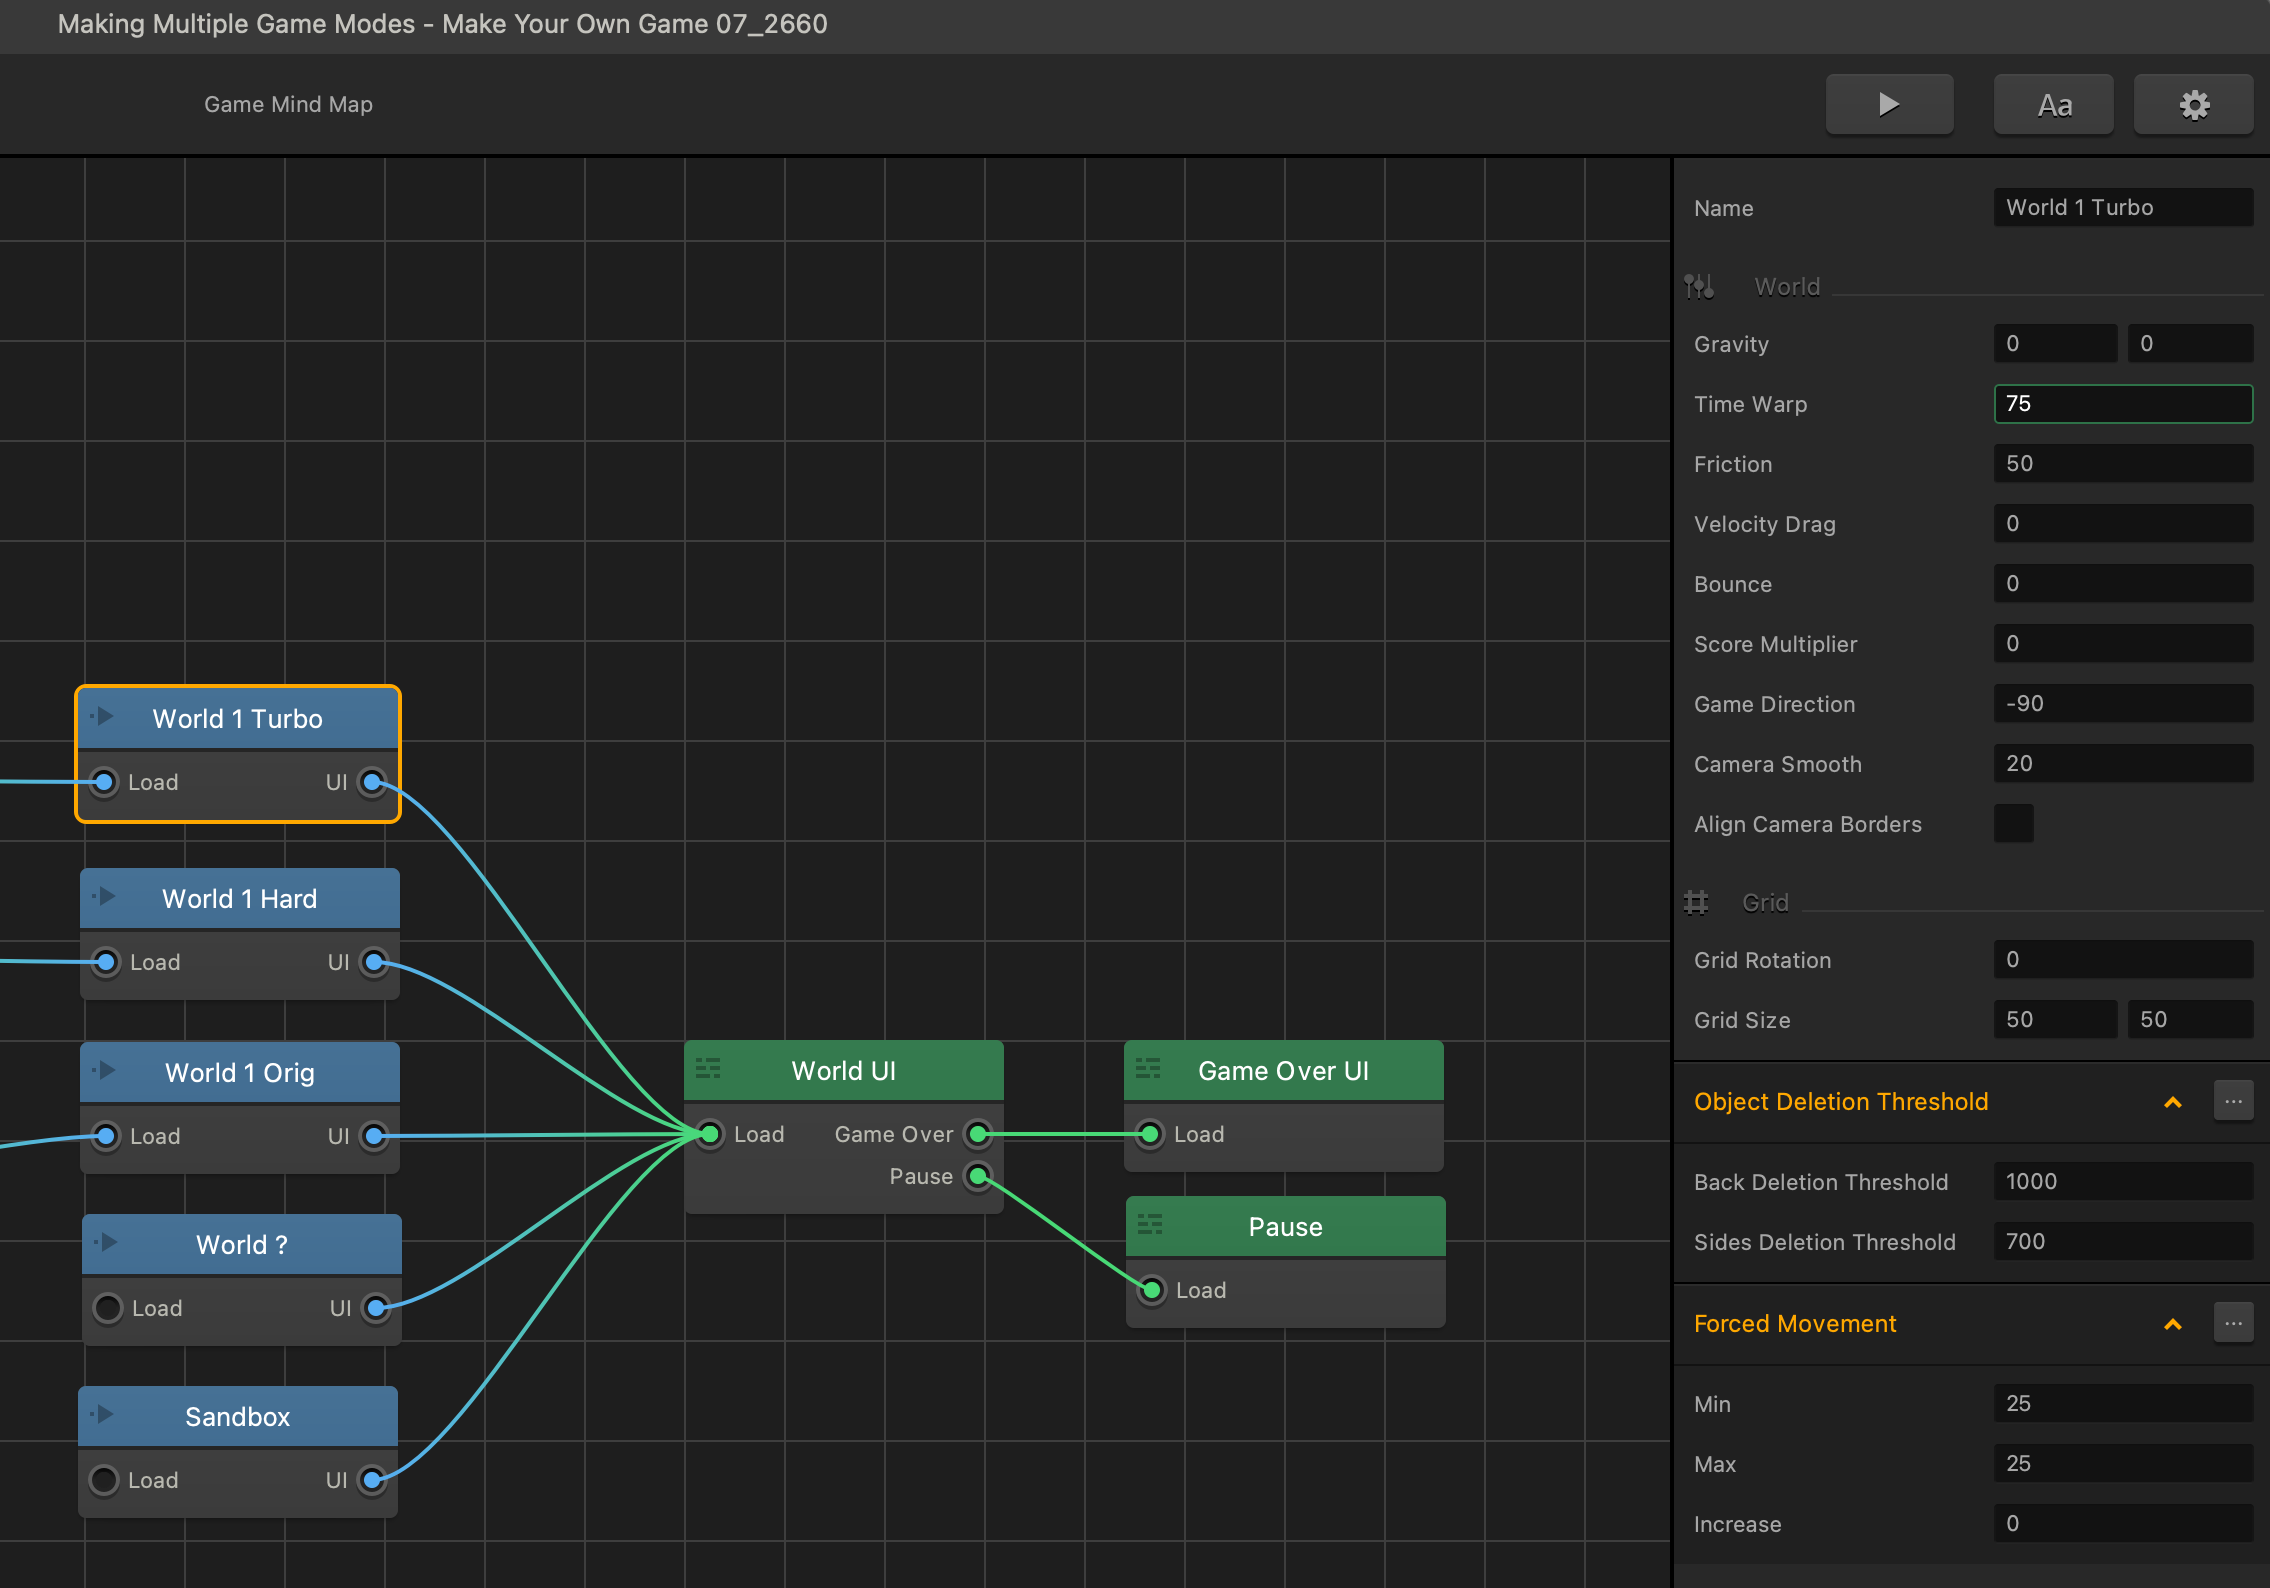
Let’s make that turbo mode right now. Making a turbo mode may be easier than you think with the power of Buildbox. In fact, we could easily make one right now with the world we have and only a few short steps. Let’s start by duplicating our world. Yep, you heard me right, we can duplicate entire game worlds. Let’s select our game world and press W, A, S, or D to duplicate it. Now we have enough for a turbo mode, a hard mode, and whatever other mode you can think of.
Before we go any further, we are going to name these worlds so we know what’s what.
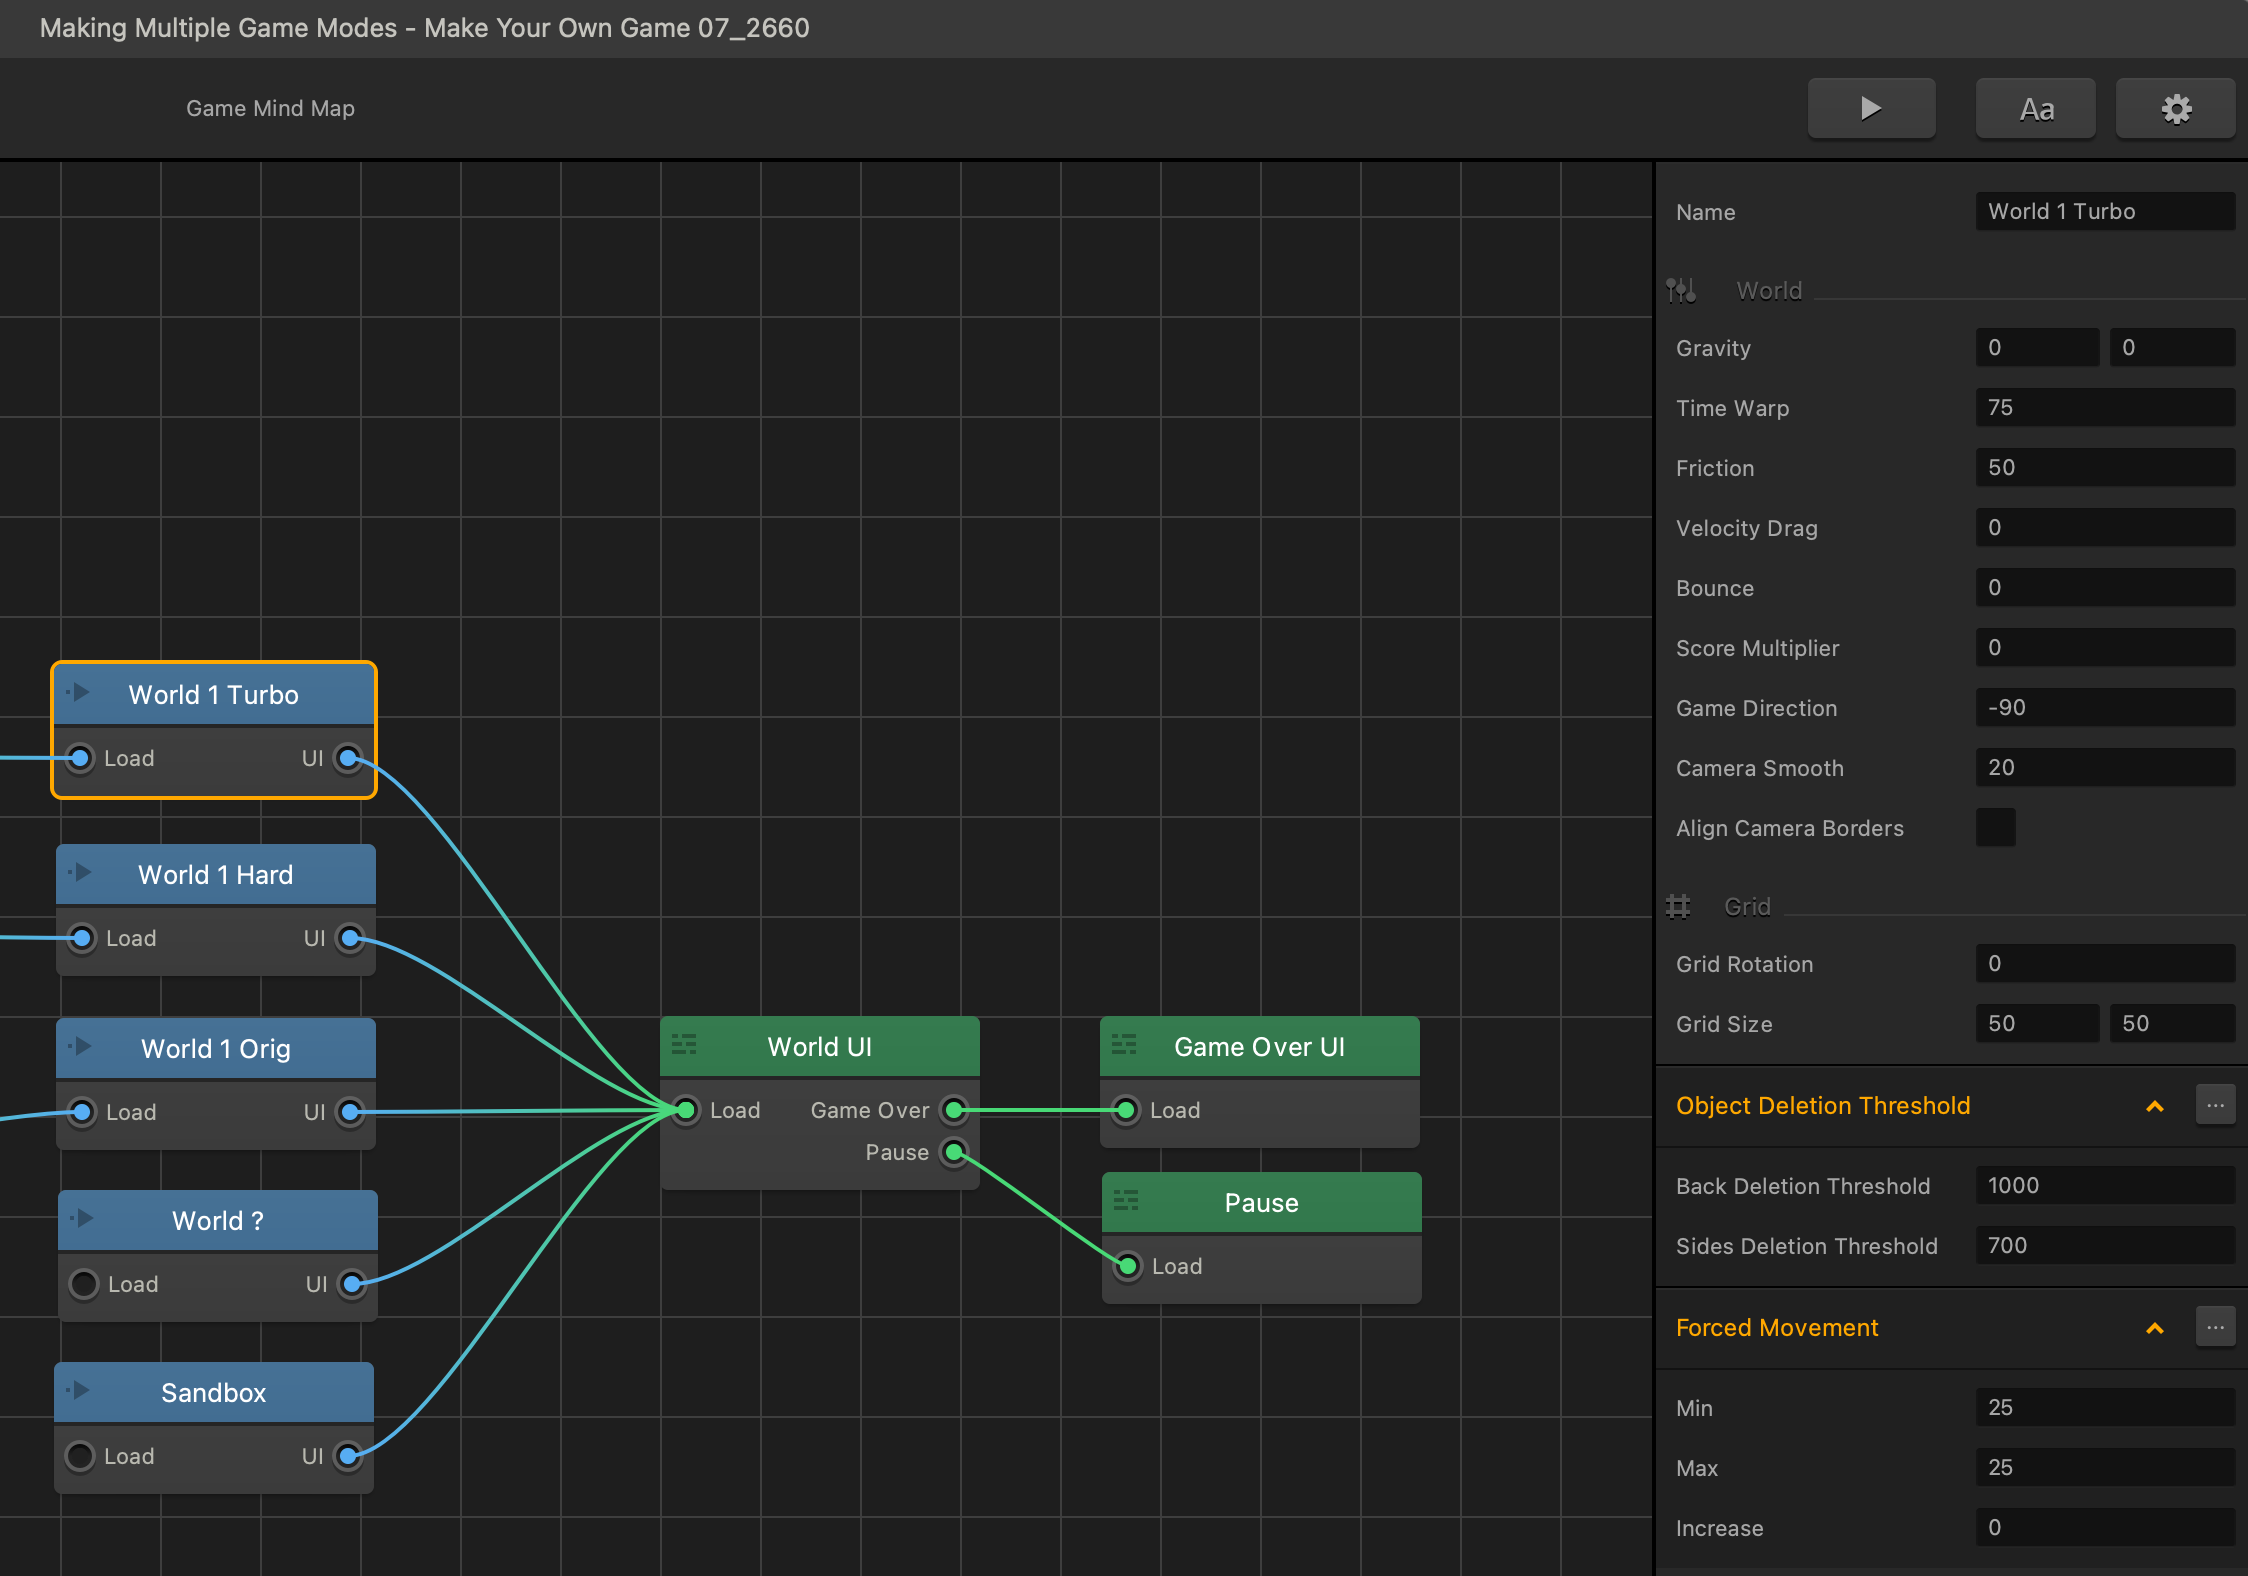
Let’s name our original world mode – ‘World 1 Original’, then name another one ‘World 1 Turbo’ and another one ‘World 1 Hard’. We’ll leave these other two for whatever inspires us, maybe even more worlds, and just use what’s already there as a sandbox to copy and paste from. So, let’s just name one of these worlds ‘World ?’, and the other ‘Sandbox’.
That only took a few seconds, and we laid the foundation for our different modes by duplicating entire worlds. If that world had 200 scenes in it, we just saved ourselves weeks of work with that feature. Let’s give our players a way to get to these different modes.
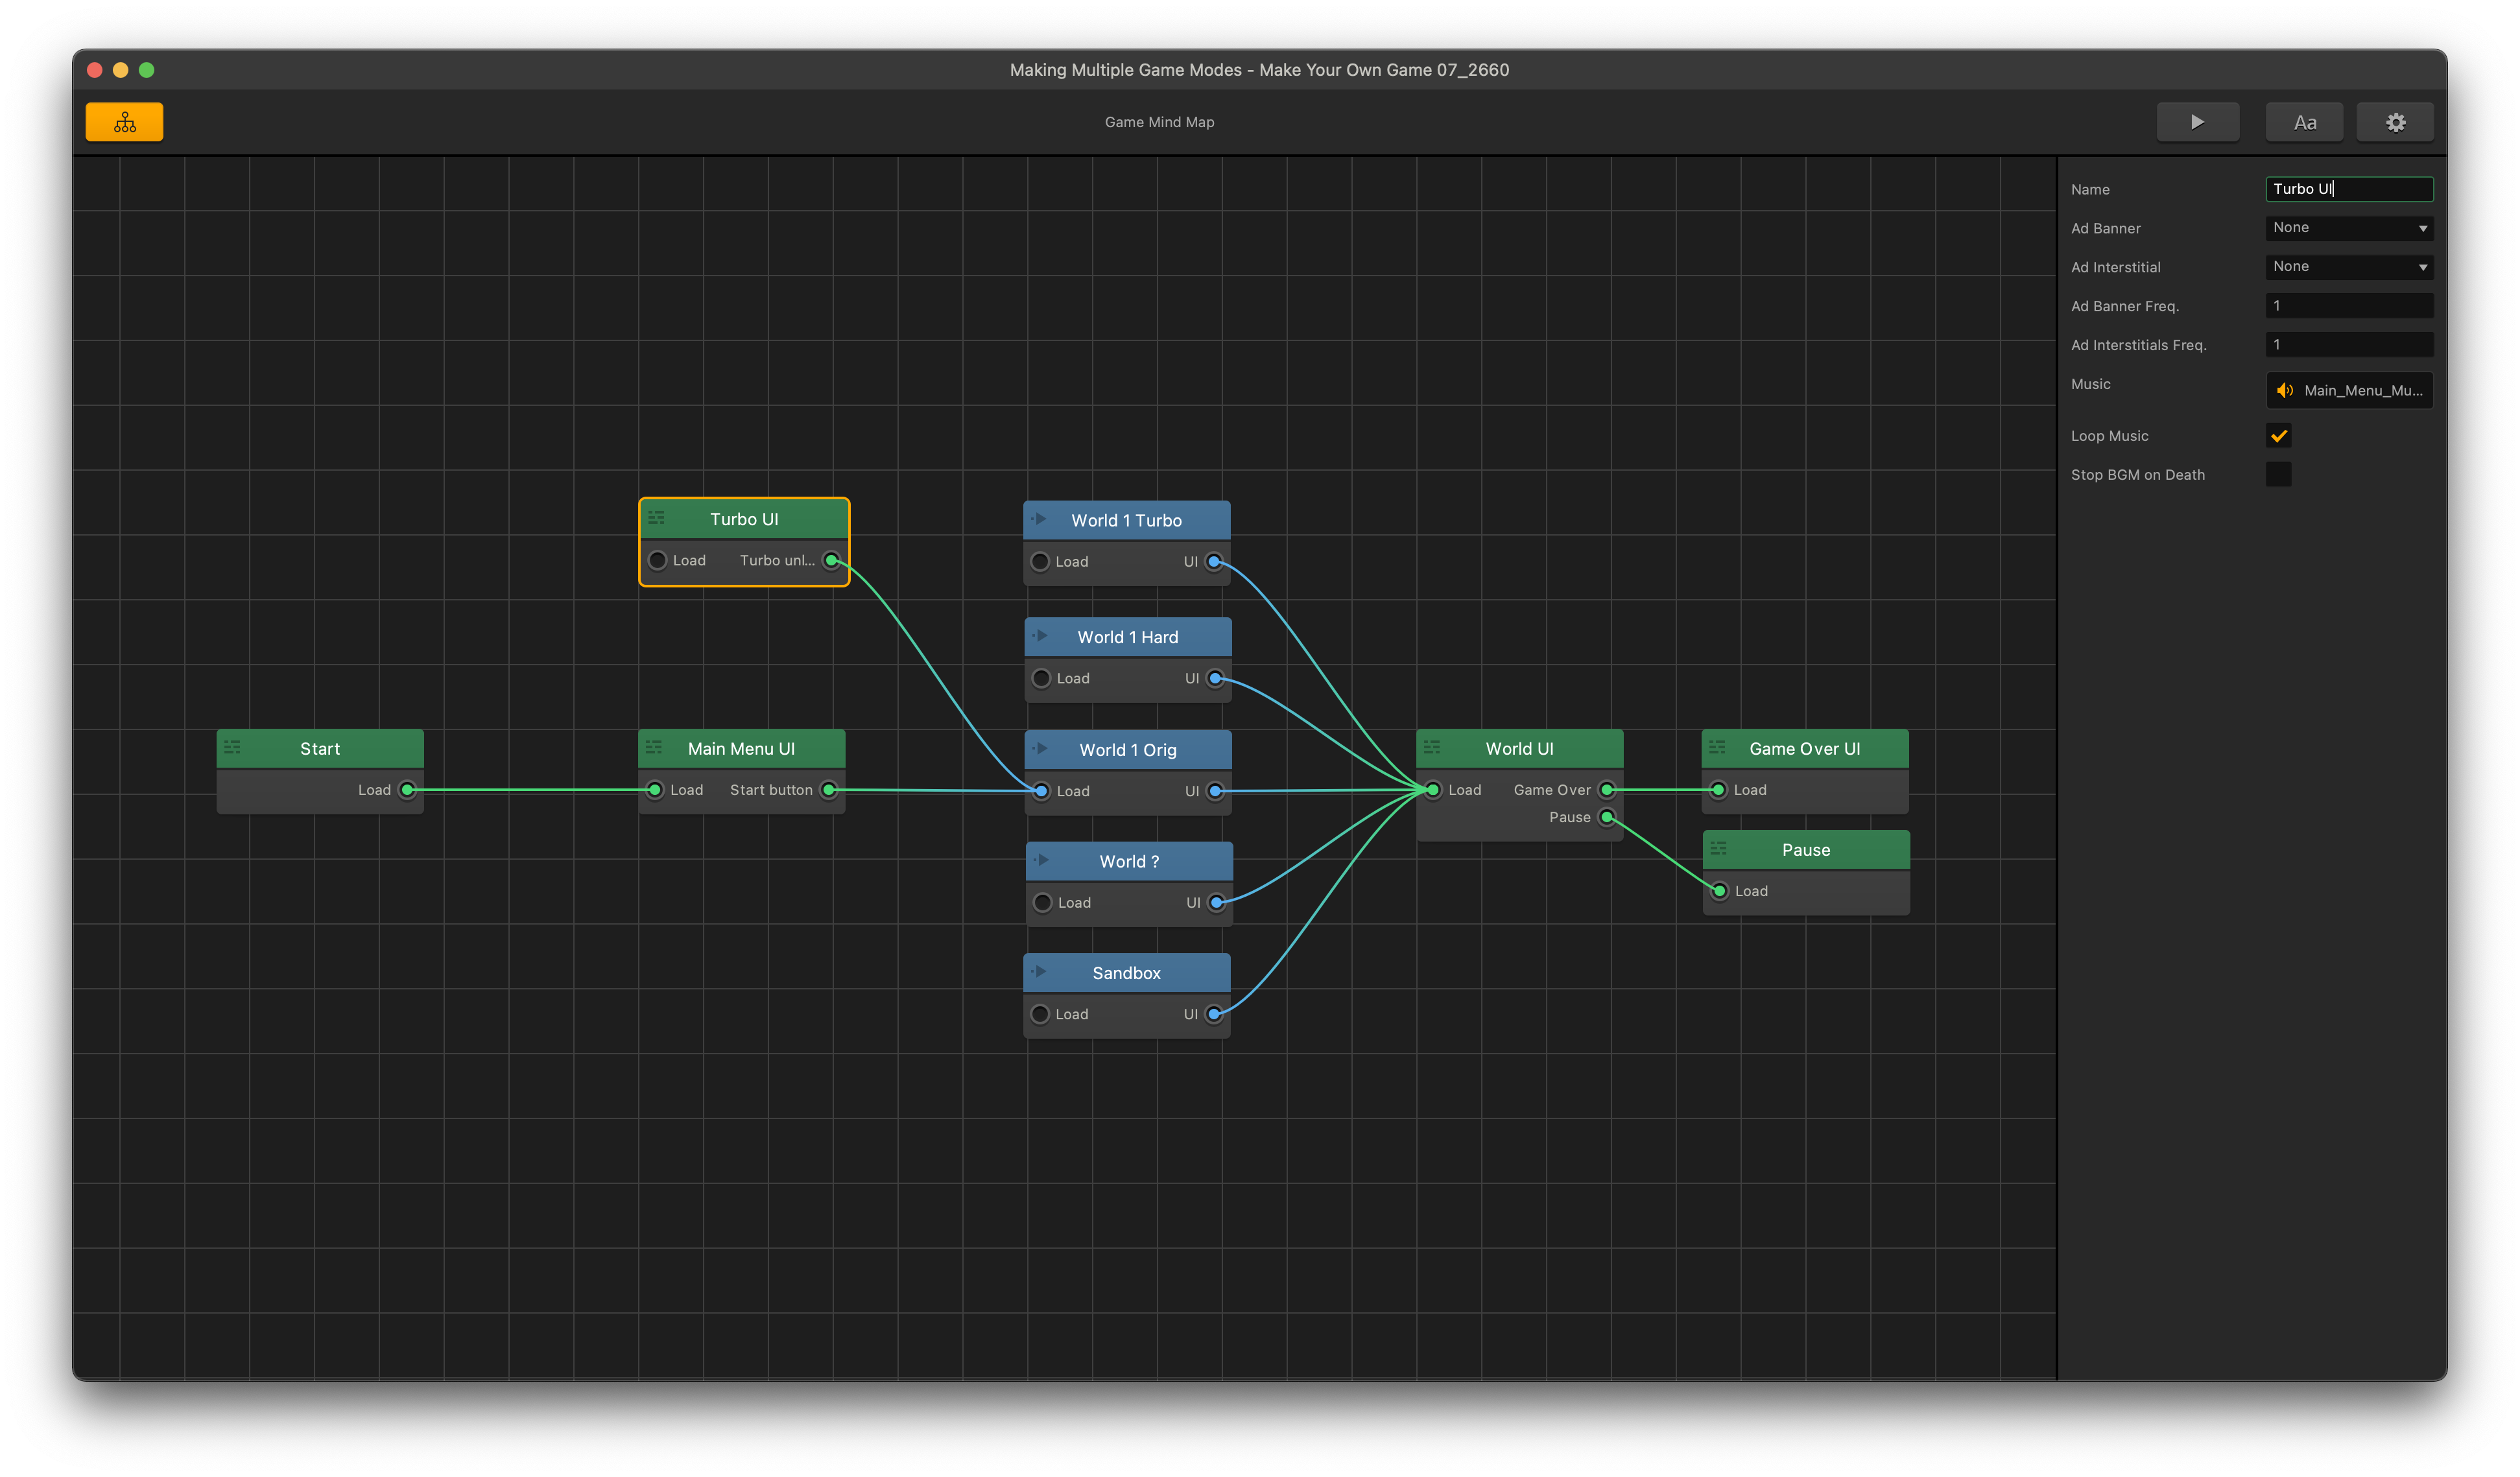
Let’s copy our main menu so we can use a copy of it, and tweak it for our different modes. Let’s name it ‘turbo UI’ and let’s double click on our Main Menu UI and start.
In our Main Menu UI, let’s add a navigation button, we can just drag our graphic, the one that looks like the image below, in and drop it on the navigation button on the drag and drop wheel, and place it below the start button, and make sure to name it “Turbo”.
By now, the Main Menu UI should look like this:
Let’s click on the mind map button in the upper left and go back up into the mind map, and let’s connect our turbo button to the new Turbo UI. This can be done by clicking on the circle next to the word “Turbo” and dragging the line into the circle for the “Load” in the Turbo UI.
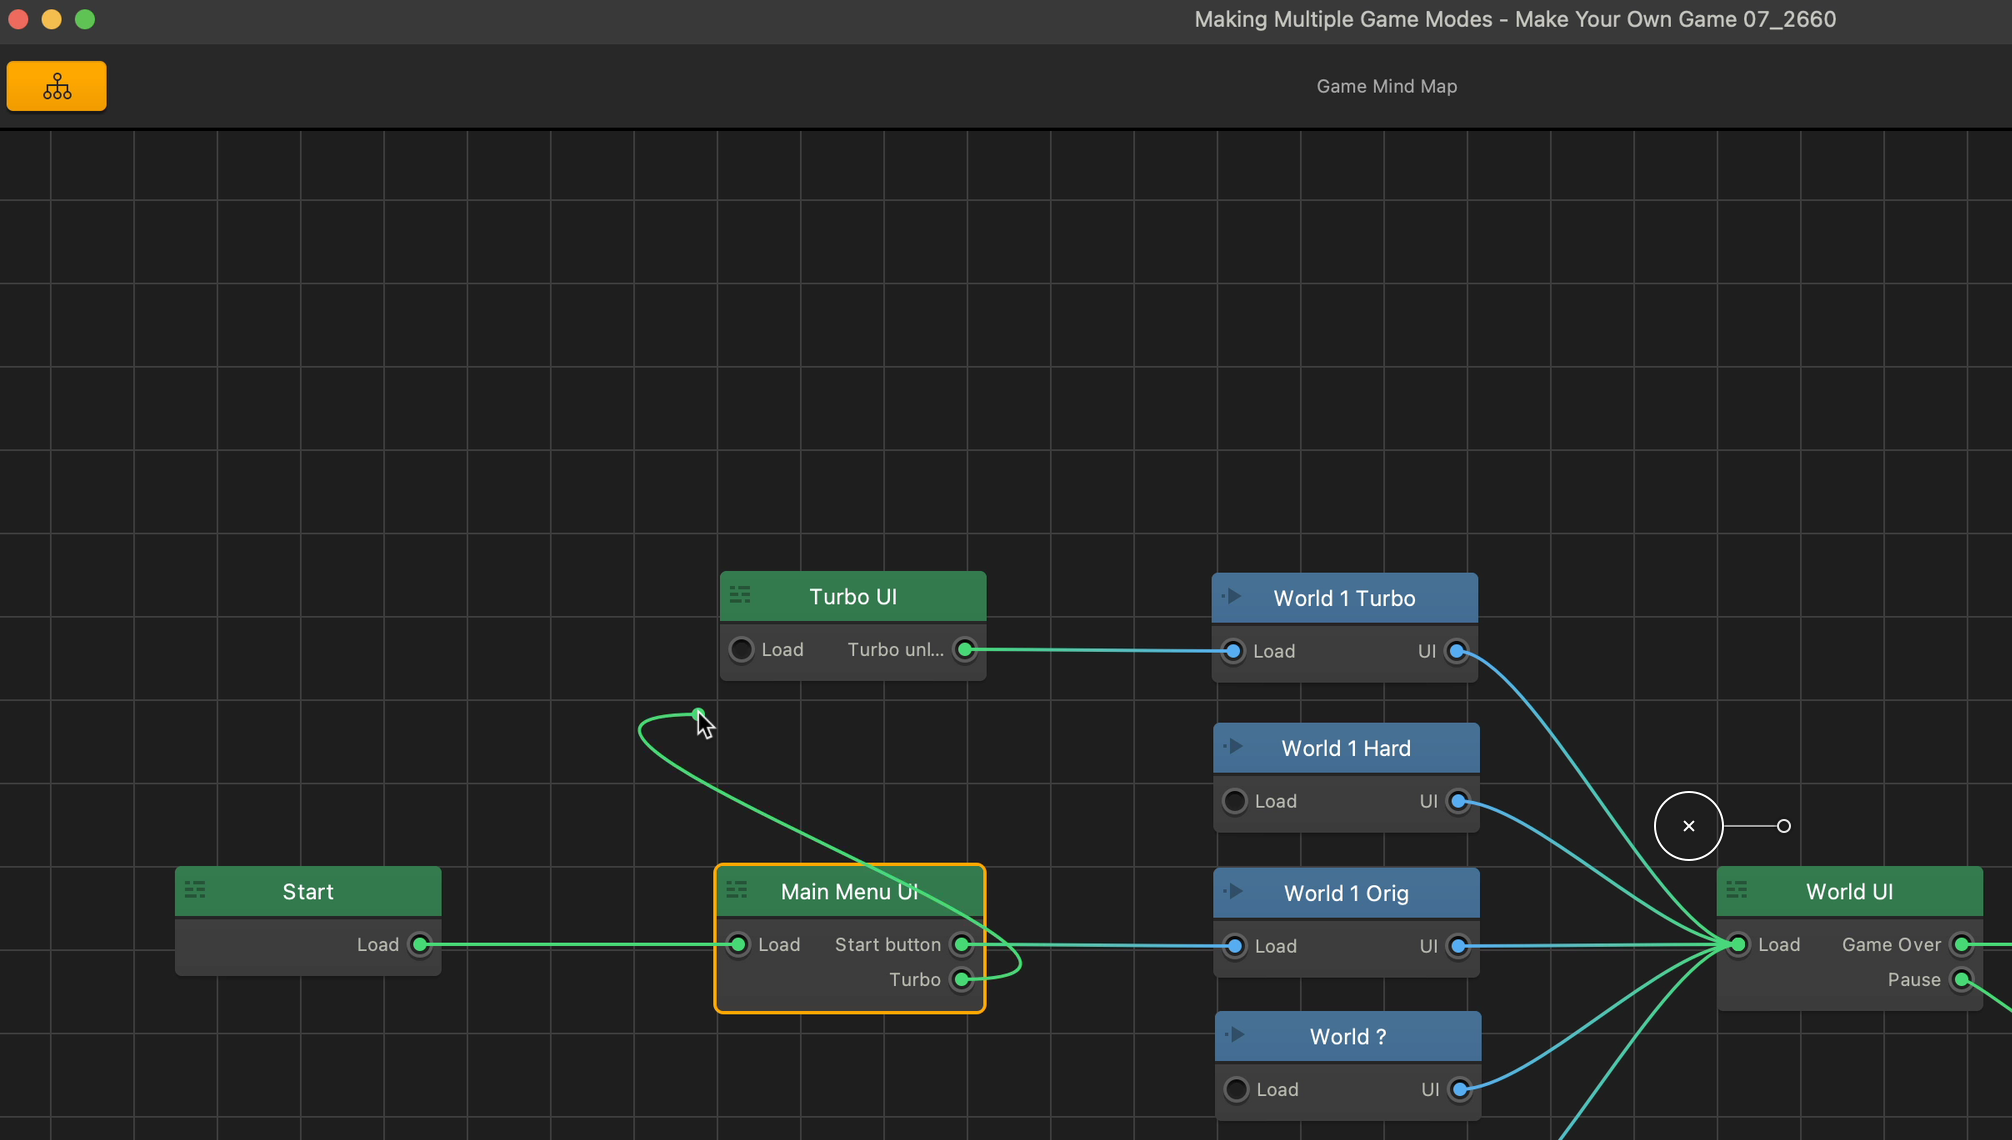
That’s how easy it is to connect Navigation Buttons to other UI and other worlds.
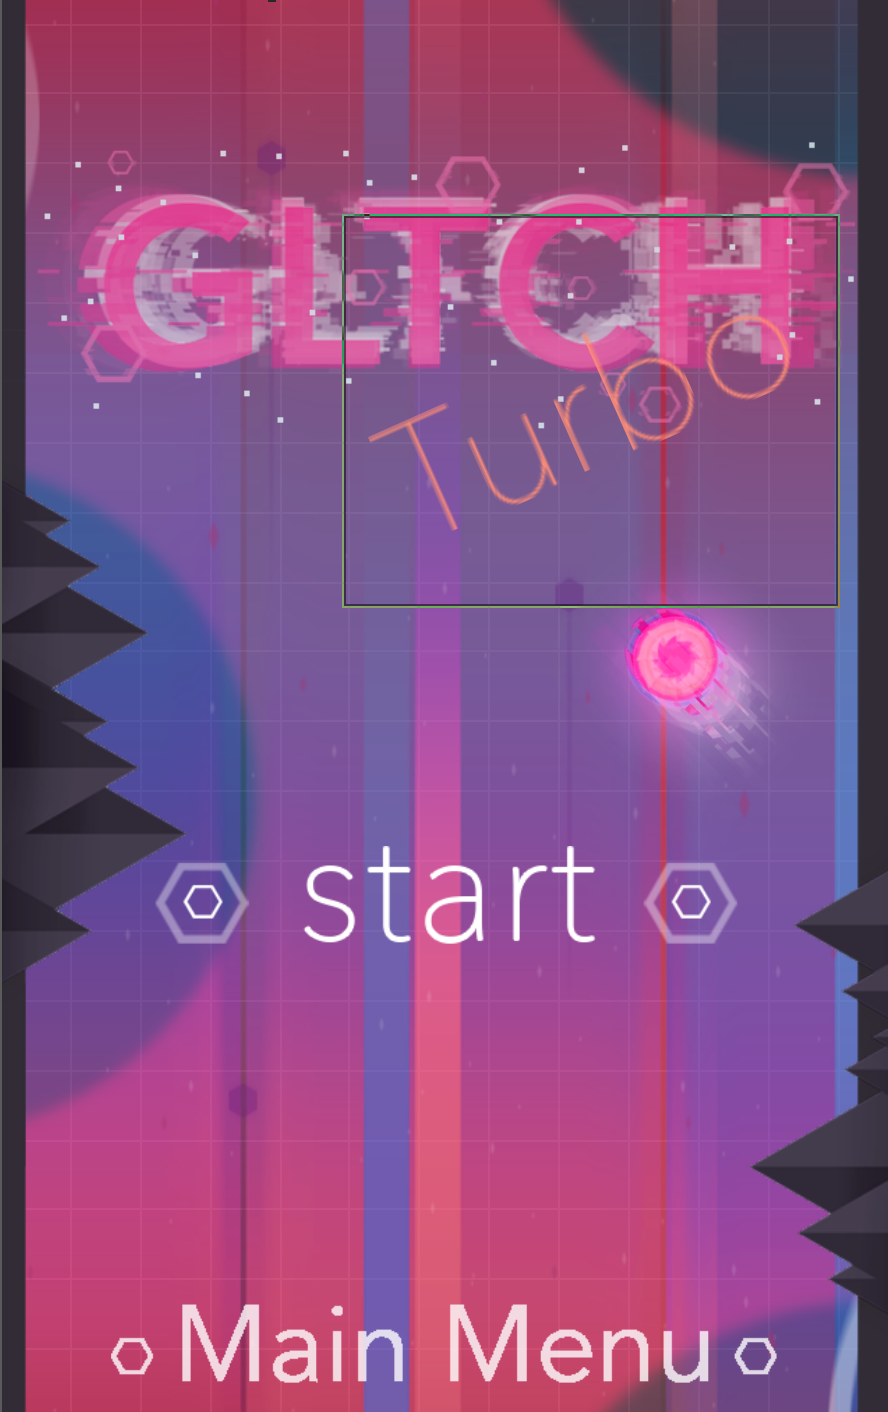
Double Click on the Turbo UI let’s update some graphics in there to distinguish it from the normal menu and give it some personality. Drag in “GLTCH__0001_Background_Dark-Version.png” and change its opacity. Arrange the outliner so it is above the background.
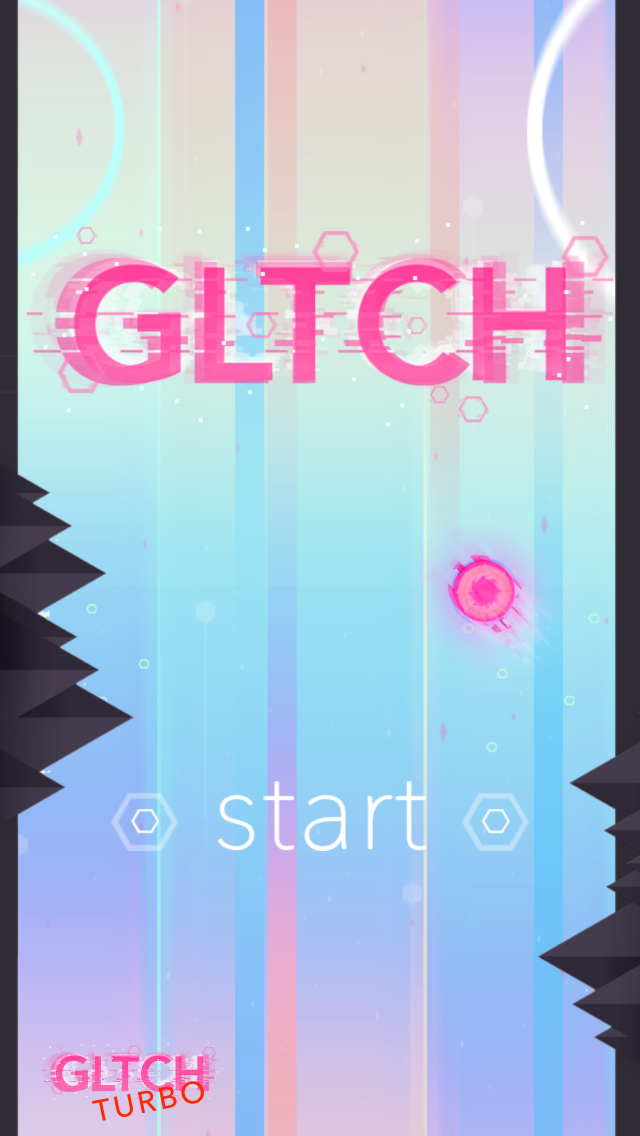
Making sure that record is not enabled. Let’s add a label in our coin tracker font to read turbo. Let’s scale it to 2, rotate it a bit over the title, and let’s give the title a 0.75 opacity, just so turbo is a little easier to see. Now, enable record and animate the label to fade in at frame 20. Disable record and test it out. The Turbo UI should look like this:
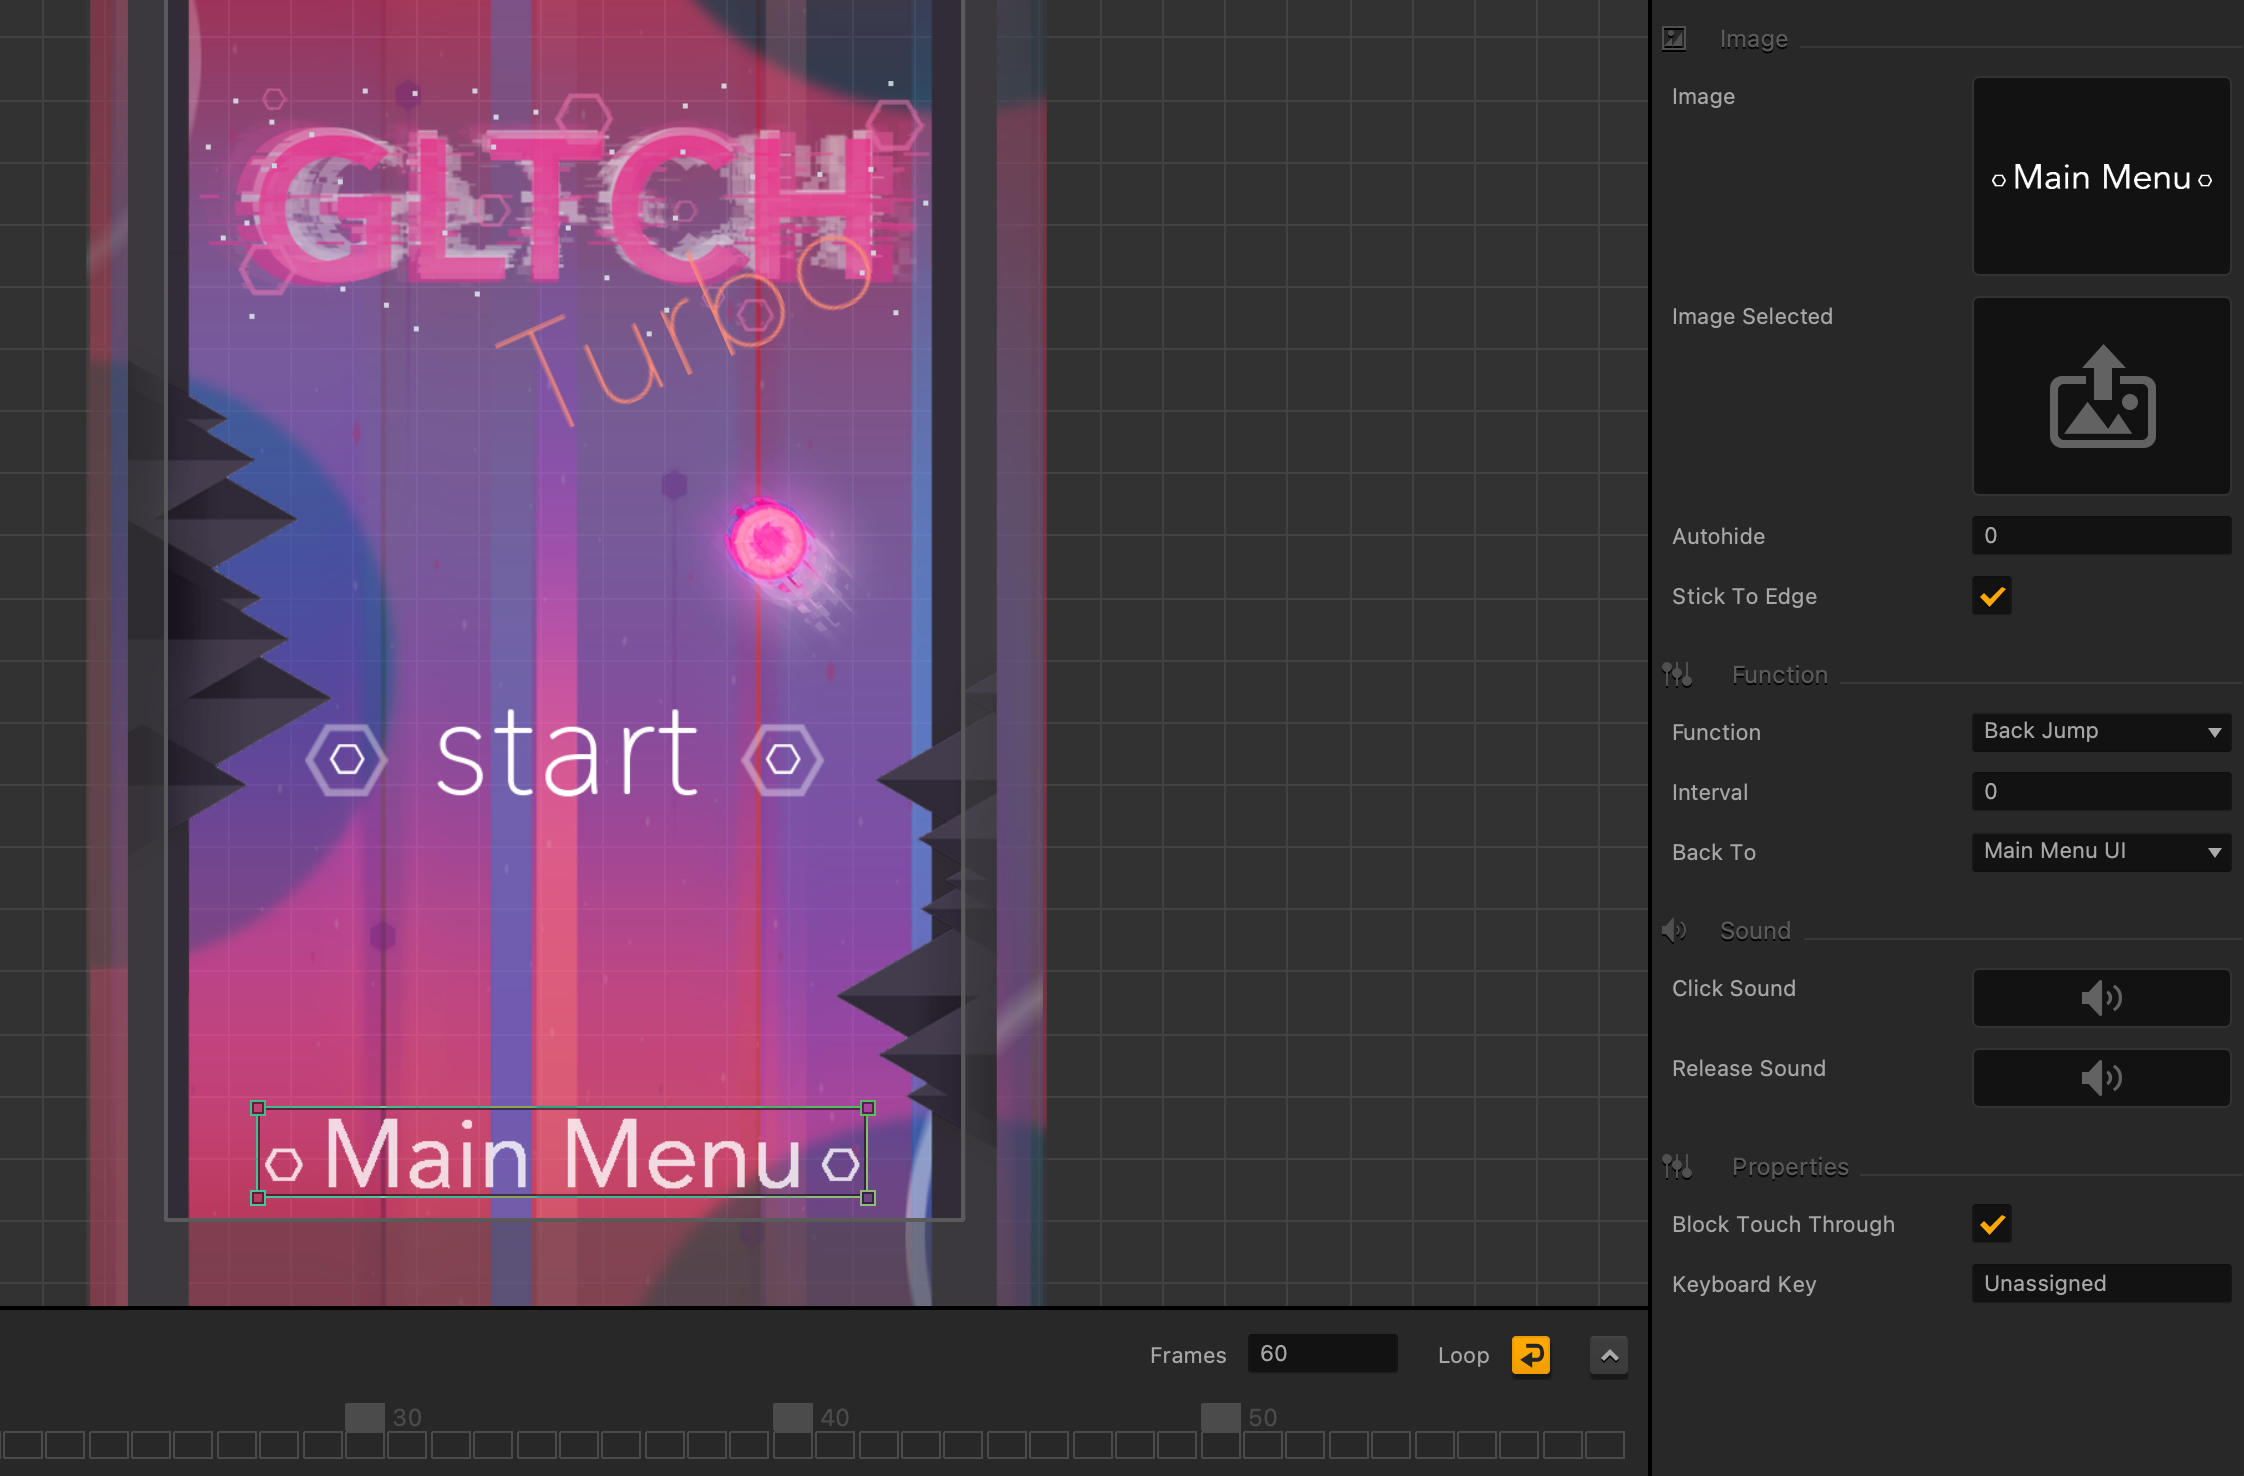
Drag in a new navigation button so that the players will be able to return to the Main Menu UI. You can connect it to the Main Menu UI via the method we used in the previous page, or just give it a “Back Jump” function in its settings. Decrease its opacity to 0.75 and record its animation.
Use the same methods to create a “Hard UI”. This means, there should be a navigation button to go there from the Main Menu UI, a button in Hard UI to return to the main menu, and the Hard UI must have distinct graphics and animation as well. Instead of “GLTCH Turbo” for the title, it should read “GLTCH Hard”.
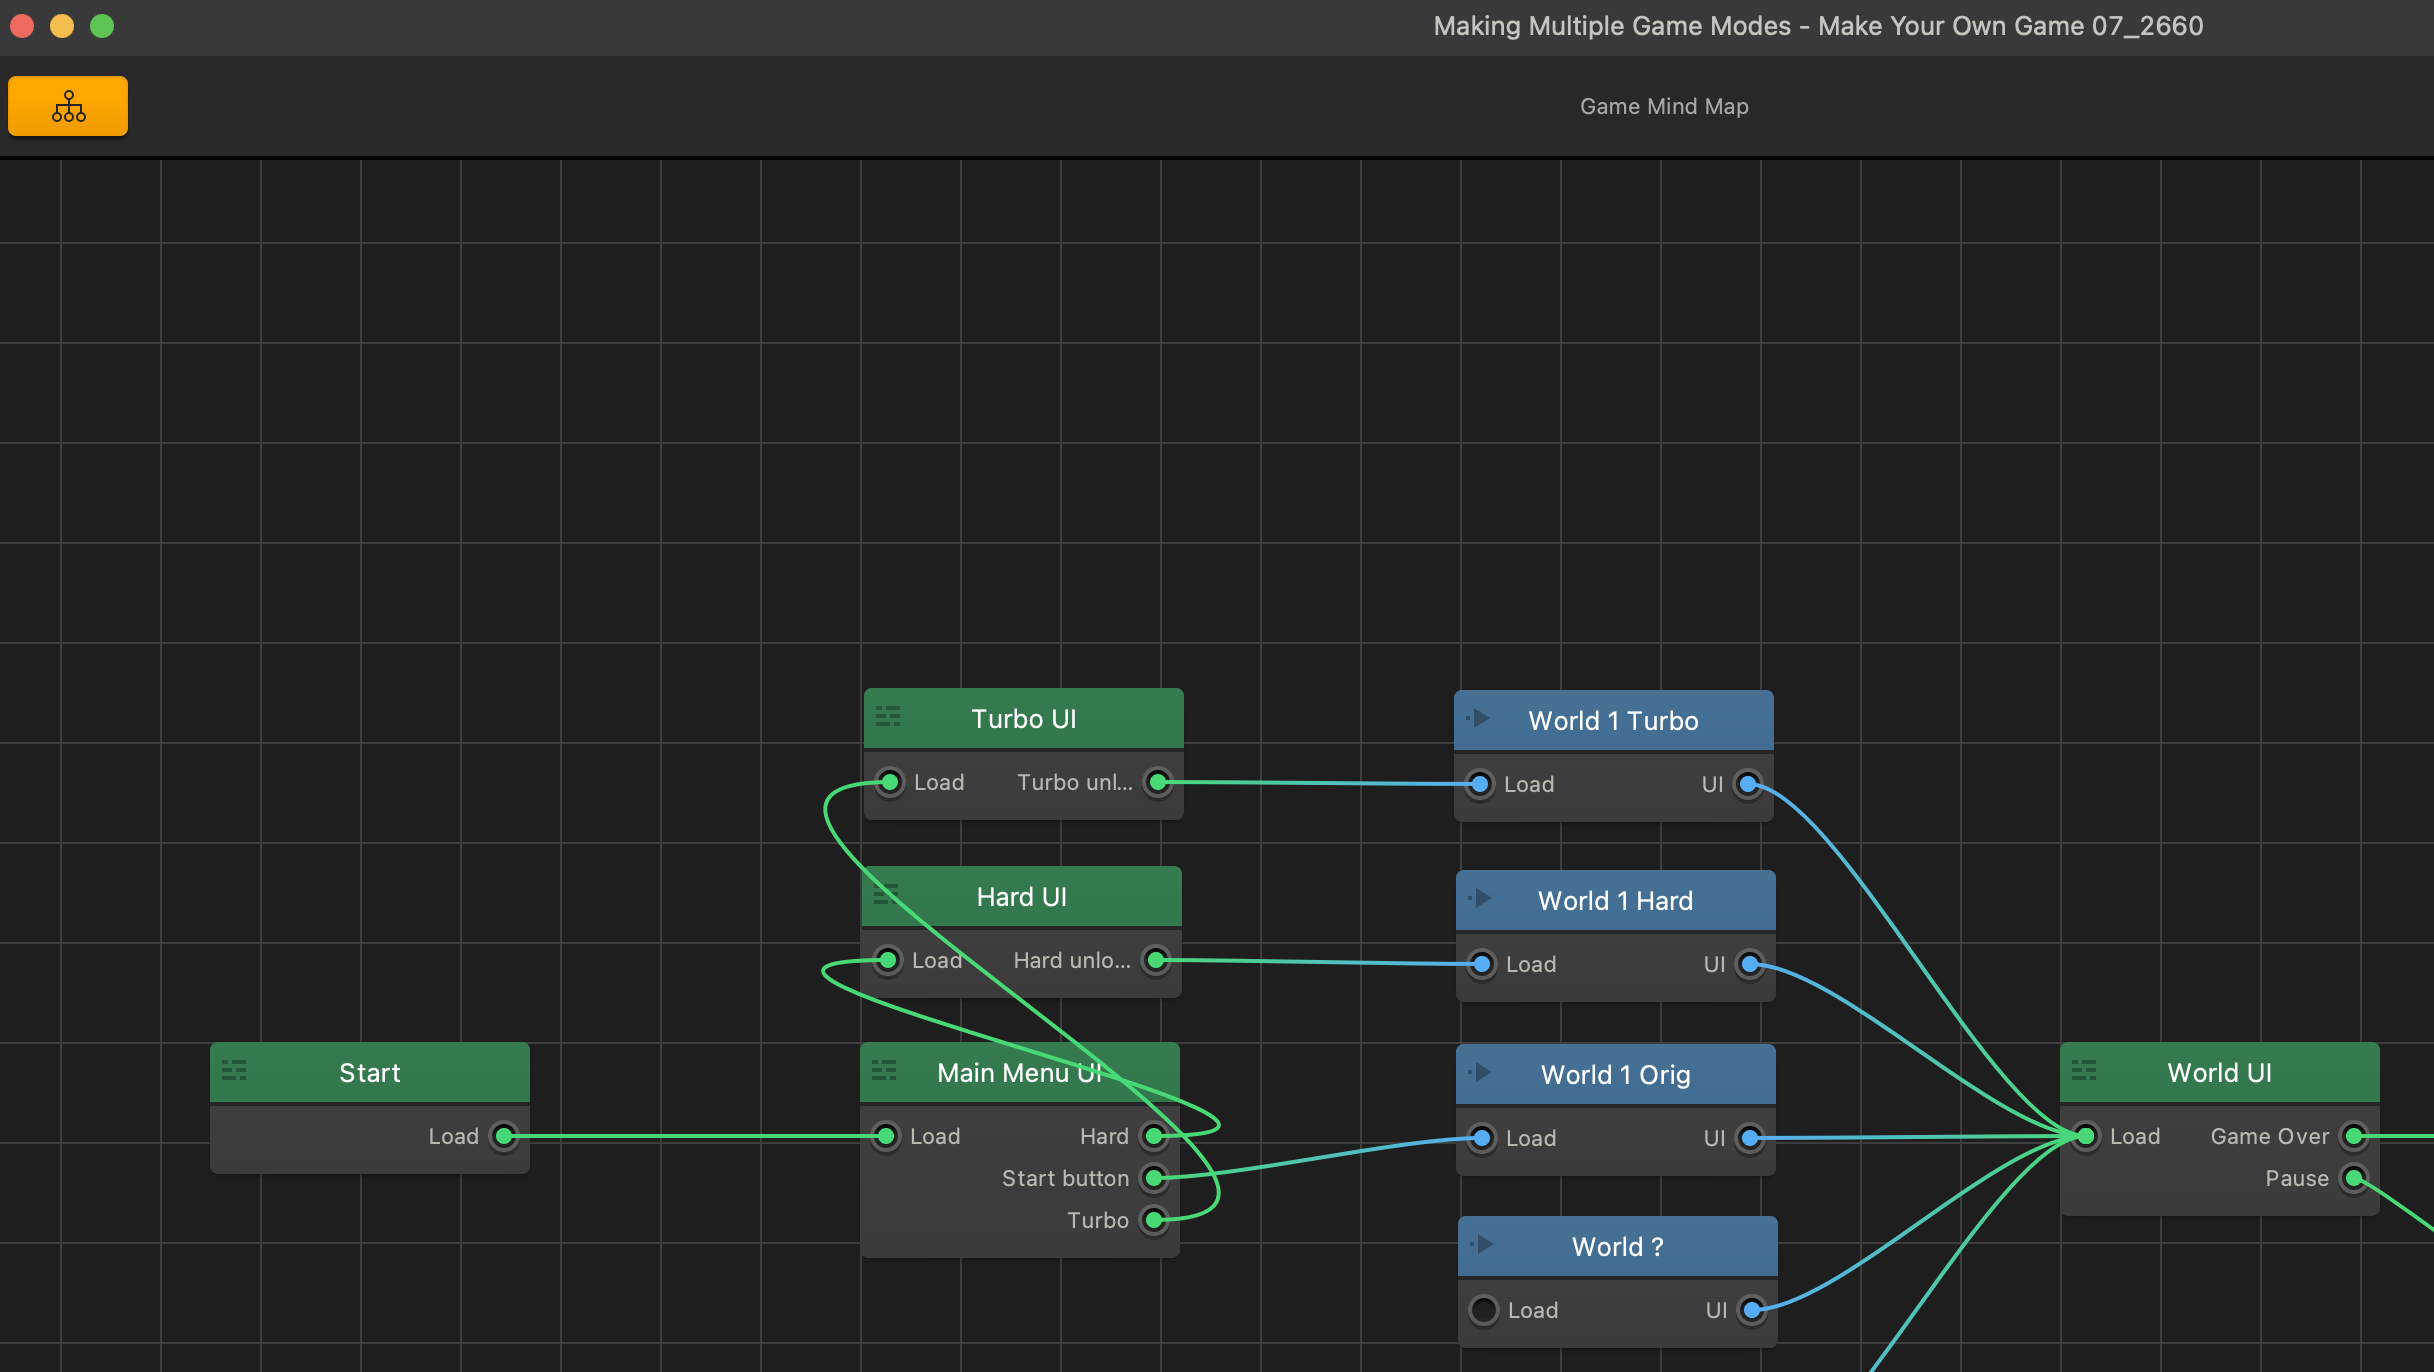
Now, we can just connect the start button of our Turbo UI to the World 1 Turbo, and the start button of our Hard UI to World 1 Hard. Let’s select our World 1 Turbo in the mind map and change the time warp to 75. Change World 1 Hard’s time warp to 57.
To make these modes unlockables, let’s change the start buttons on our turbo UI and hard UI to be lock buttons. Let’s double click on our turbo UI and select our start button and delete it.
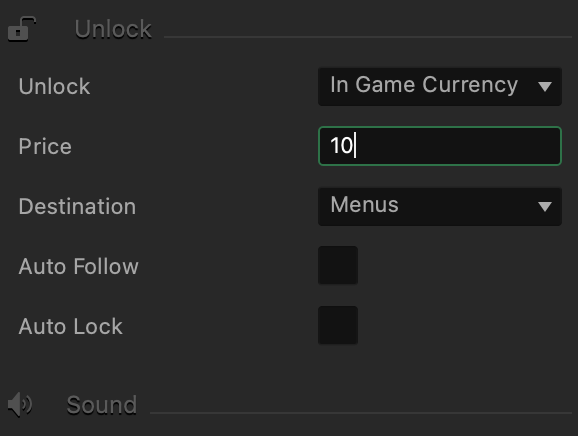
Now, let’s drag a lock button from the assets panel into the menu. Lock buttons can be set up to be unlocked using in-game currency like coins or as an in-app purchase for real money. Let’s start by naming the button ‘start’ and dragging in our start button graphic into the image option. And then we need an image to display while it is still locked. Something that communicates its cost.
Now let’s scroll down and set its price. For now, make it 10 coins, so it’s easier to test, but you would of course make it match the communicated cost.
Let’s repeat the process for the hard UI, let’s delete the old start button, drag in the lock button, get the appropriate images in order, set the price, go back out, and make sure the new lock buttons are all connected to their appropriate worlds, and play our game.


