
Did you know that one of the best places to sell game assets is Buildbox Shop?
Our Buildbox Shop allows anyone to sell their own original assets right inside Buildbox. Creators can find everything they need to finish their games, from 2D and 3D assets to user interface (UI) elements and more.
It doesn’t matter whether you’re an illustrator, graphic designer, artist, or simply have a passion for creating game art; being a seller on Buildbox Shop is a fantastic opportunity to showcase your work. Plus, you get to share your love for art while helping others in their quest to make a game.
Are you ready to set up shop in Buildbox Shop? Here’s a quick guide on getting started and a few of our best practices to follow for success!
How to Sell Game Assets in Buildbox Shop
Let’s set up shop! To get started, all you need is a Buildbox account. If you don’t have one, you can sign up right here. Once you have an account and have downloaded Buildbox, click the button below to connect to the shop’s website and log in using your Buildbox credentials.
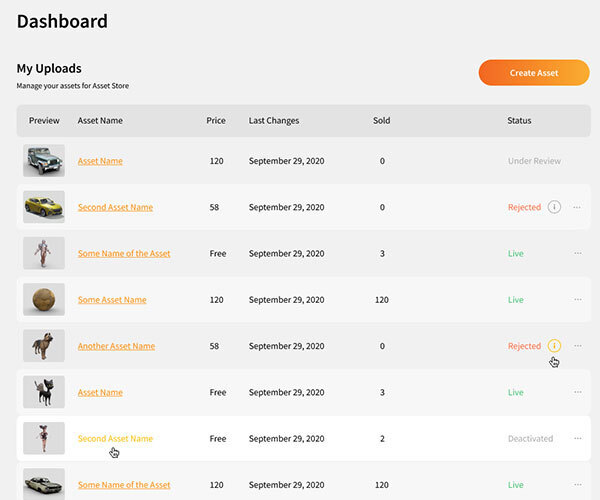
If you’re on the Buildbox desktop client, select the ‘Set Up Shop’ option in the bottom right corner of the home screen to open your shop. There will be helpful tooltips to assist you along the way too.
Buildbox Shop .bbasset File Creation and Asset Bundles
All assets uploaded to Buildbox Shop must be in .bbasset file format. But don’t worry, you can easily convert any 3D or 2D asset to .bbasset format.
Here’s how:
First, open Buildbox to create a new empty game, or you can open any recent project. Then drag and drop your asset from the Finder/Explorer into a Buildbox Scene. Your asset files can be in OBJ, FBX, JPEG, or PNG format.
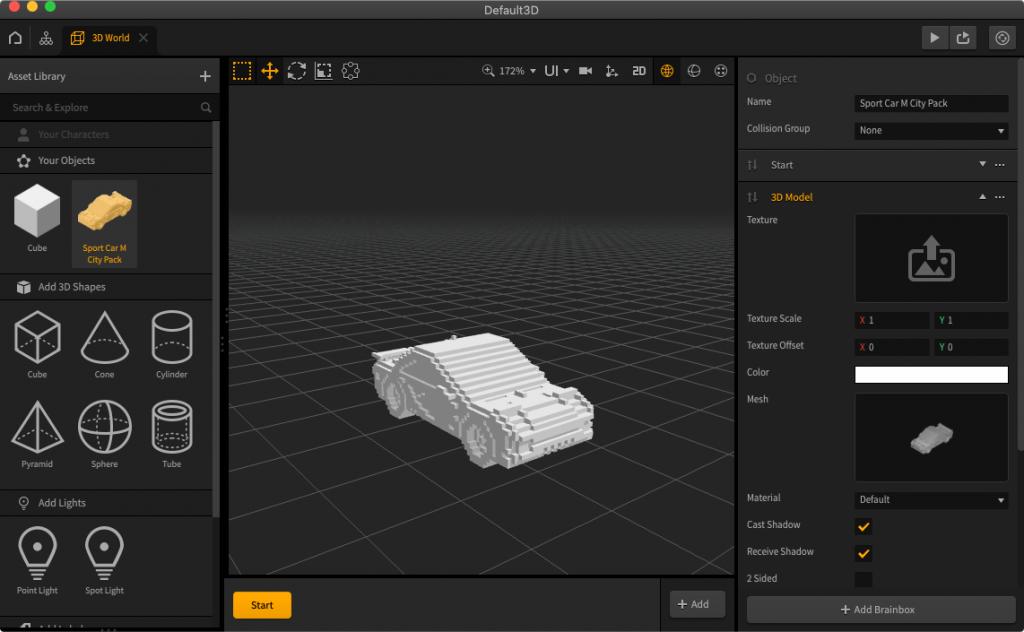
If it’s imported without a texture, you’ll need to add the texture to the asset. To do this, simply select the asset in the left bar, then in the right bar under “3D Model” settings, find the “Texture” drop area. Drag and drop the texture from the Finder/Explorer into the drop area. This field only accepts PNGs, so make sure that’s the file format you use.
Make adjustments to the most common properties. Select the asset in the left bar to see the settings in the right bar.
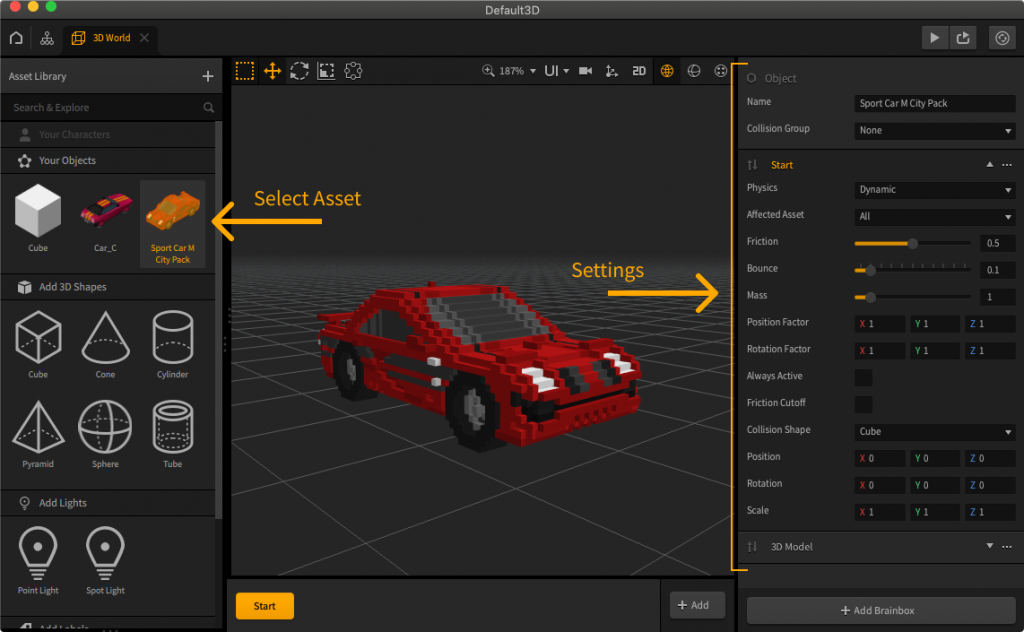
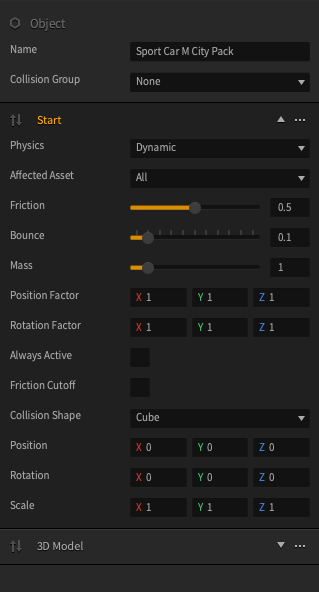
You’ll need to set up the Collision Group, Physics, Affected Asset, and Collision Shape. Also, if necessary, fix any other settings, including the friction, bounce, or mass of the asset.
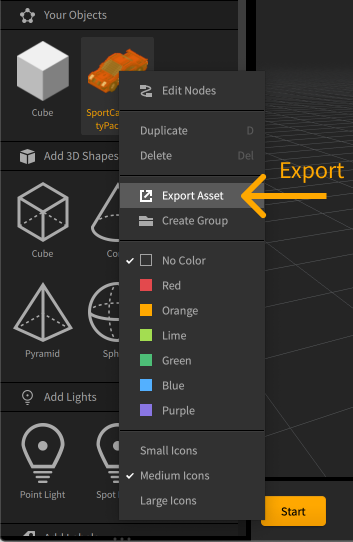
That’s it! Now you can export to .bbasset format. Select the asset or multiple assets (Hold Cmd/Ctrl and click on each), right-click on the mouse, and select Export Asset from the Menu.
Creating Asset Bundles
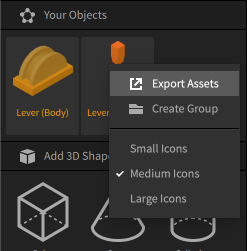
You can also set asset Bundles in the Buildbox Shop. To create an asset bundle, you must export them together and sell them as a combo asset. Select both assets (Hold Cmd/Ctrl and click on each) and export both as a single .bbasset. Asset bundles can include anywhere from 2-10 assets.
Best Practices to Follow for Success
Tip #1: Only Sell High-Quality Assets
If you want to be successful at selling game assets, it’s important only to create and sell high-quality assets. The assets that you submit to Buildbox Shop should look professional and must be fit for one or multiple gameplay types. The more versatile, the better.
Whether they are background objects or animated characters, they should all look good and add to the game. Any submitted asset that doesn’t meet our criteria may be rejected. So be sure to review our list of acceptance criteria and adhere to those requirements before submitting.
Tip #2: Don’t Be Afraid to Bundle
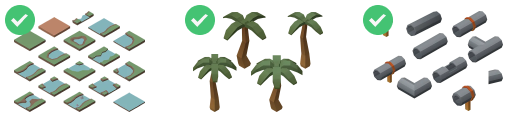
In cases where you have assets that look similar or situations where one doesn’t work without the other, always try to sell it as a bundle. Developers love bundle packs which can help increase your odds of making a sale. Some great examples are a lever body and a lever handle. These two assets work together to form a functioning lever or a set of slightly different trees that can help someone build a forest in their game.
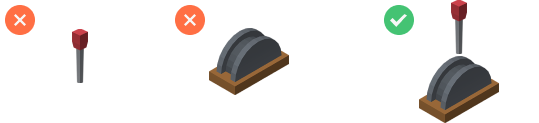
Tip #3: Take Your Best Shot
When creating your asset listing, it’s important to use the best possible screenshot. The image that you upload to the Buildbox Shop will help the creator make their purchase decision. Most users skim through the description. It’s the eye-catching screenshot that will spark their interest. We recommend taking a front view screenshot when selling a 2D asset and an isometric view screenshot for 3D assets to show off your game art. Your screenshot dimensions should be 520×400 px. The image will automatically be padded, so be sure to use as much of the 520×400 as possible to display your asset. Also, keep in mind that the maximum file size limit is 5 MB.
Tip #4: Make Sure Your Prices Are Fair
Buildbux is the native currency of Buildbox. Creators can purchase Buildbox with real money and use the coins to buy assets from the Buildbox Shop. As a seller, you can set the price of your assets to any amount of Buildbux you wish. However, we recommend being fair in your pricing for the best results.
Most assets are generally sold for anywhere between 25 and 1000 Buildbux. Try to price your asset based on its type and functionality. For example, super simple assets like a basic 3D model or 2D image are typically sold for under 100 Buildbux. Assets that contain animations can be priced over 100 Buildbux. If your asset features complex Smart Asset functionality with pre-built game functionality, you can charge up to 1,000 Buildbux. Just remember to keep it fair, and you will have a following of loyal customers in no time.
Following these best practices and tips can help lead you towards success. We can’t wait to see what you create and sell in Buildbox Shop!


