
Step 1: Register for a Google Play Developer Account
This tutorial will take you through the final steps of taking your Buildbox game and putting it onto the Google Play Store. This tutorial will assume that your Buildbox game is already polished, bug free, and ready for the world to see.
In order to submit your game to the Google Play Store, you must first register for a Google Play Developer Account. To do this go to the Google Play Developer Account signup page to start your enrollment. You will have to sign into your Google account, accept some terms of service, pay a one-time $25 registration fee, and complete your account details.
 Google Play Console
Registering for a Google Play Developer Account gives you access to the Google Play Console, which is where you will go to submit and update your game and manage the analytics and data for it.
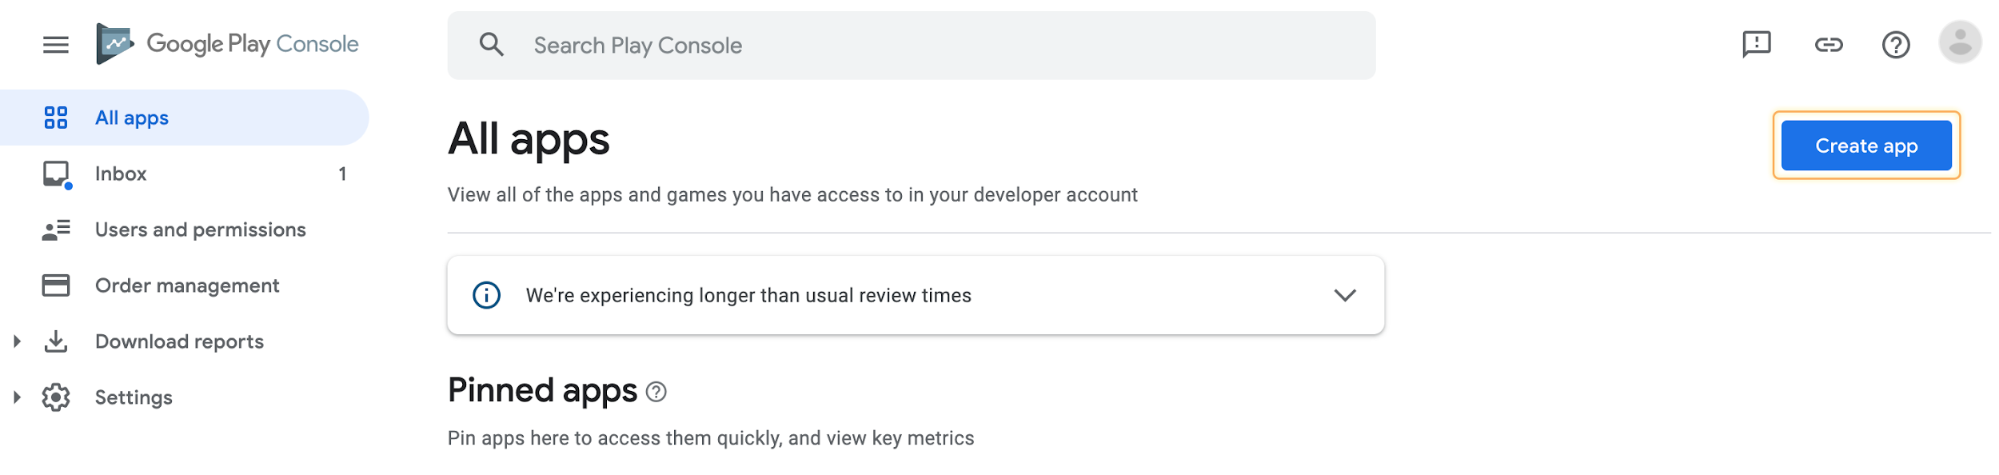 Google Play Console – Home Page
One more tool you are going to need is Android Studio, which is the tool that professional Android Developers use to design, code, test, and debug applications for Android devices.
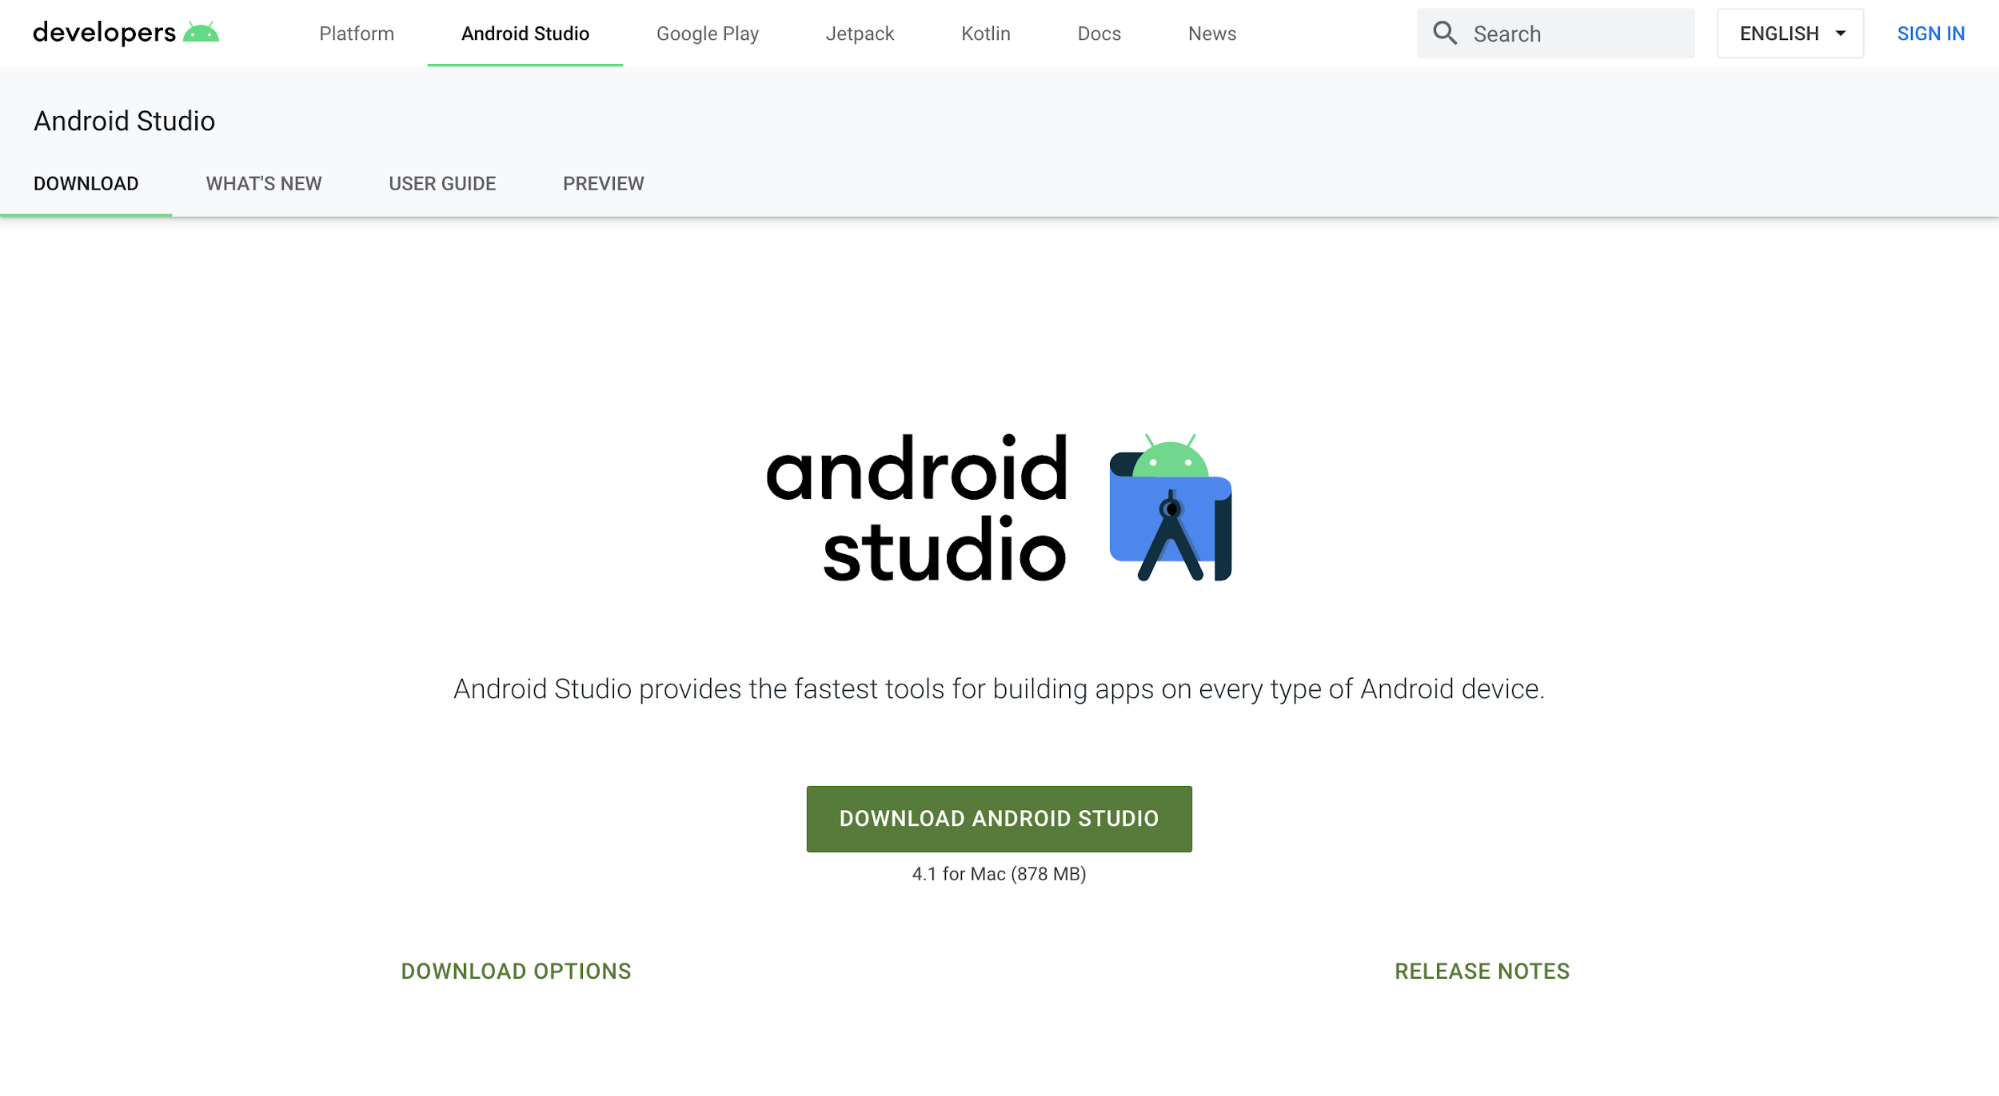 Android Studio – Download
Step 2: Export Your Game
If you are using Buildbox 2, then please use Step 2a. If you are using Buildbox 3, then please jump to Step 2b.
Step 2a: For Buildbox 2 Users
Once you are registered in the Android Developer Program, have Android Studio installed, and your Buildbox game is completed, it’s time to export. To start, open your game in Buildbox 2.
Before exporting, you will need to fill out some app info on the Project Settings page. To get to the Project Settings Page, click on the gear in the top right of Buildbox 2.
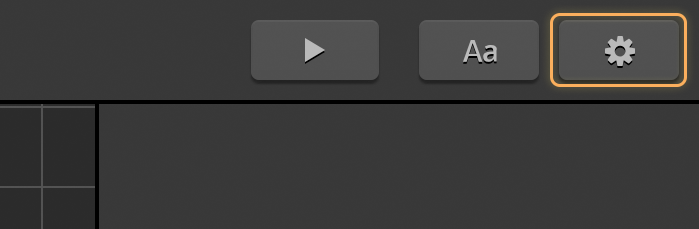
Buildbox – Project Settings Button
The App info you need to fill out is under the General tab. Make sure you import an Icon Image and Full Game Name. For Use Encryption, you may check the box to encrypt your game file to prevent other developers from stealing or remaking your game. For Application Store, select Google Play Store. Make sure you fill out Bundle ID and Name On Device as they are required for submission. You only have to fill out Leaderboard ID, Review Link, Share Message, License Key, and Game Services ID if they apply.
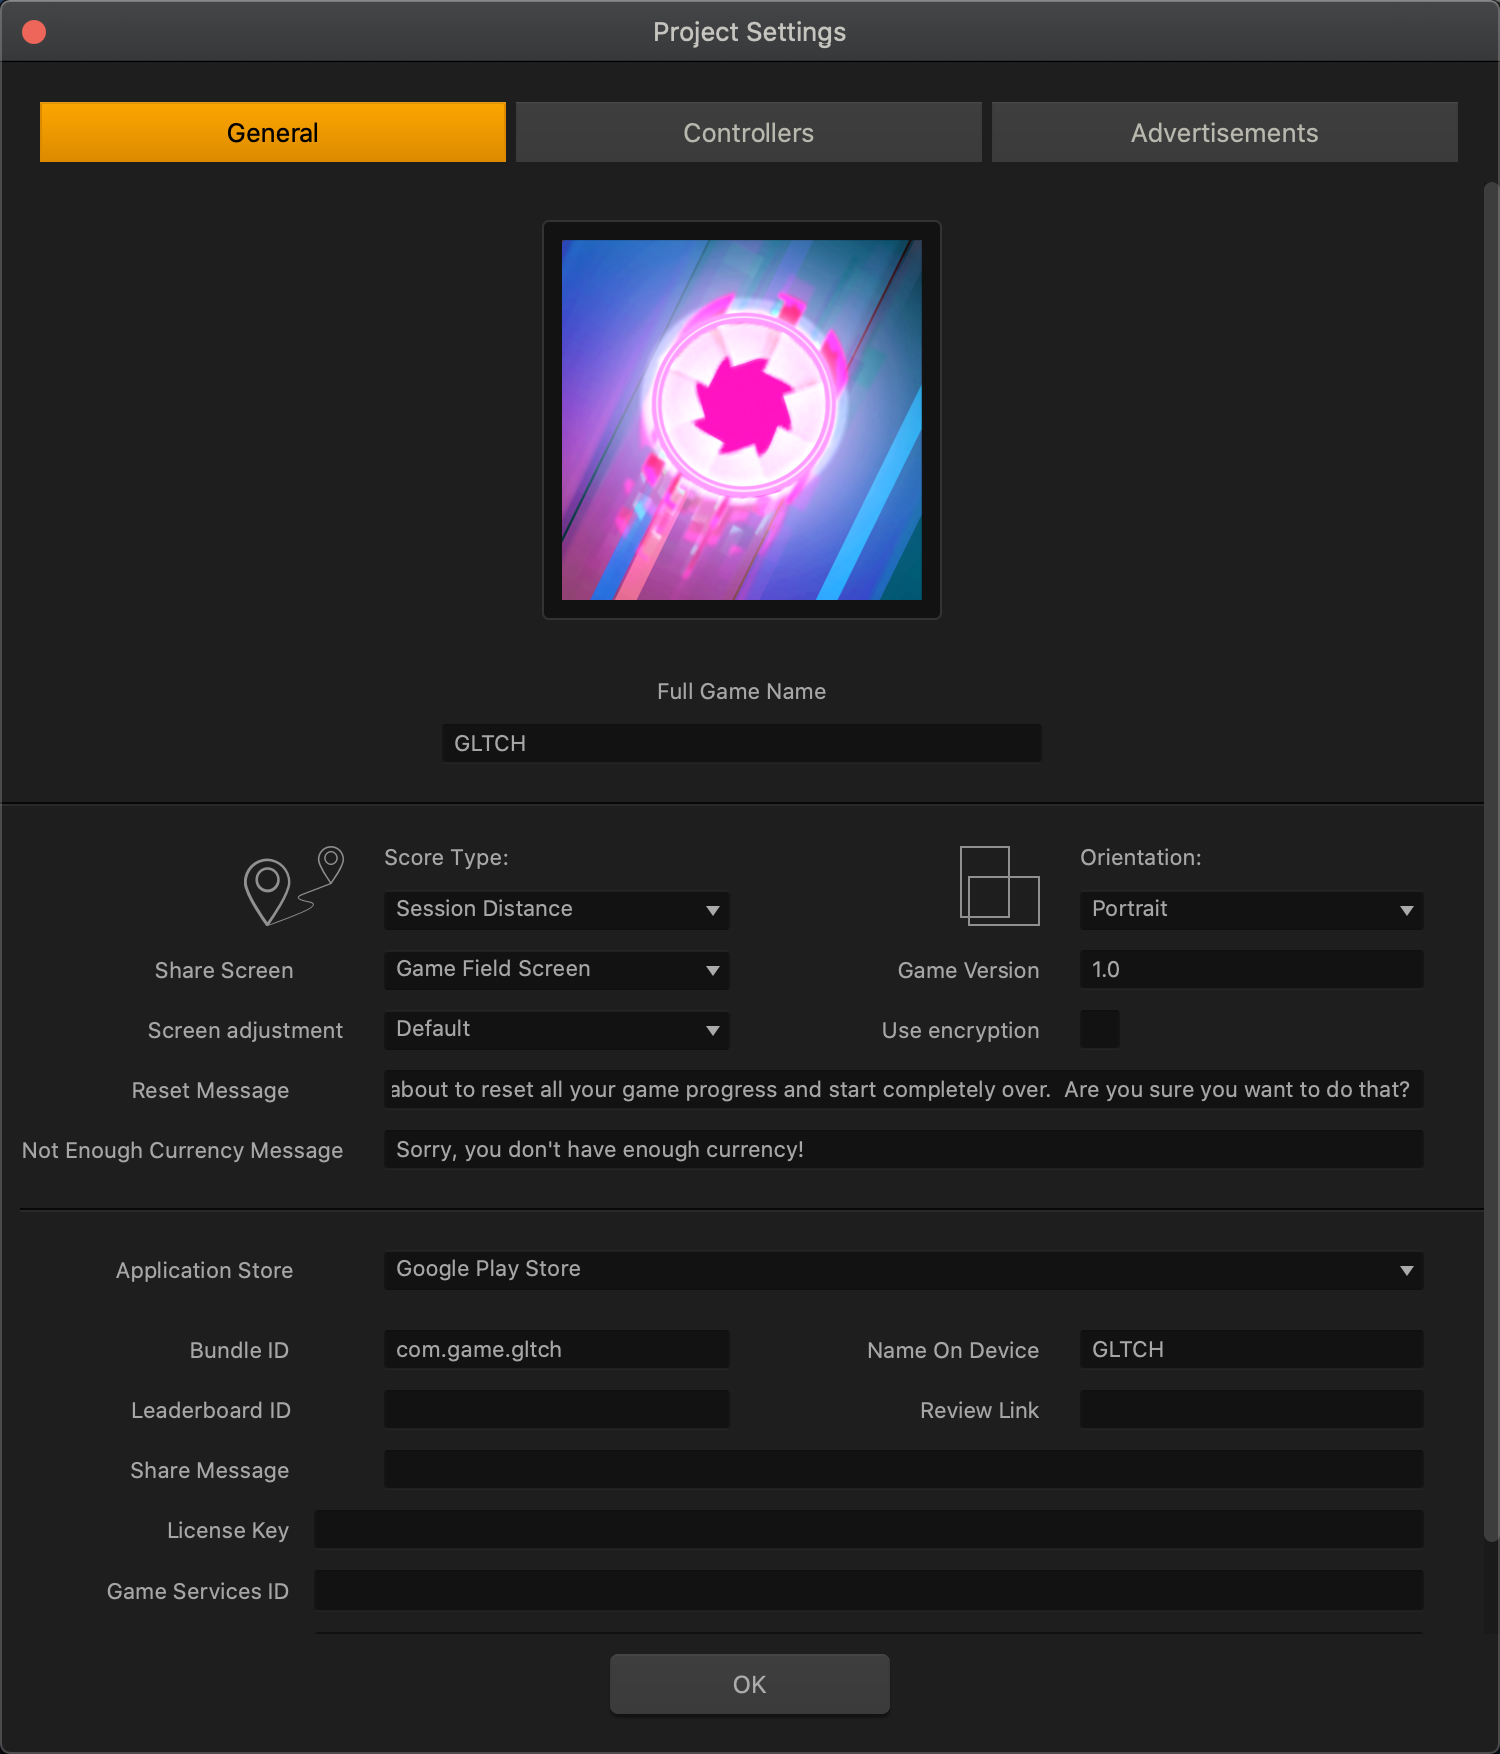
Buildbox – Project Settings Page
Now that all the important information is filled in, it is time to export. In the Menu Bar, go to File > Export > Android. In the popup, fill out Save As and select the file location on your computer. This will create a set of files on your computer to be used with Android Studio to be put onto the Google Play Store.
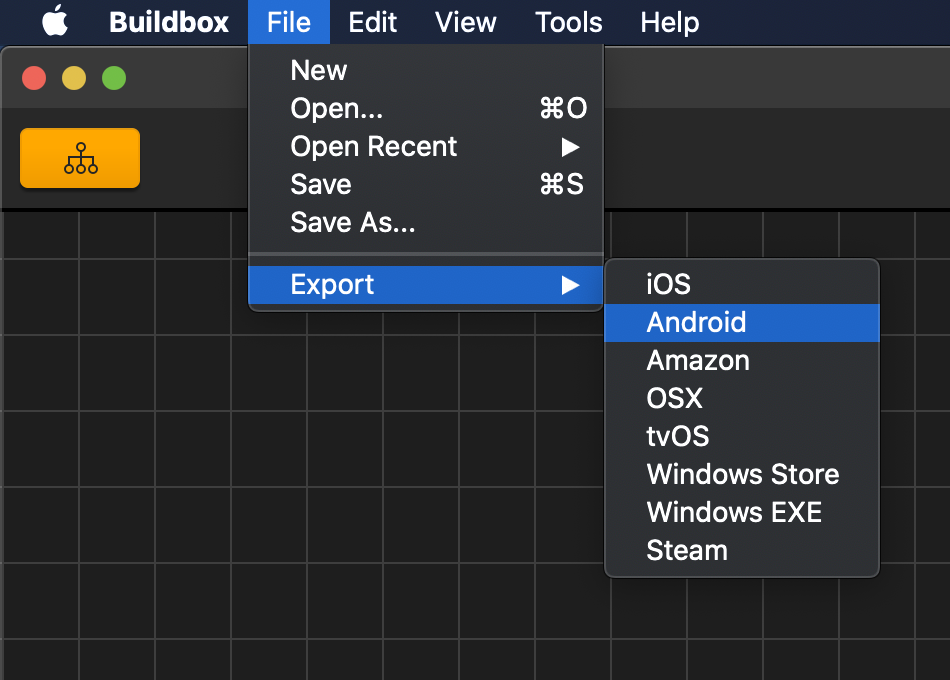
Buildbox – Android Export
Step 2b: For Buildbox 3 Users
Once you are registered in the Android Developer Program, have Android Studio installed, and your Buildbox game is completed, it’s time to export. To start, open your game in Buildbox 3.
Before exporting, you will need to fill out some app info on the Project Settings page. To get to the Project Settings Page, go up to File –> Project Settings or you can use the (Ctrl/Cmd + ;) hotkey as well.
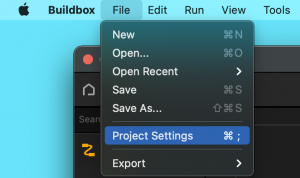
Buildbox – Project Settings Button
The App info you need to fill out is under the General tab. Make sure you import an Icon Image and Full Game Name. For Use Encryption, you may check the box to encrypt your game file to prevent other developers from stealing or remaking your game. For Application Store, select Google Play Store. Make sure you fill out Bundle ID and Name On Device as they are required for submission. You only have to fill out Leaderboard ID, Review Link, Share Message, License Key, and Game Services ID if they apply.
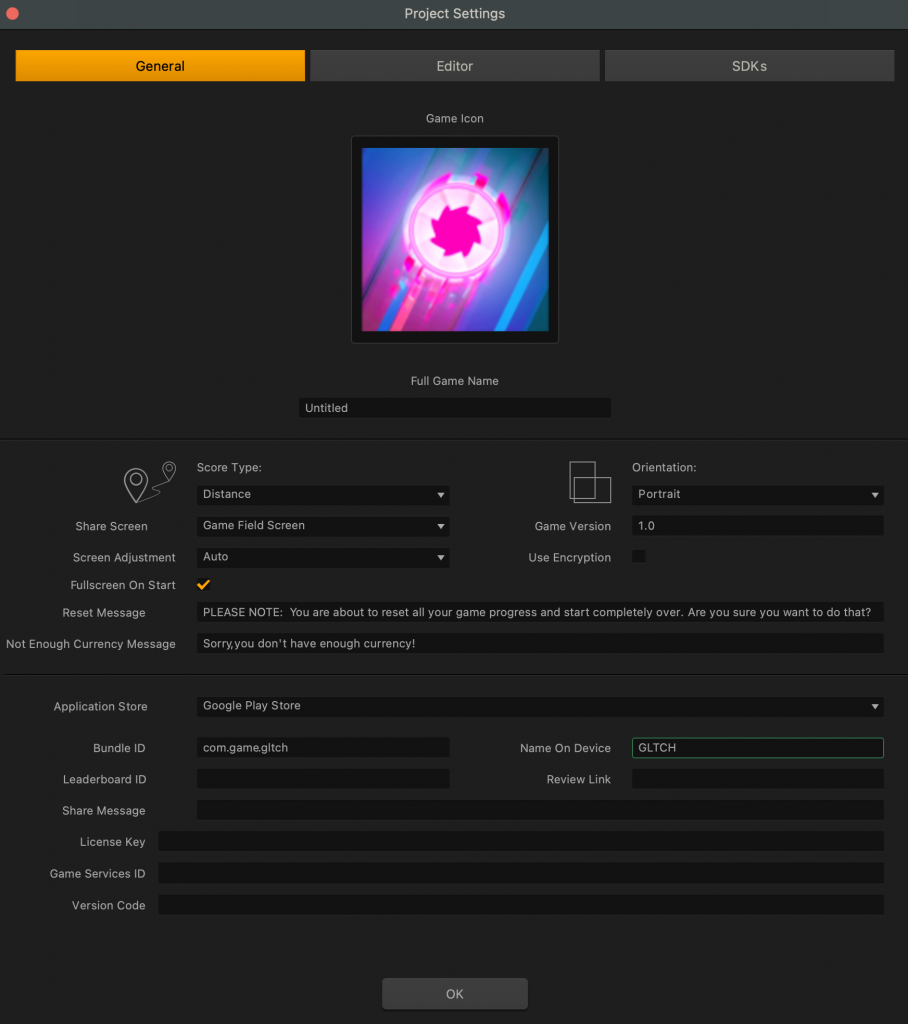
Buildbox – Project Settings Page
Now that all the important information is filled in, it is time to export. In the Menu Bar, go to File > Export > Android. In the popup, fill out Save As and select the file location on your computer. This will create a set of files on your computer to be used with Android Studio to be put onto the Google Play Store.
Buildbox – Android Export
Step 3: Setup your Android Studio Project
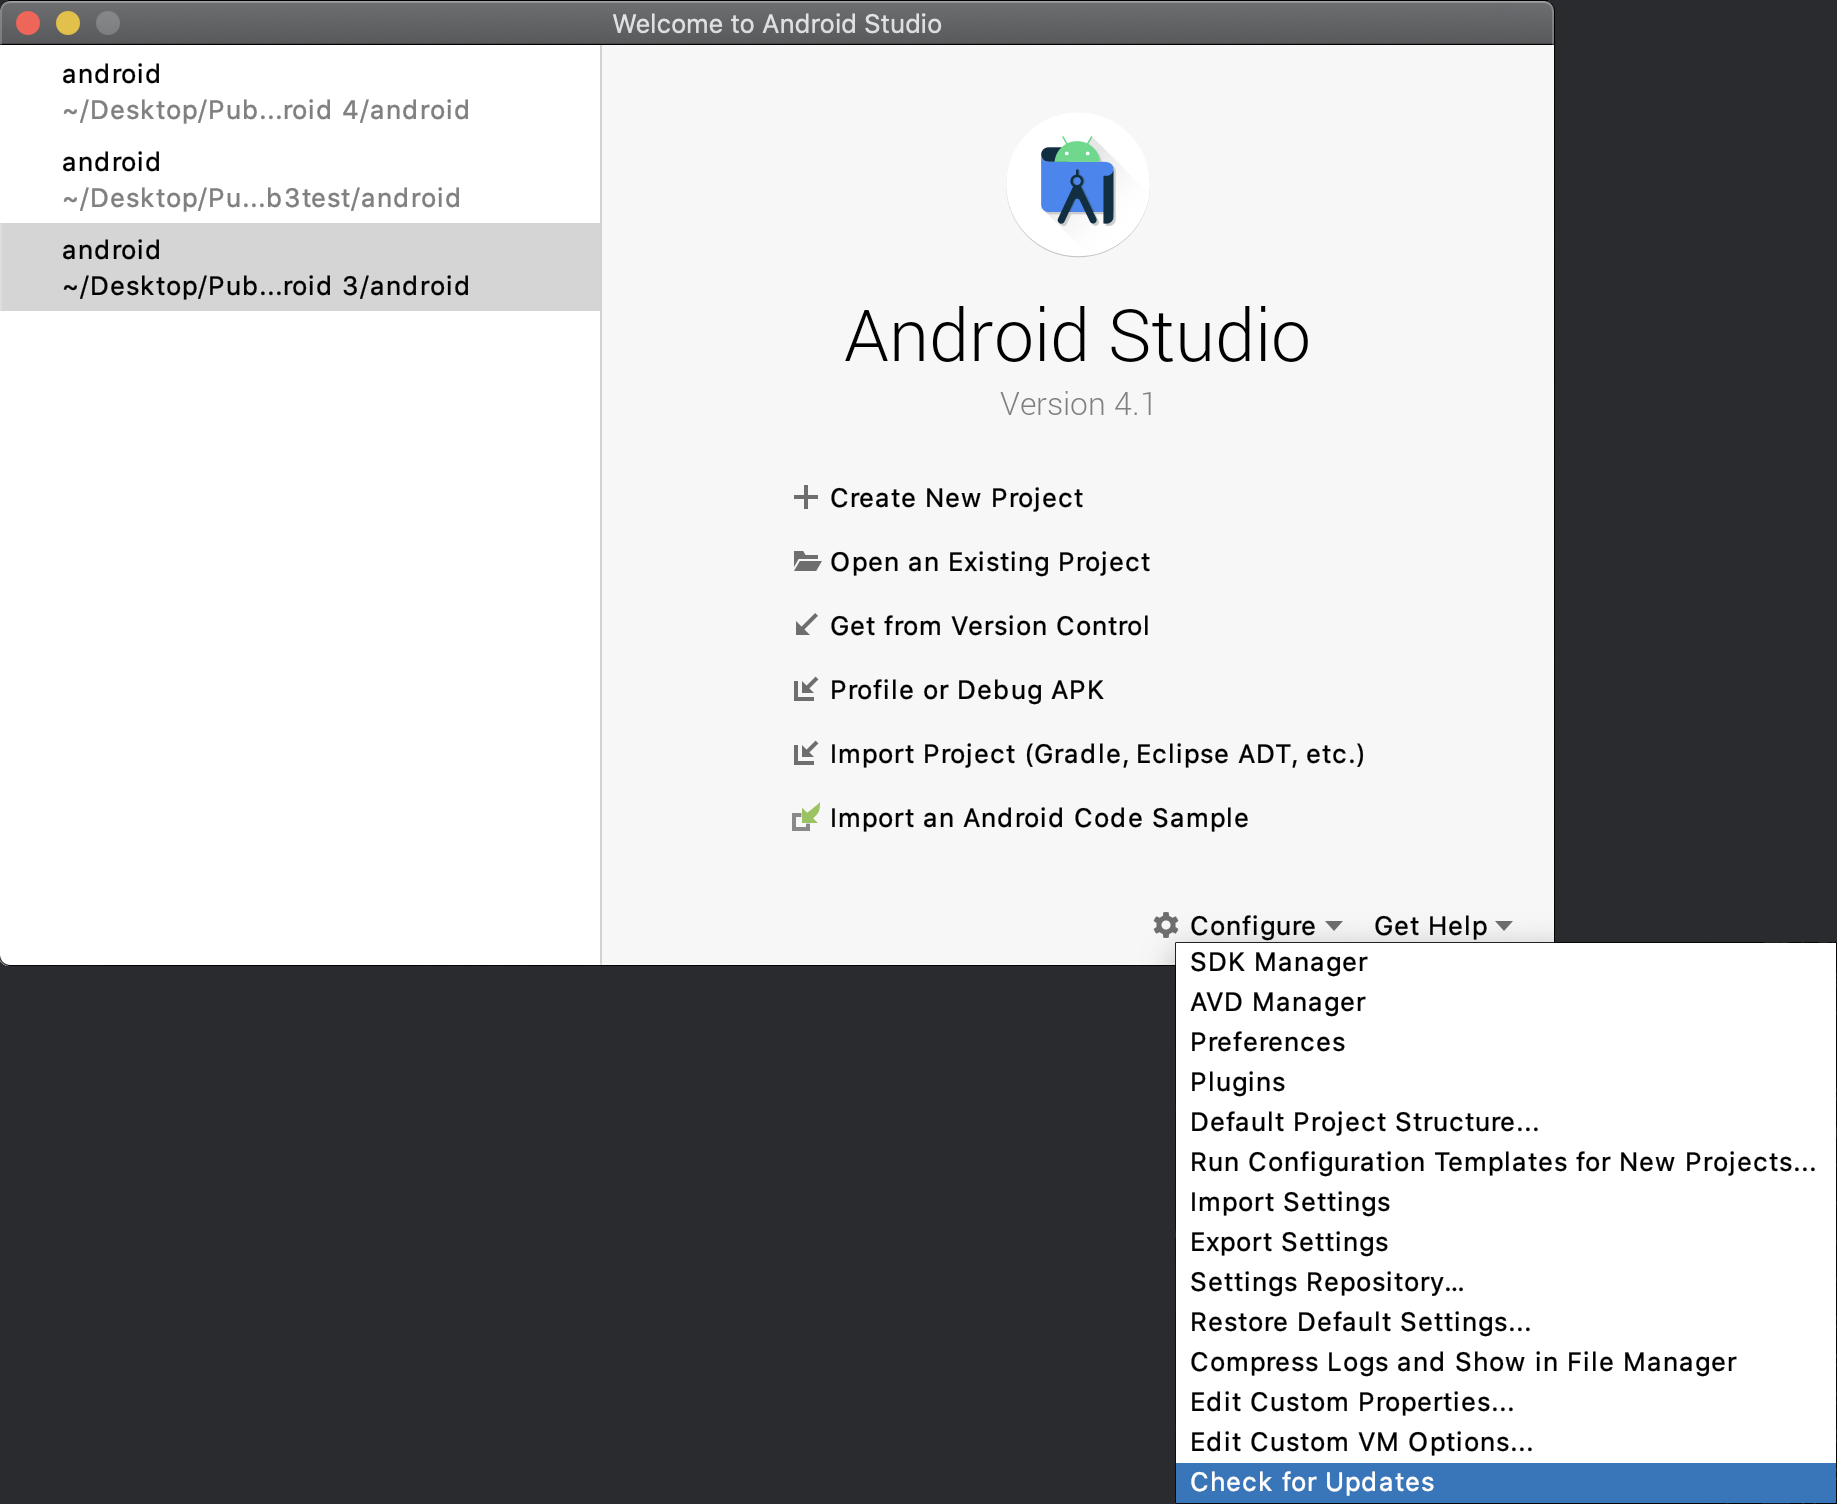
Now you are going to have to build your game using Android Studio. First, make sure you have Android Studio installed and up to date. You can update Android Studio by opening it and on the welcome screen selecting Configure then Check for Updates. This will check the internet for updates for all Android Studio components. You can then select Update All and Restart to update.
 Android Studio – Check for updates
Next, open your exported buildbox game in Step 2 by going to the Android Studio welcome screen and selecting Open an Existing Project or going directly there on your computer. Go to where you exported the game and open the folder, open the android folder, then select the build.gradle file. This will open your project in Android Studio for you to edit settings and generate a signed Android App Bundle file for you to upload to the Google Play Store.
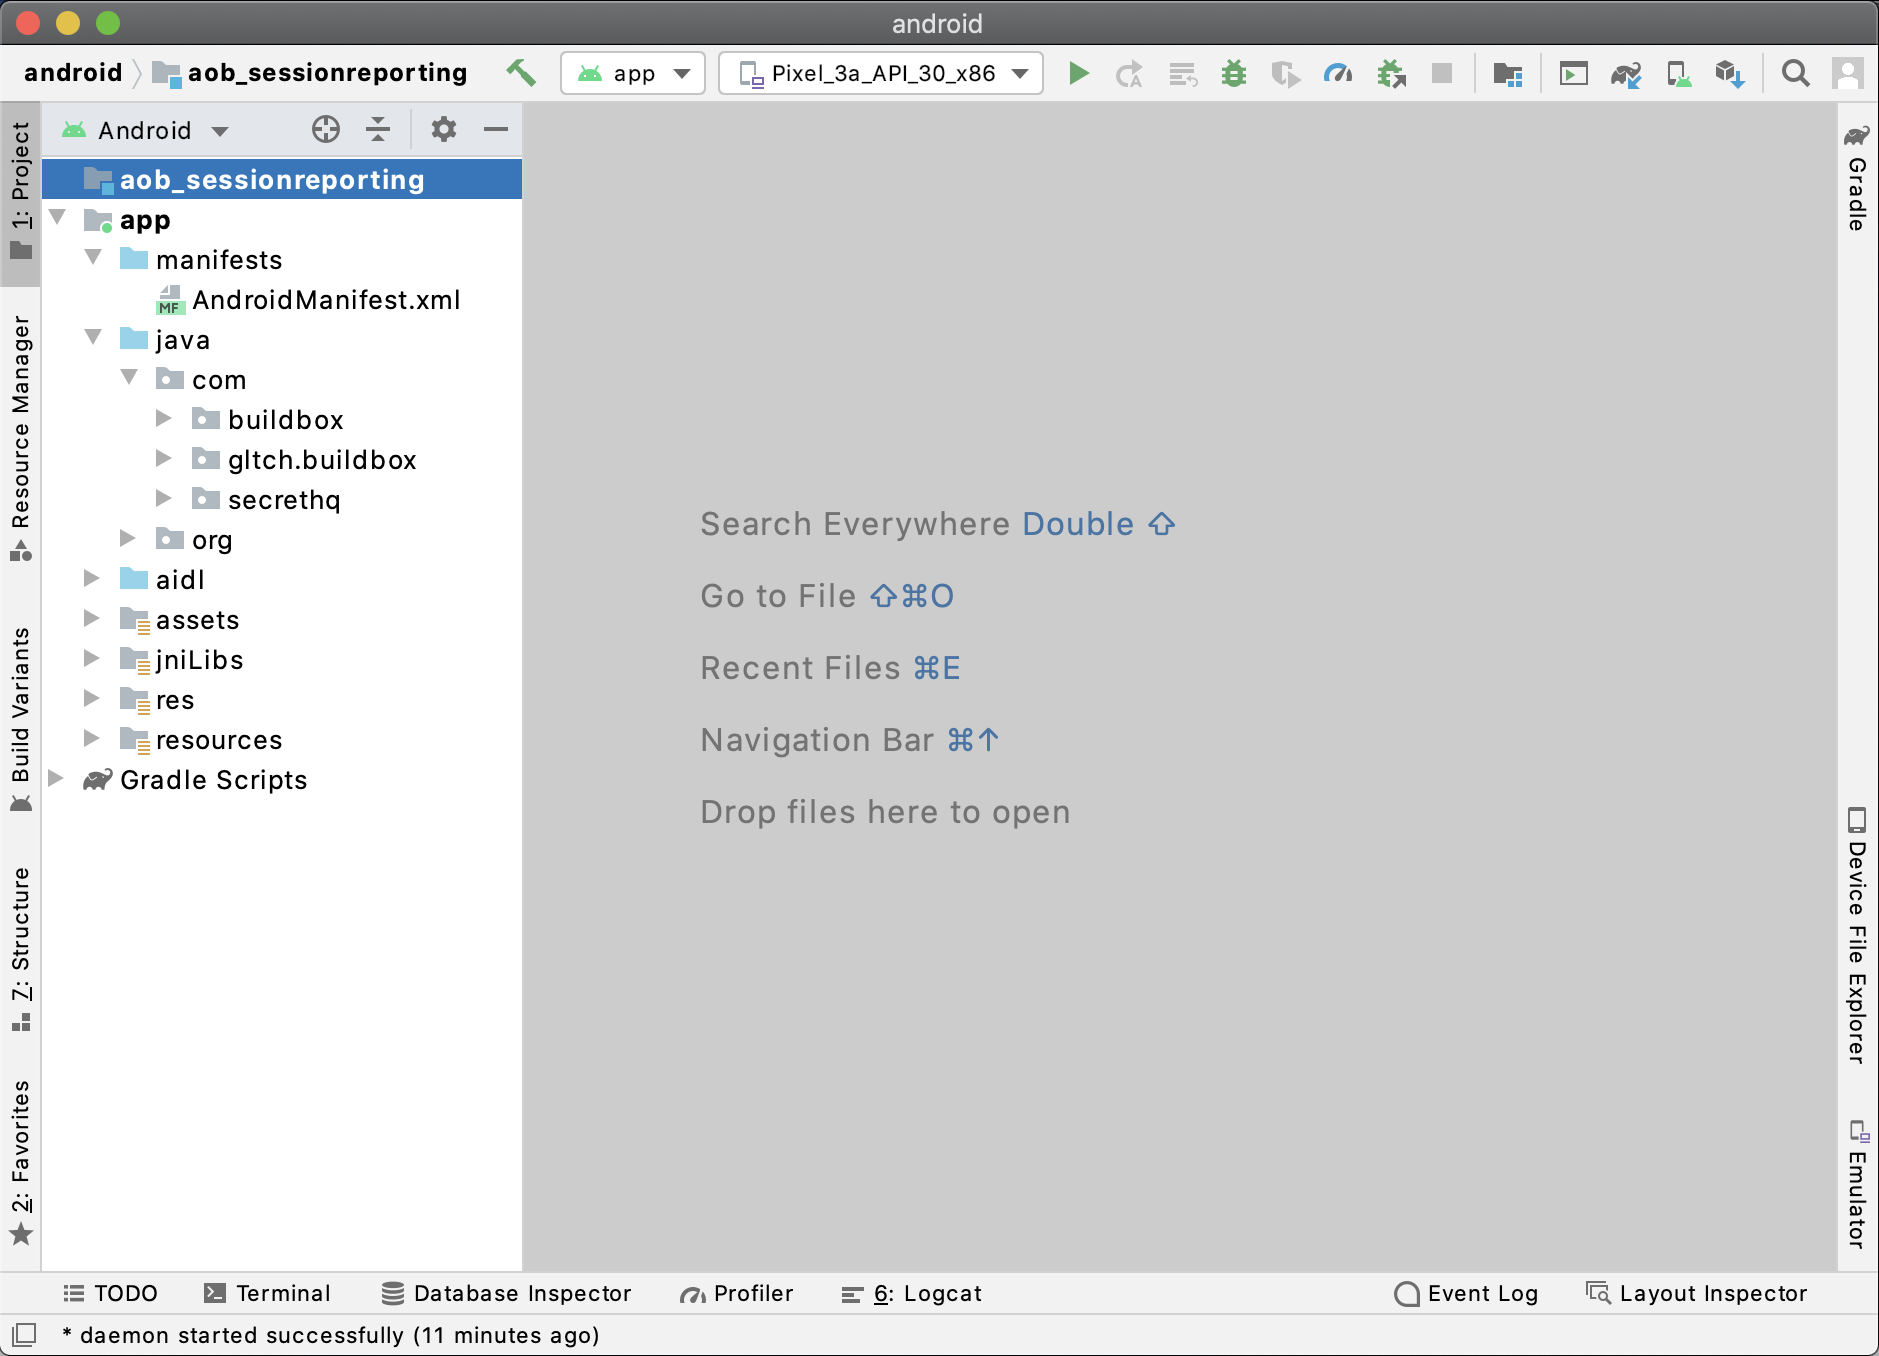
Android Studio is where you will set up your game to prepare it for the Google Play Store. You can adjust settings, fix errors, test on a device, and generate your signed app bundle. There should not be any settings that you have to change before building.
 Android Studio – Project
If you want to test your game on an Android Device before uploading to the Google Play Store, you can do that here. If you do not wish to test on an Android Device, you may skip ahead to the next step. First, you will need an Android Device with Developer Options and USB Debugging turned on plugged into your computer. The exact directions for how to activate these settings on your Android Device may differ depending on your exact model, so if you are having trouble you may have to look it up elsewhere.
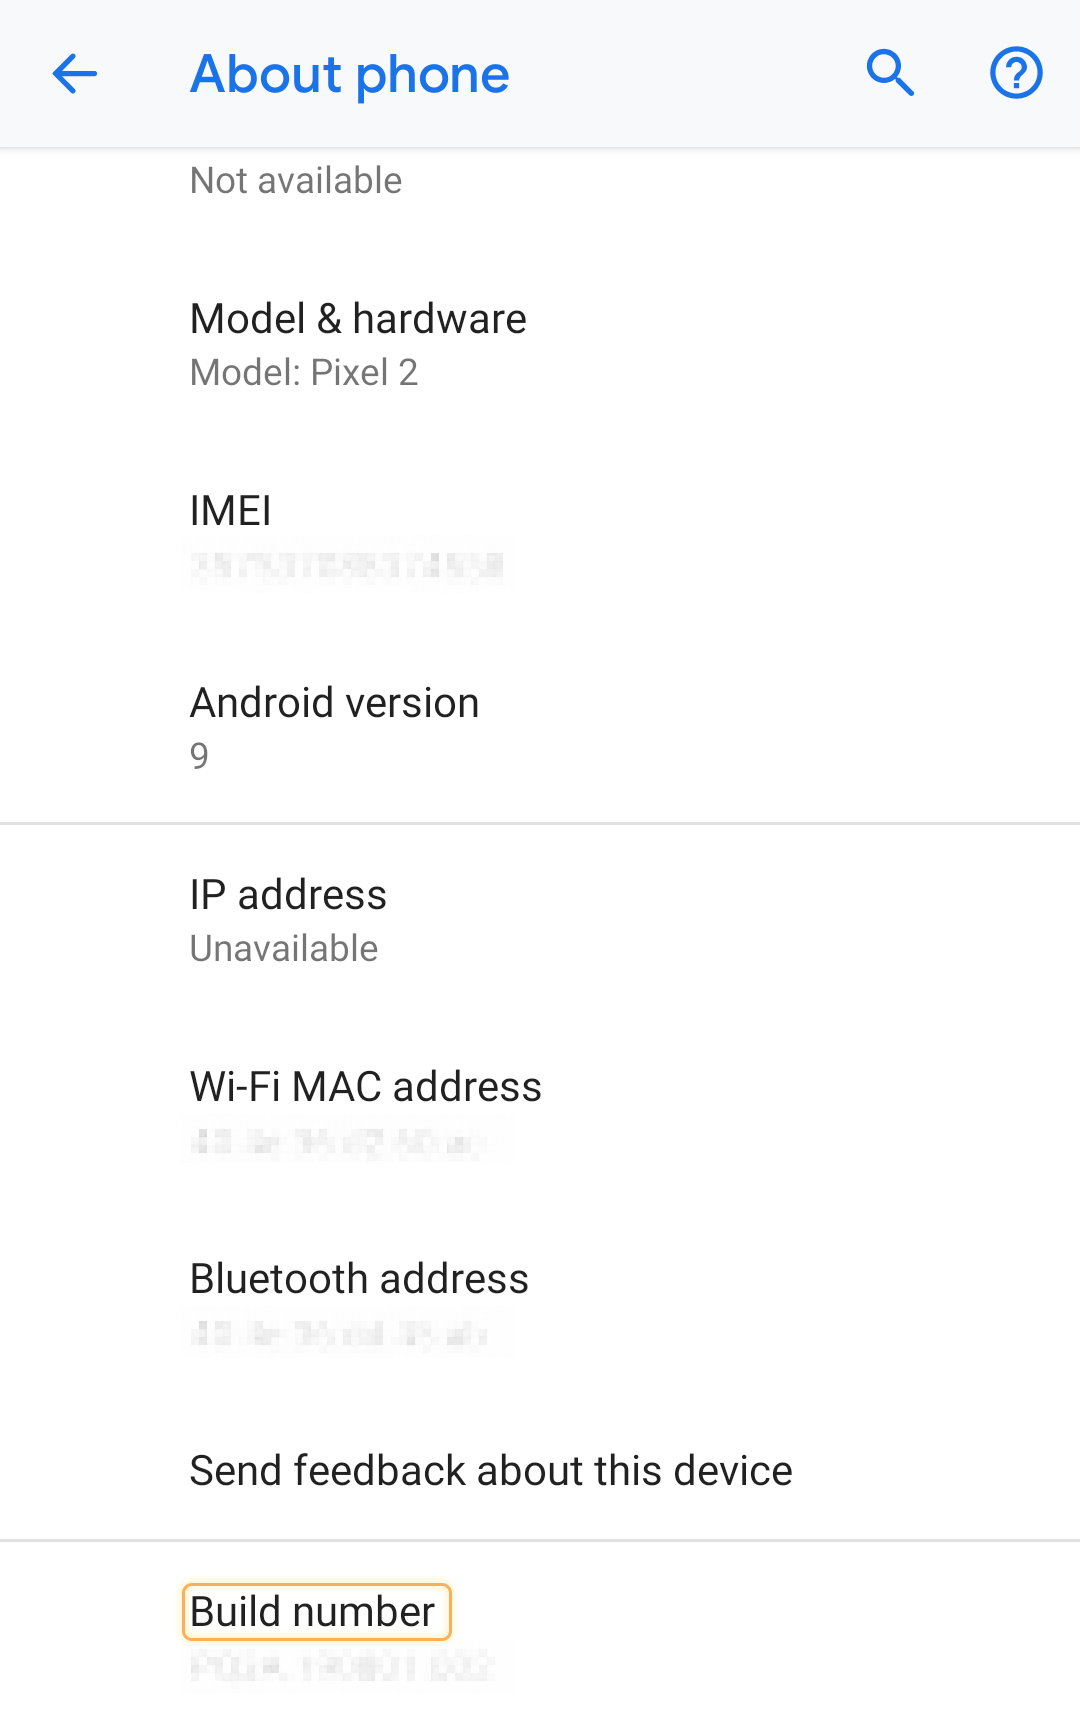
Developer Options is a hidden setting that you can activate to give your Android Phone access to special settings that Android Developers require to test their apps. To turn Developer Options on, go to your Android phone’s Settings Menu and find the Build number (which should be under About phone). Tap Build number seven times, which should activate Developer Options. You should now have access to Developer Options as an entry in the Settings Menu.
 Android Settings Menu – Build number
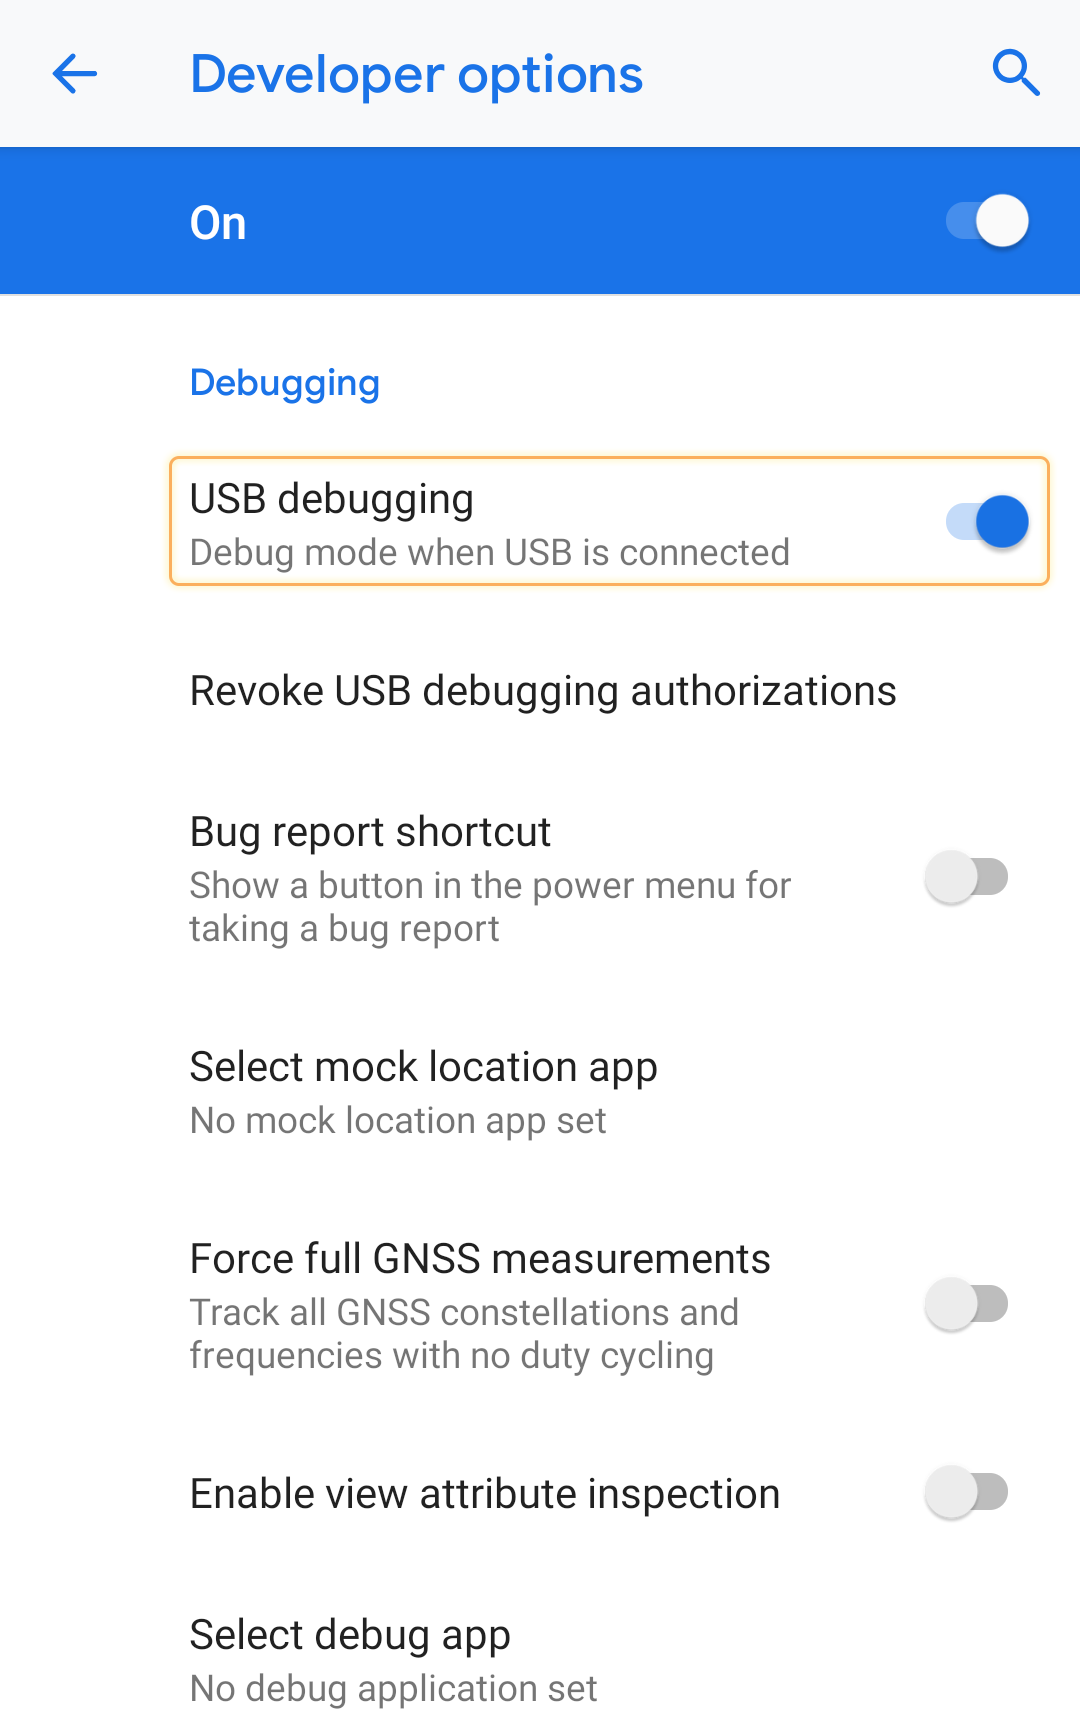
USB Debugging gives your Android Phone added privileges when connected to your computer through a USB, which will allow you to test your game on your Android Device through Android Studio. This setting can be found in the Developer Options Settings Menu.
 Android Settings Menu – USB Debugging
Finally, to test your game on your Android Phone, plug your phone into your computer through a USB and run the Android Studio project through Android Studio. To run through Android Studio, at the top select the devices dropdown and select your plugged in Android Phone, which should show up at the top, then select the run button, which should run your game through the selected Android Device. It will take a moment to build, you may have to fix some errors, and you will have to make sure the Android phone is not asleep. When the build is done your game should open on the Android phone. This will be your last chance to test your game on a device before it is on the Google Play Store.
 Android Studio – Testing
Step 4: Generate your Signed Android App Bundle
Now it is time to generate your Signed Android App Bundle. This App Bundle is what will be uploaded to the Google Play Store and what your players will download and play. You want to generate a signed bundle vs. an unsigned bundle because Google requires that all apps uploaded to the Google Play Store are digitally signed with a certificate. The digitally signed certificate is used to identify that you are the author of the app.
To generate your signed Android App Bundle go to the Menu Bar > Build > Generate Signed Bundle / APK… If the choice is greyed out, that means you have an error that needs fixing before you can continue.
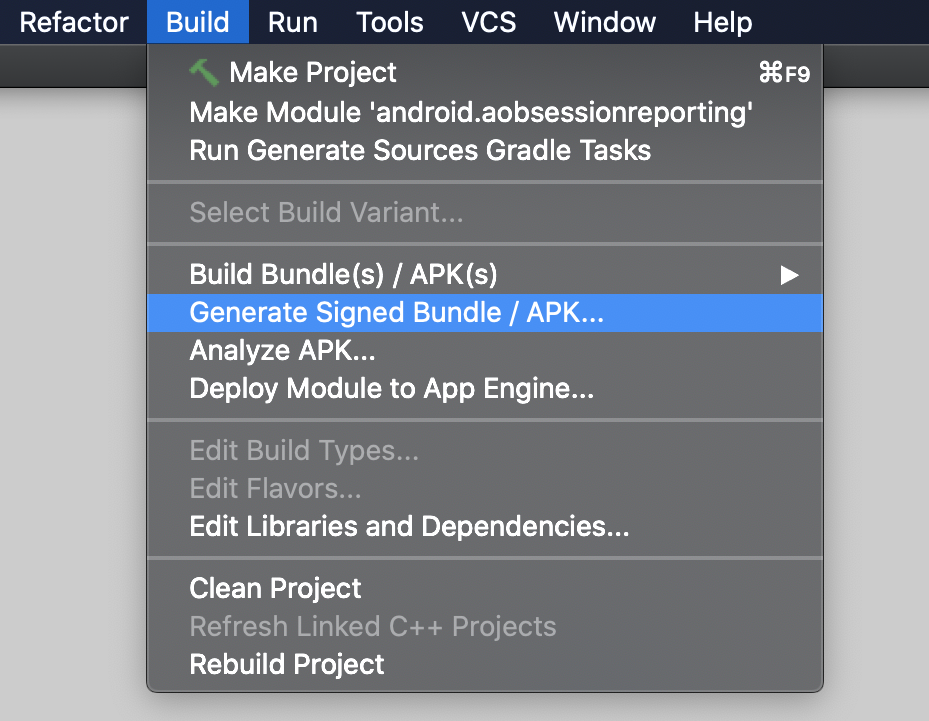 Android Studio – Generate Signed Bundle / APK…
Selecting Generate Signed Bundle / APK… will open a popup. Select Android App Bundle and click Next. An Android App Bundle is for uploading to the Google Play Store, where an APK only allows you to deploy to your phone.
On the next popup, for Key store path, select Create new… (unless you have already created one, then you may select Choose existing…)
 Android Studio – Generate Signed Bundle or APK
This opens a new popup to create a key store. A key store is an encrypted container for your keys which are used for signing your game. Here, you are creating a new Key store and saving it onto your computer, which you will be referencing on the previous popup once you are finished here. In this new popup, choose the location to save the key store and create a password to access the keystore (remember this for later). Next, create an Alias for the key, a password to access the key (remember this for later), and how long the key is valid for. Next, fill in the Certificate info with your name and organization info. Finally, select OK to create the keystore.
Android Studio – New Key Store
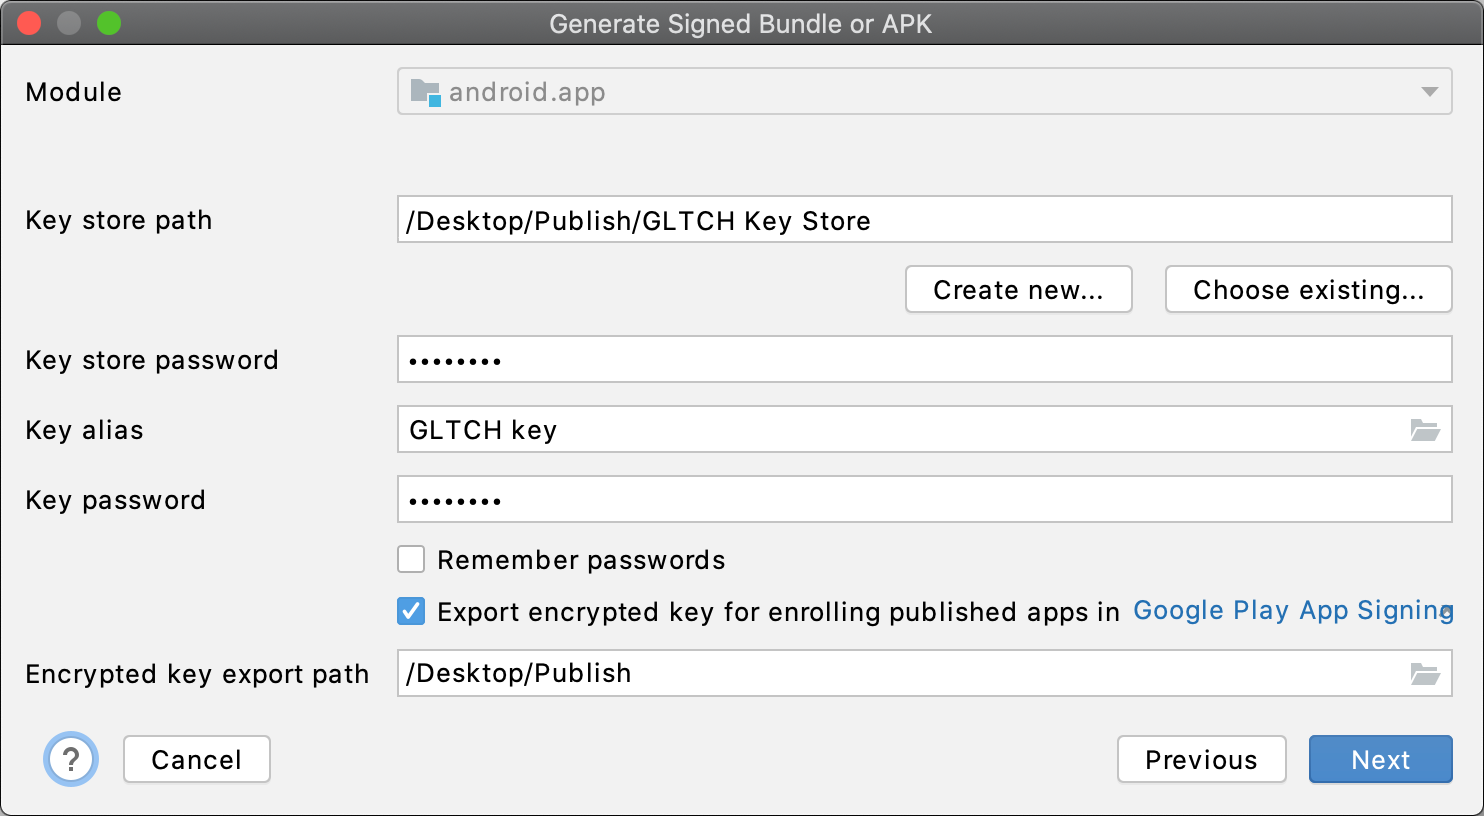
Back on the previous popup, the Key store path should be filled out with the Key store you just created. Next, fill in your Key store password, Key alias, and Key password you created while creating the new key store. Next, check the box for Exported encrypted key for publishing app in Google Play App Signing and select a location for your Encrypted key export path. Finally, select Next.
In the next popup, select the Destination Folder (remember this for later) for your Signed App Bundle and select release for your Build Variants. Then select Finish to generate your Signed App Bundle. This will generate a folder called release with a file called app-release.aab which you will upload to the Google Play Console later.
Step 5: Create App on Google Play Console
Now it is time to create your App Listing on the Google Play Console. To do so, go to the Google Play Console and click Create App on top right.
 Google Play Console – Create app button
You are now on the Create App page where you will fill out your App details and check the Declaration. Note that if you choose Free, once your game is published you can not change it to paid. When finished, click Create app.
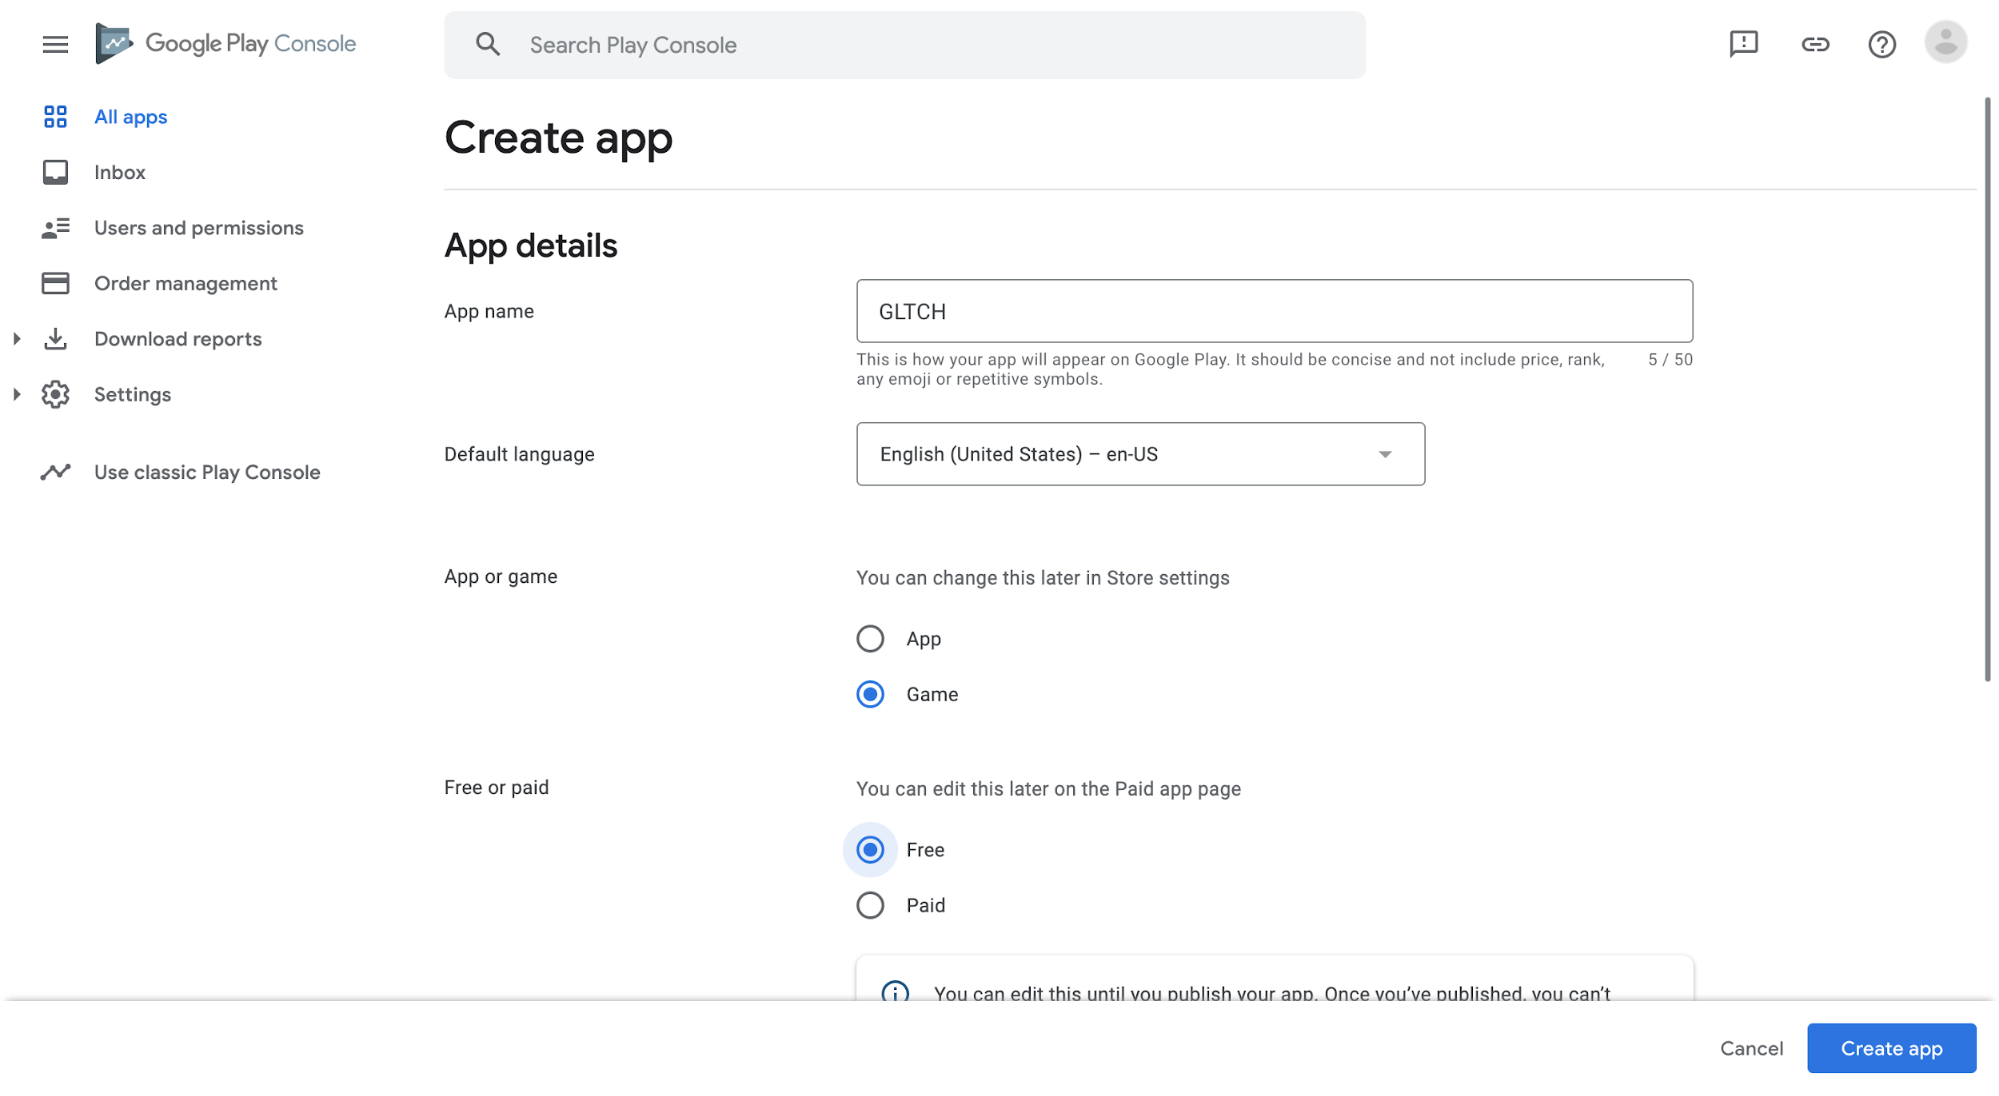 Google Play Console – Create app
Step 6: Initial Setup
You have just created your App Listing but your game is not on the Play Store yet, you will still have to add more information and upload the Build for your game before releasing. You can go to various pages to edit and review various aspects of your app release with the left bar, however the dashboard takes you through all the steps needed to release your game on the Google Play Store. Be sure to Save all changes before leaving any page.
 Google Play Console – Dashboard
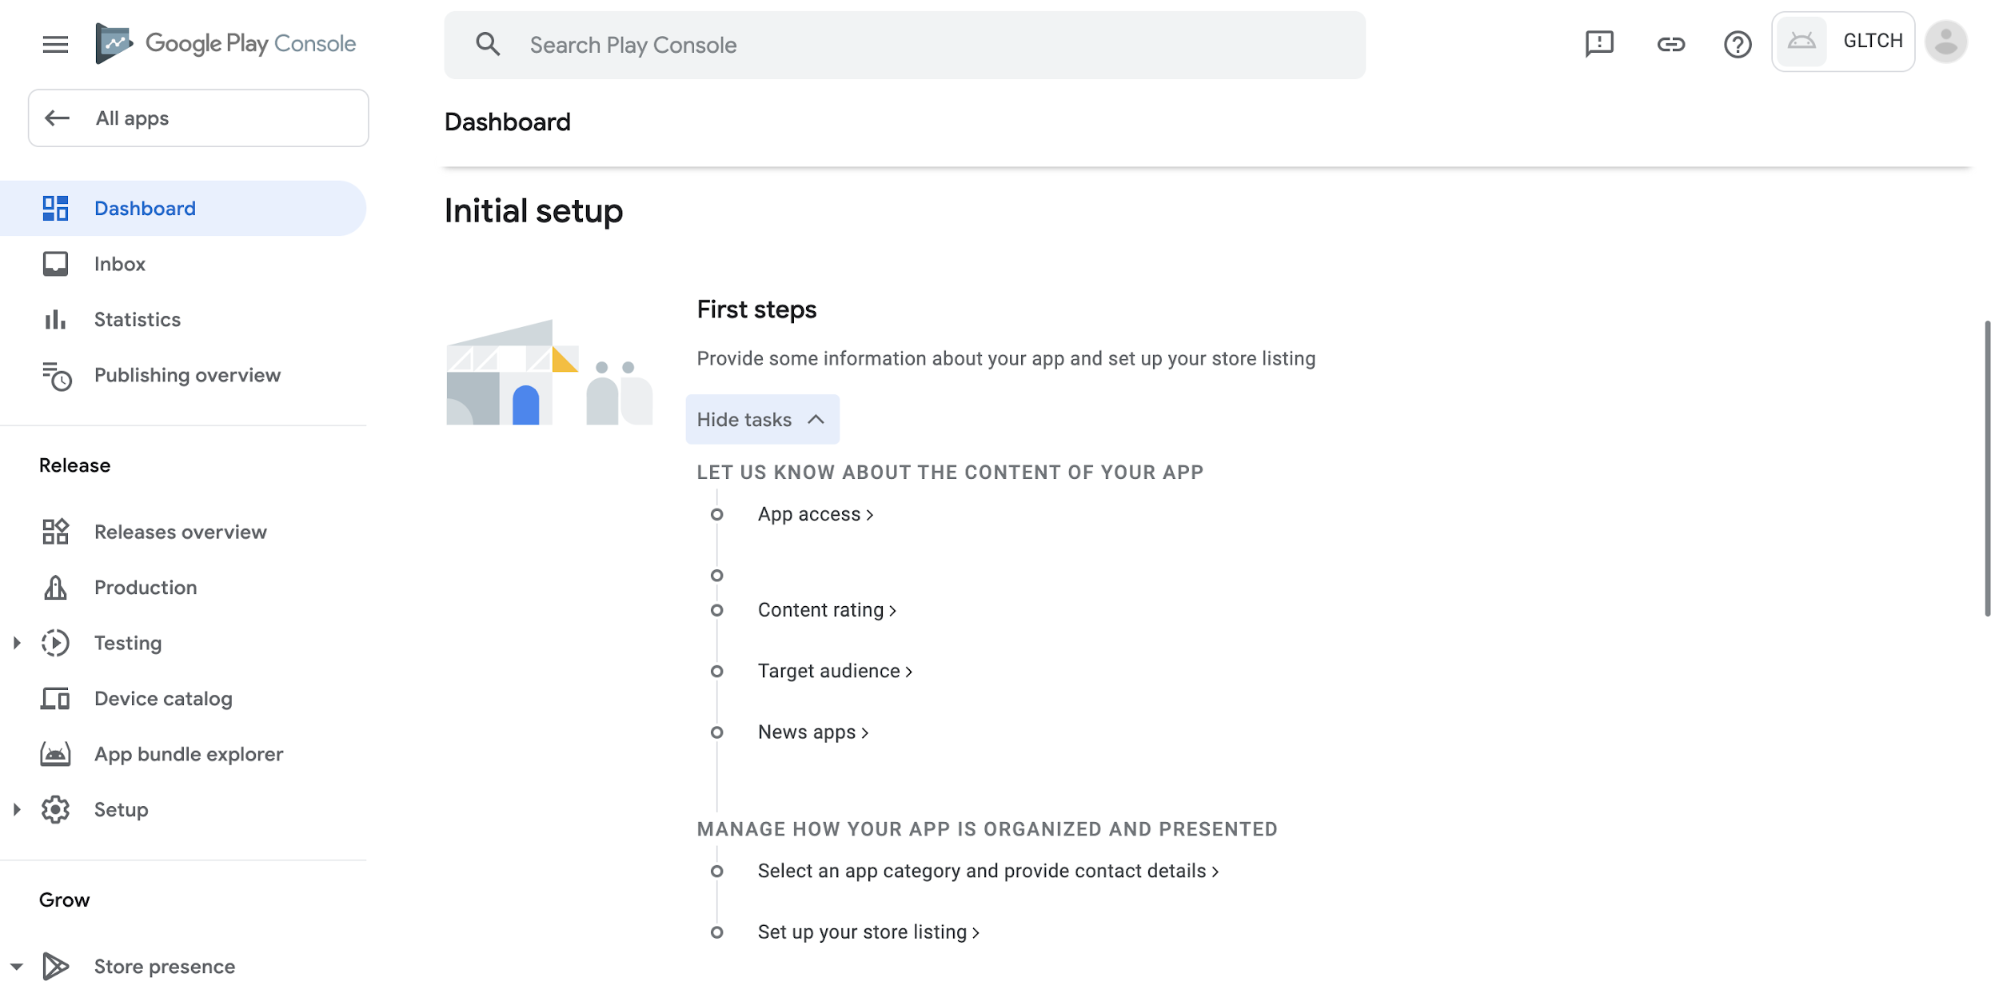
You must start on Initial Setup by selecting View Tasks.
- Select App Access and select whether your game requires any special access like a login to access anything. Buildbox does not natively support logins, so the answer is probably no, unless you added this feature manually.
- Select Content rating and fill out the questionnaire to decide the age rating for your app.
- Select Target audience and Go to Ads and select whether your game contains ads then fill out the Target audience questionnaire.
- Select Select an app category and provide contact details and fill out all required fields. Select Set up your store listing and fill out the text fields and upload images for showing off your game on the Play Store. For the images, you will require screenshots of you game of various resolutions for the various devices.
 Google Play Console – Initial setup
Once Initial Setup is complete you can move on to any step. You can test your game with various sized test groups and pre-register your app or skip straight to publishing your app to the Play Store. We recommend that you perform these tests before publishing. To do so, simply follow the steps on your App Listing Dashboard. This is a great way to build an audience and improve various aspects of your game before a full release. However, this tutorial will not cover these steps, so if you want to run these tests, do so now before continuing on. However, if you simply want to release your app now, continue the tutorial.
 Google Play Console – Release your app
Step 7: Publish your App
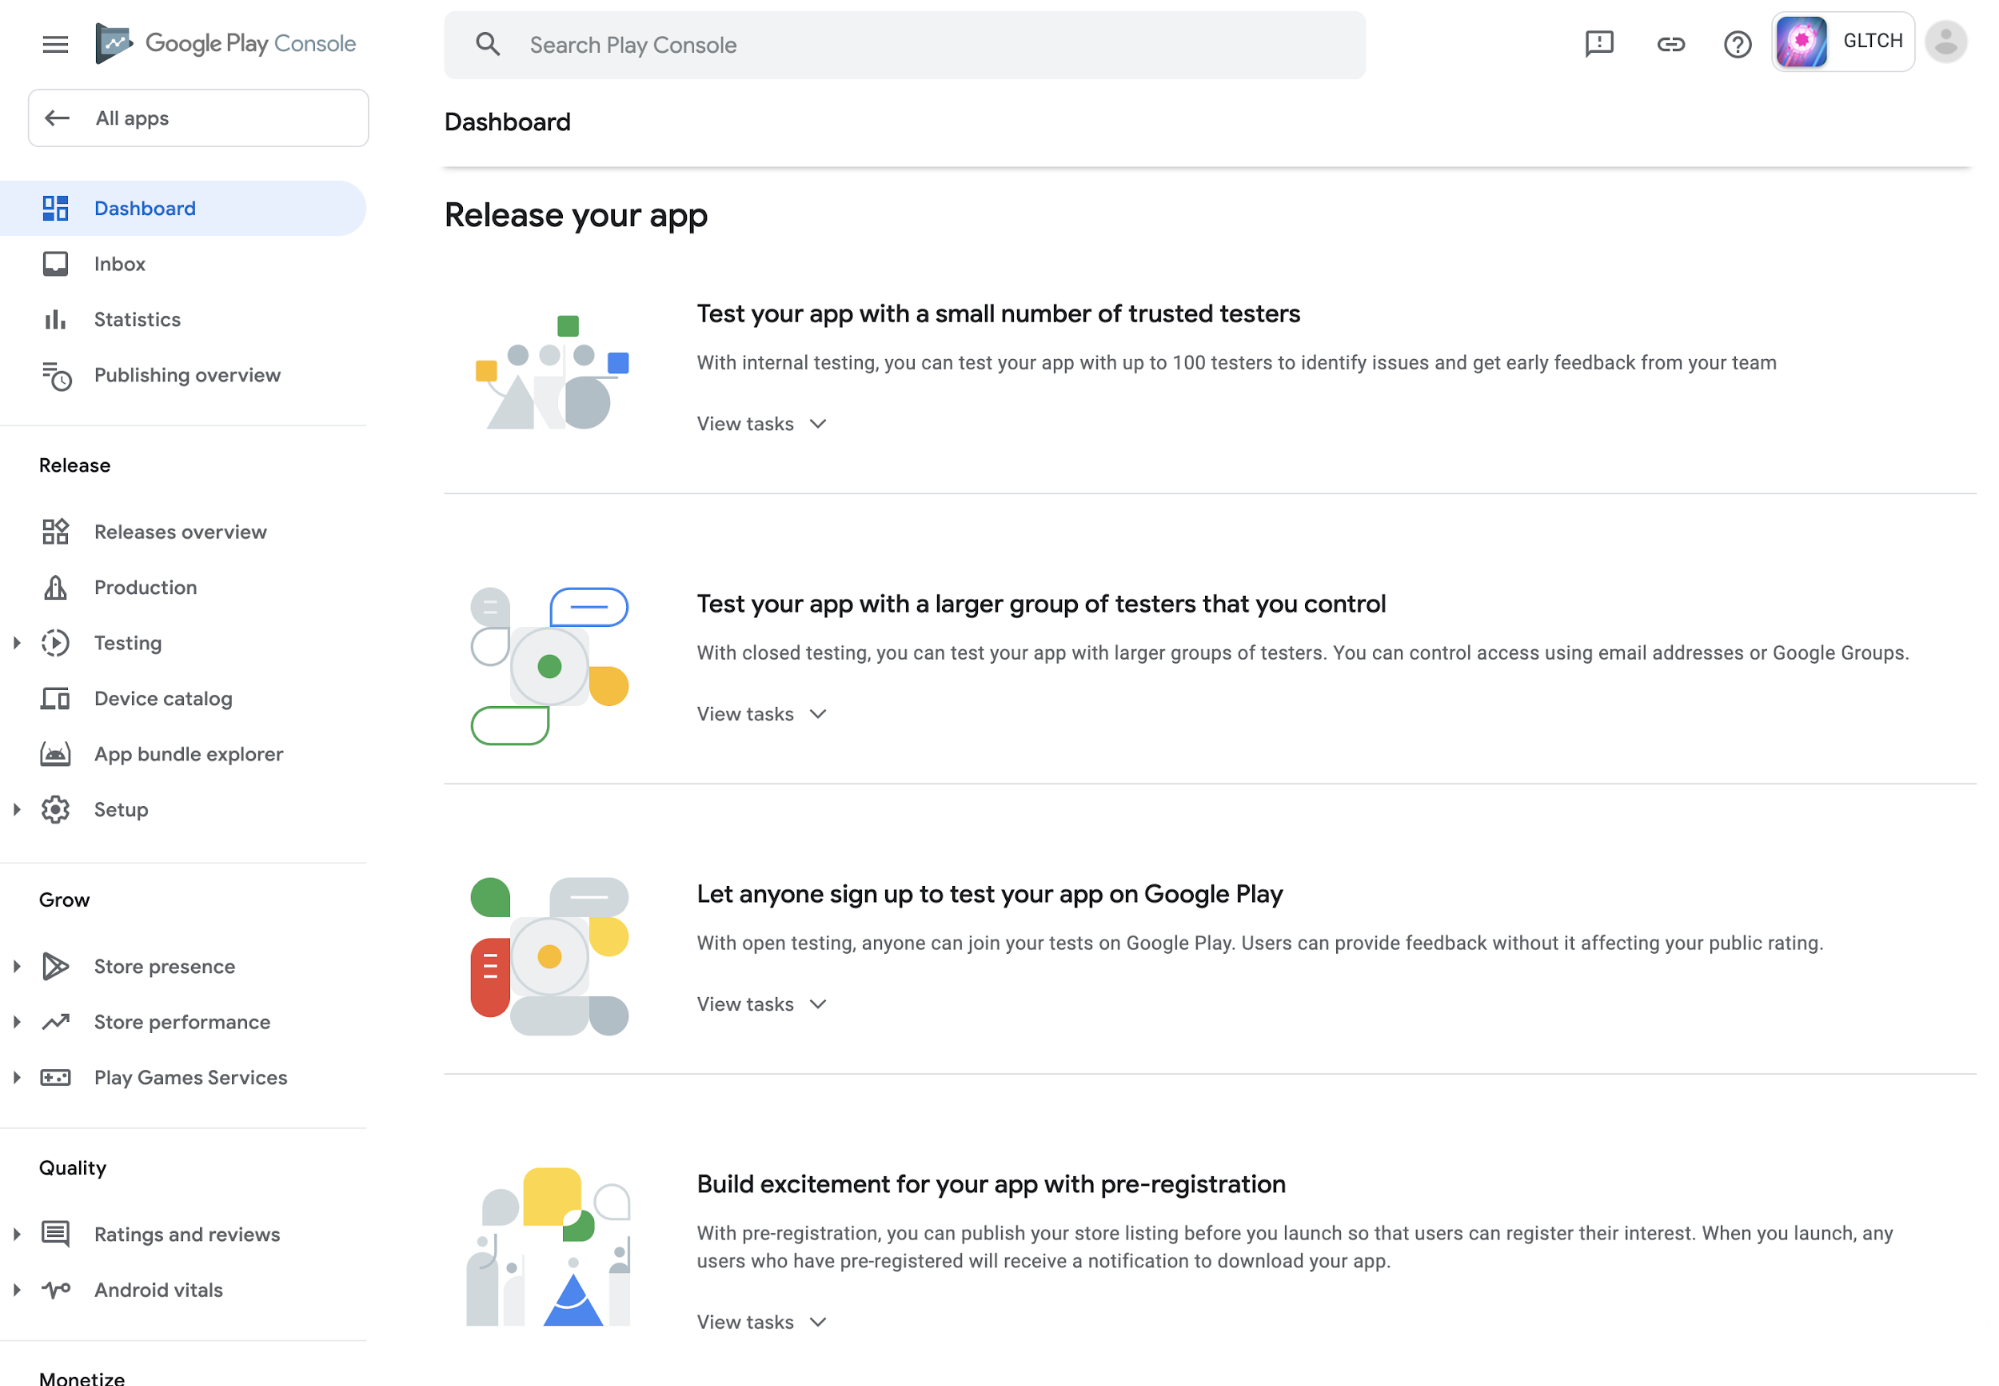
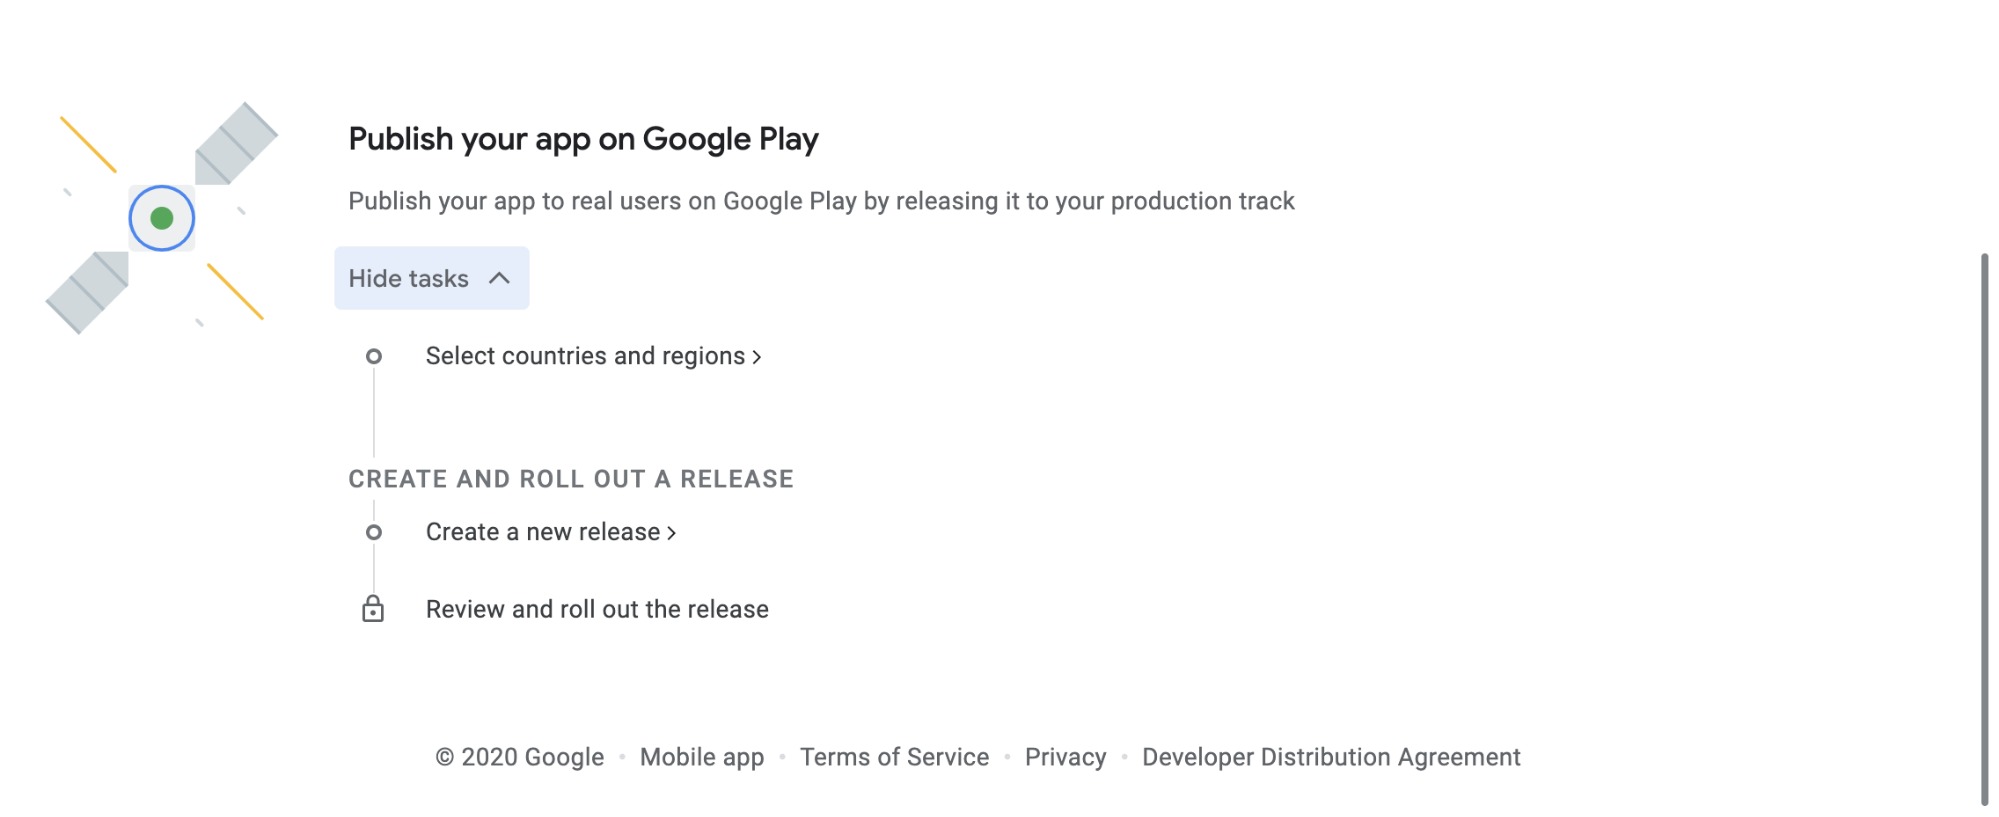
Now that you have updated all the initial information for your game and have completed all the pre launch tests you want it is finally time to publish your game to the Play Store. To do so, go to your App Listing Dashboard on the Google Play Console and scroll all the way to the bottom to the Publish your app on Google Play section. Select View tasks to see everything your need to do.
 Google Play Console – Publish your app on Google Play
First, click Select countries and regions and select Add countries/regions. From here you can select exactly which countries and regions your game will appear on the Play Store in. Exactly which you choose is up to you.
Next, select Create a new release then Create new release. This takes you to the Create production release page. Under App Bundles and APKs, add your generated Signed App Bundle from Step 4, either by selecting Upload or dragging it from your computer. This Signed App Bundle should be a file called app-release.aab in a folder called release. The default location for this is in the exported Buildbox folder from step 2, inside the app folder. If you have already uploaded the Signed App Bundle, then you can add it with the Add from library button.
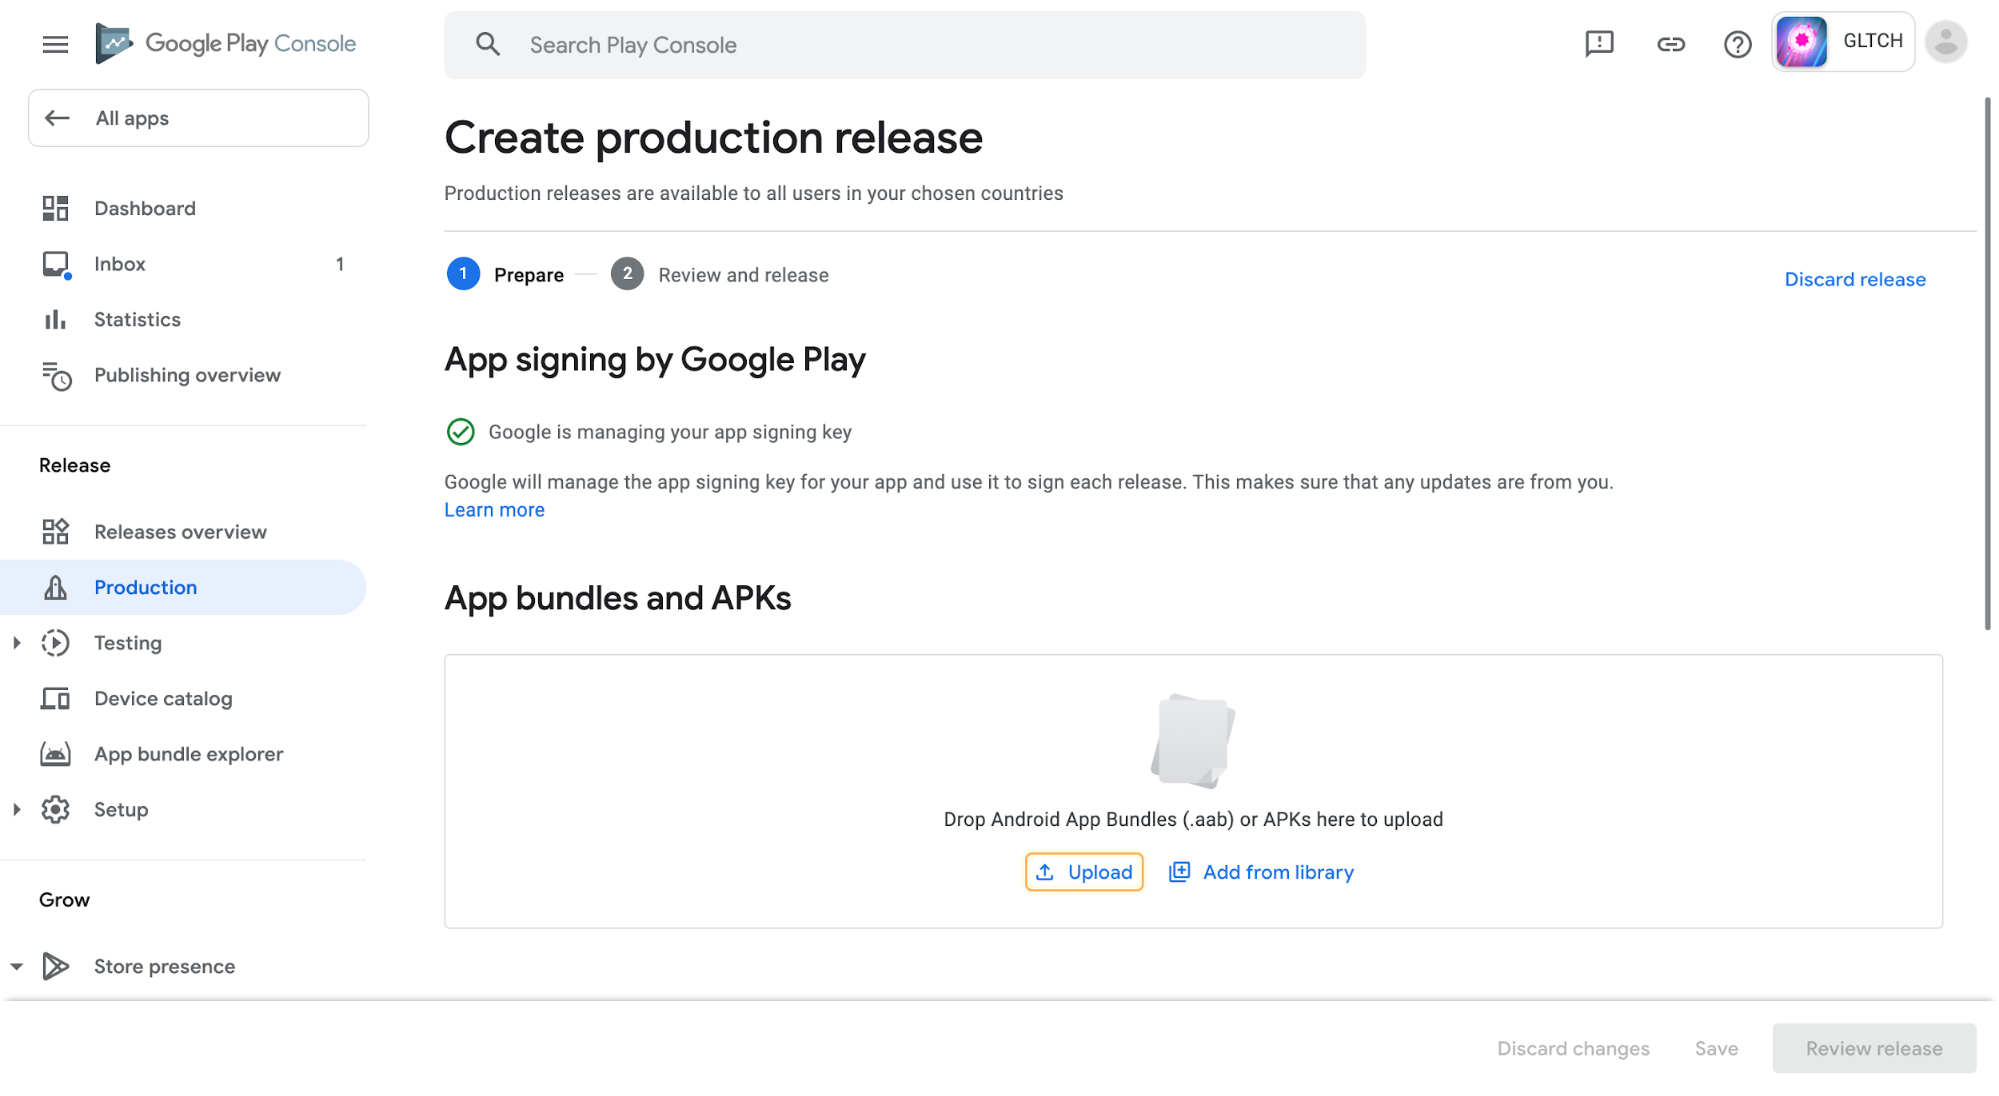 Google Play Console – App bundles and APKs
Once the Signed App Bundle is uploaded, review and edit the release details and select Save then Review Release.
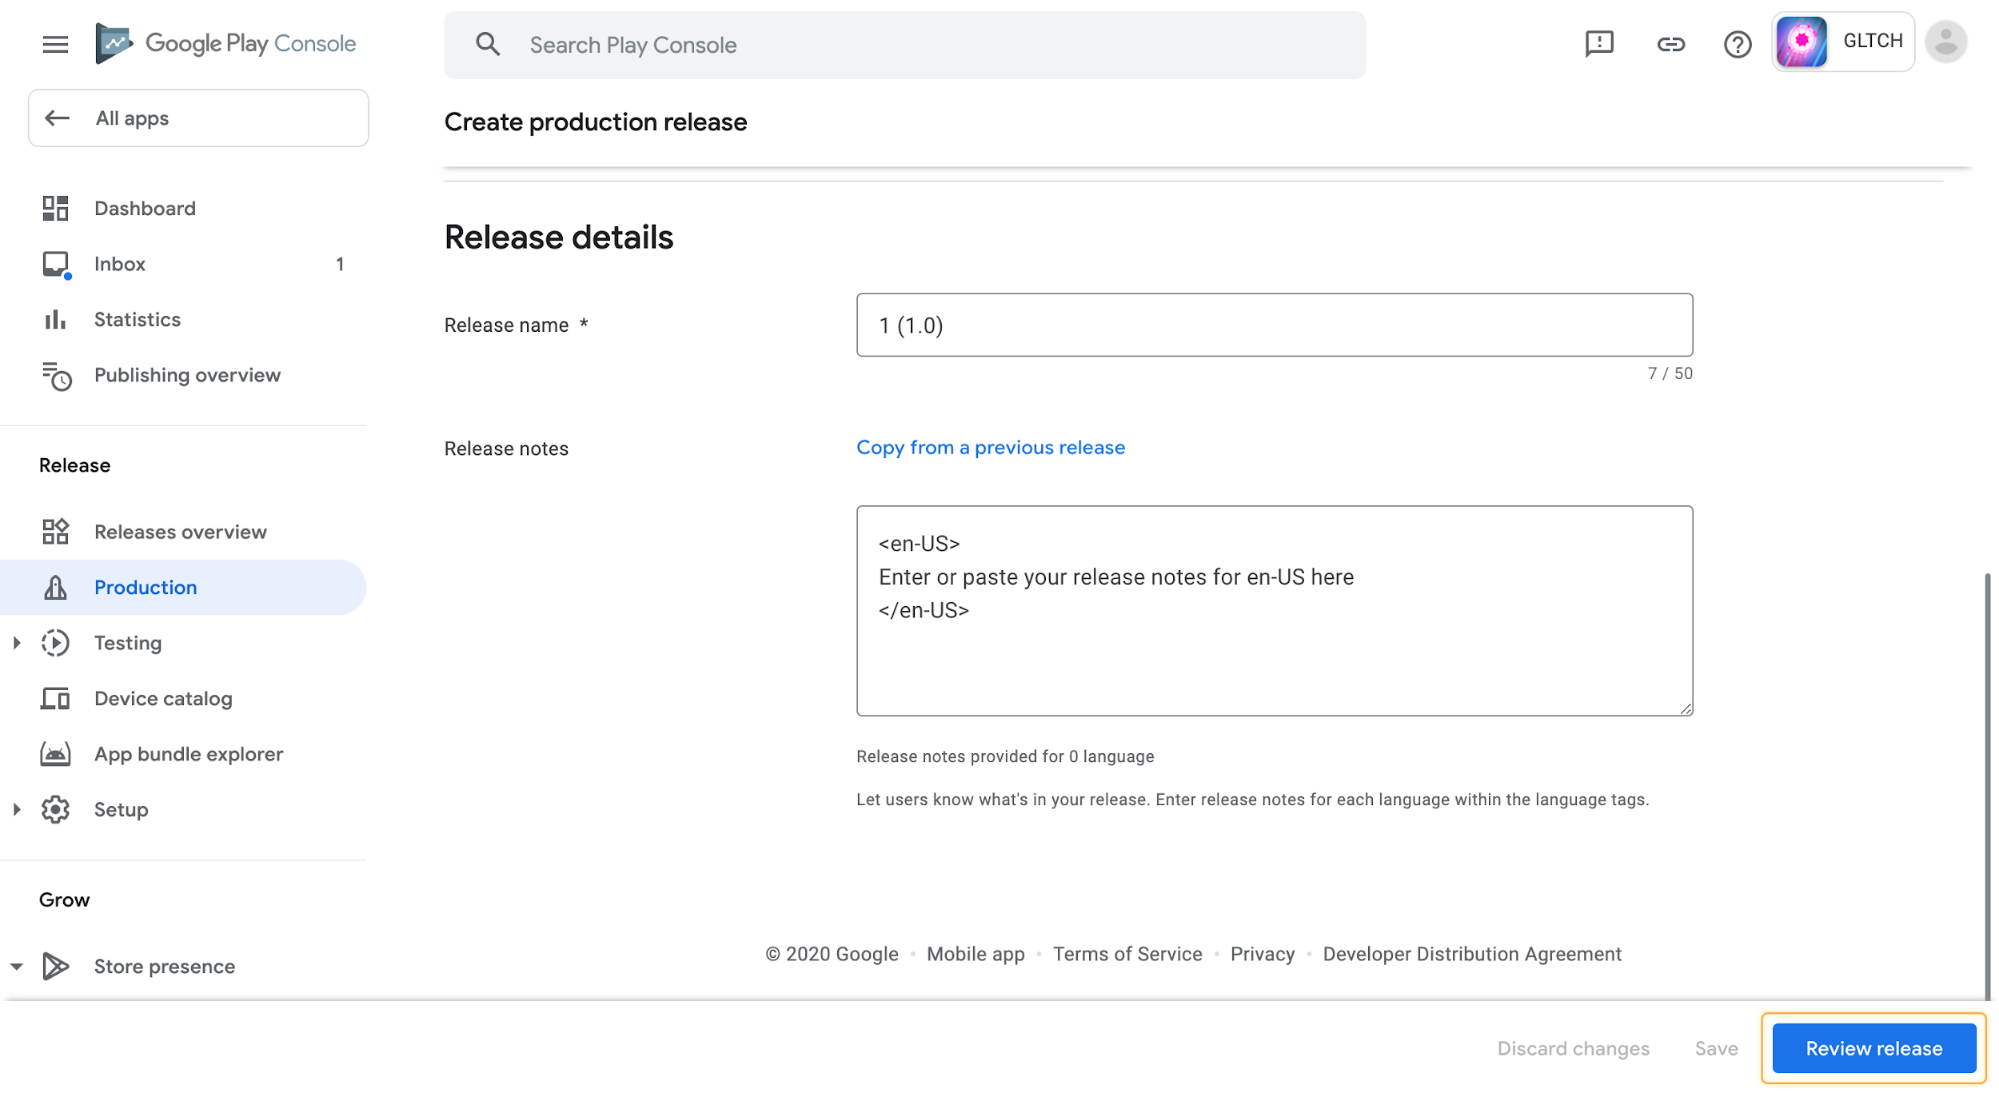 Google Play Console – Release details
On the next page, review the release to make sure everything is perfect, fix any errors (red errors must be fixed before release and yellow errors may be ignored, though it is not recommended), and add Release notes if you want. This is the last chance you will have to make any changes before your game goes live. Once you are ready, select Start rollout to Production. In the next popup, select Rollout.
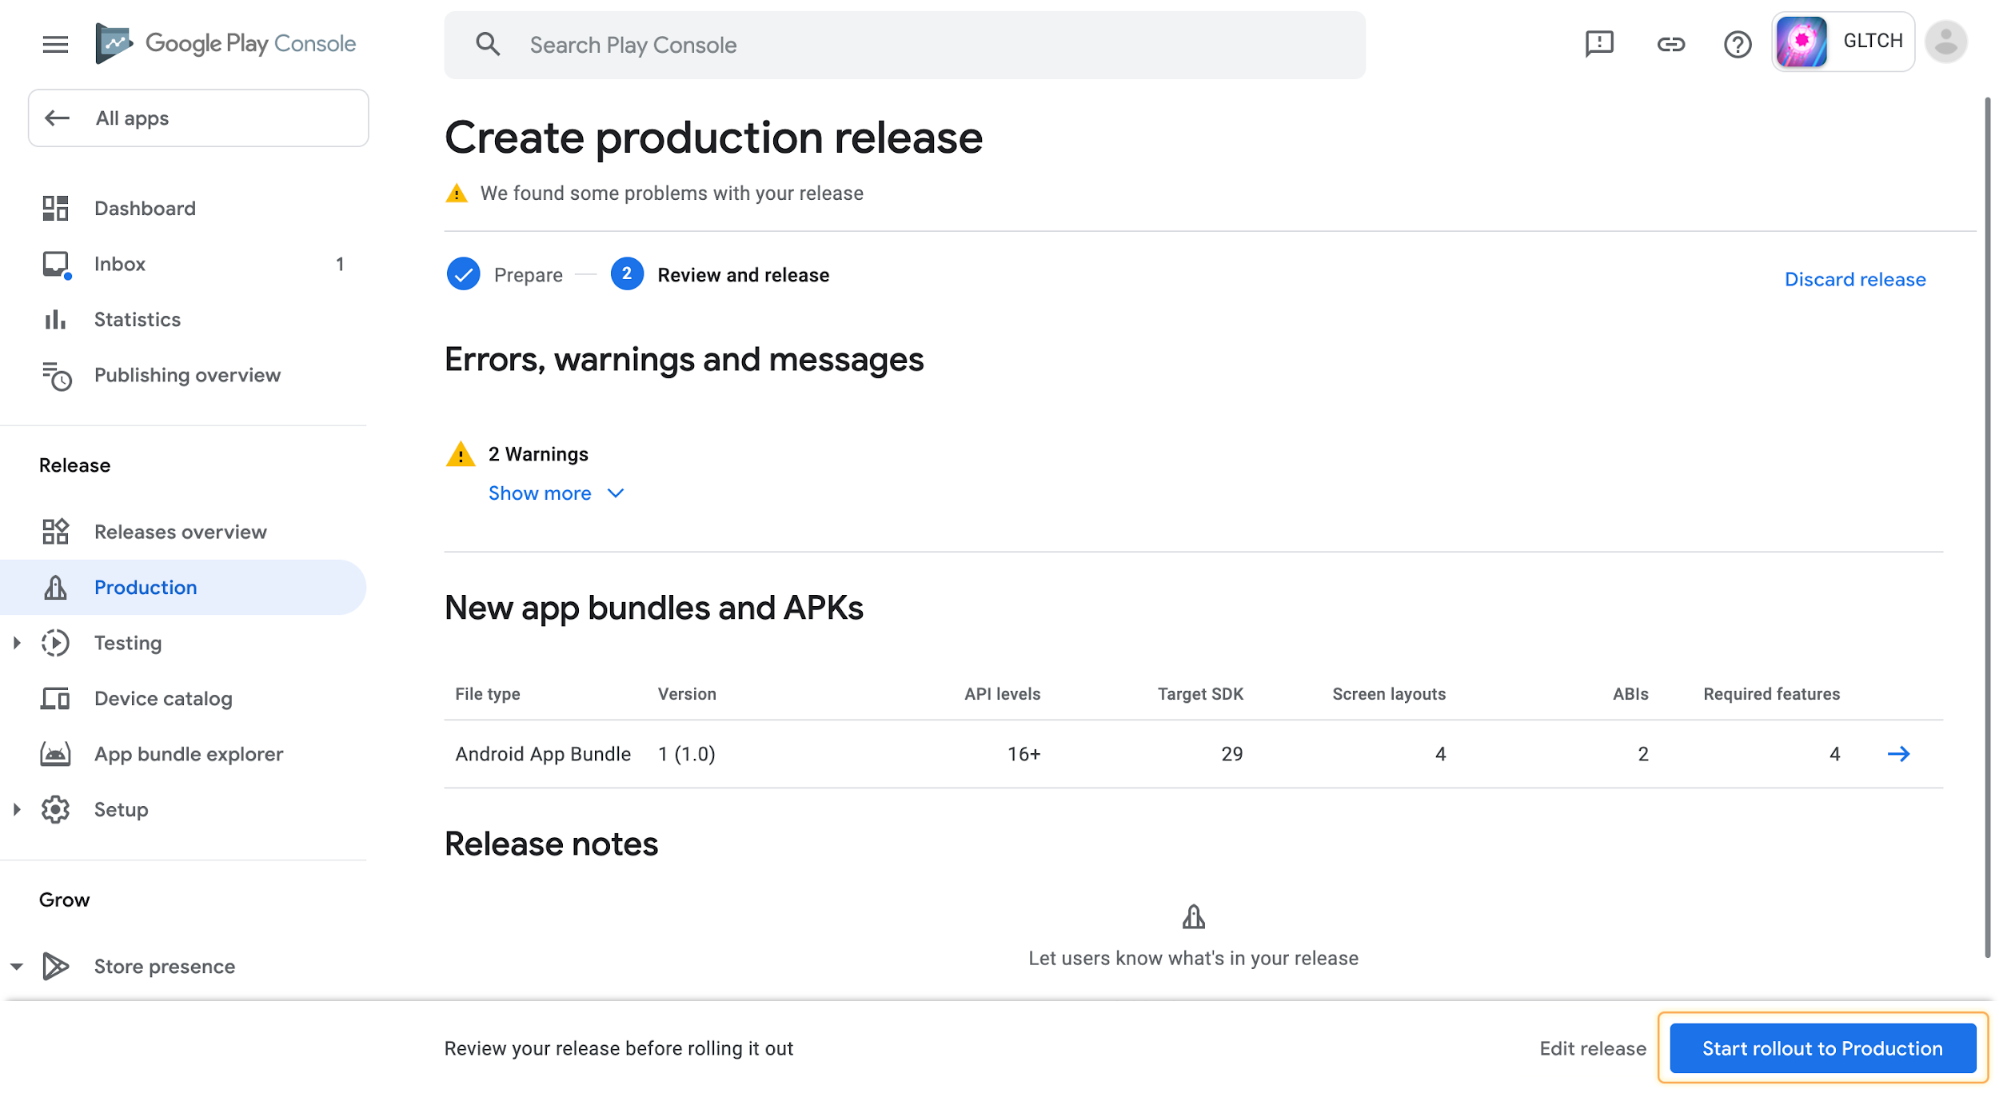 Google Play Console – Start rollout to production
Wait for the rollout to go through, this may take a moment, but when it is finished the status for the release will change to “Being reviewed”. Your dashboard will be changed to showing various analytics and statistics for your game.
This review process can take anywhere from a day to a week or longer. Google may reject your submission with feedback on what needs to be changed, but you can always release again. Once your submission is accepted, your app will be released to the Google Play Store. At that point, congratulations! You officially have your very own game on the Google Play Store.


