Our goal is to help you create a game that could potentially be featured by Apple or reach the top the charts. To accomplish this, you have to make your game unique. There are hundreds of games released on a regular basis across every single platform. This makes originality crucial for not only visibility in the App Store but overall player engagement.
In this chapter, you’ll learn how to make a game app that’s truly unique. We’ll go beyond graphics and explore game characters and the way they interact. We will explain you how to add a new gameplay element to ‘GLTCH’ to set our game apart enough to make it memorable and fun.
You’ll learn how to add a barrier obstacle into your gameplay and a new way to add a fun twist to the element. We’ll also show you how to easily create a ‘taking damage’ animation in Buildbox.
We already made the game unique with the amazing graphics. But it doesn’t end there. We need to offer a gameplay element that sets our game apart, and makes it memorable and fun.
In the previous chapters we used the creator to get us started on this journey, but we want to offer more than just a good starting point.
Adding Gameplay Elements
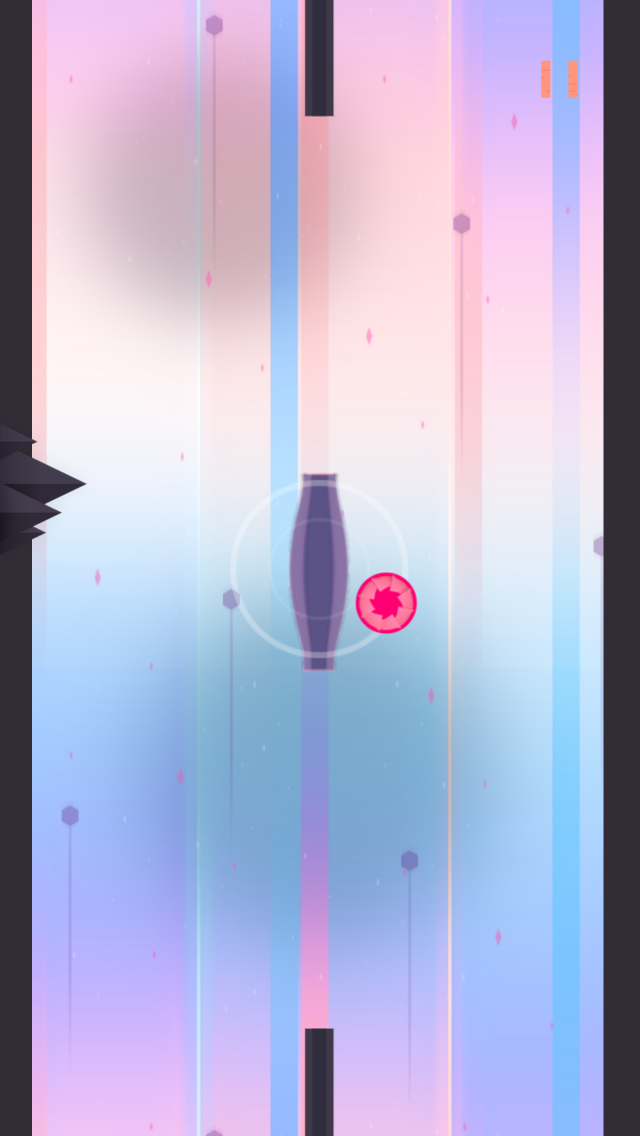
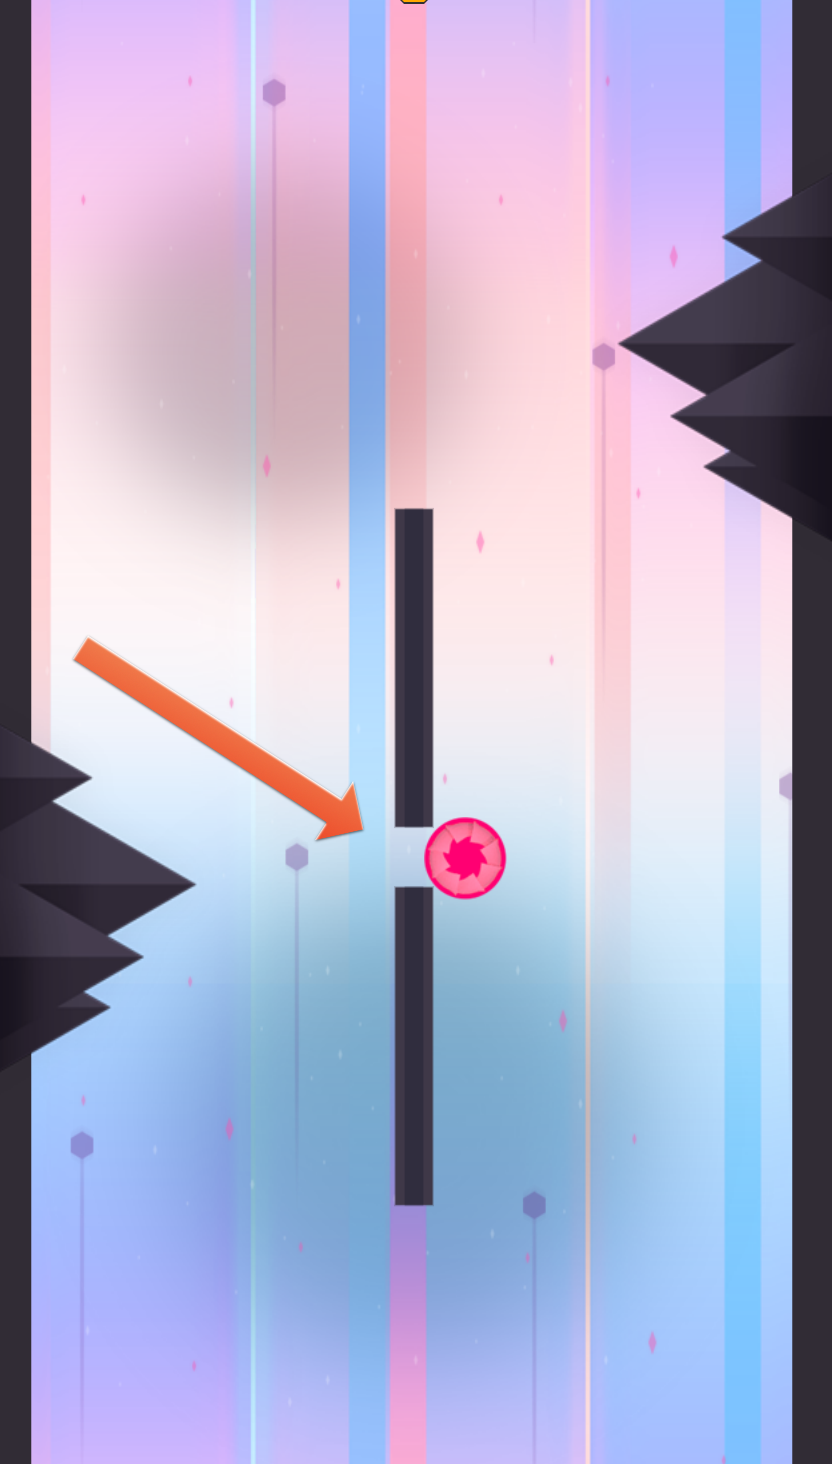
As mentioned earlier, in this section we will be adding a new gameplay element. The aim is for the player to find obstacles and barriers throughout the game as shown in the below image.
We would be placing these elements anywhere on the screen so that the player can maneuver around the mentioned obstacles.
We could offer some variety on that barrier by leaving openings to travel through, and force the player to make decisions on which side of the screen to travel on. Later on in the chapter, we will be adding a twist to this new element.
Now it’s time to start adding these elements by importing a new graphic which is very similar to our walls.
Let’s duplicate the last scene by clicking on it and hitting “D” to duplicate it, and let’s delete our swirly enemies from this scene so we have more room to work this all out.
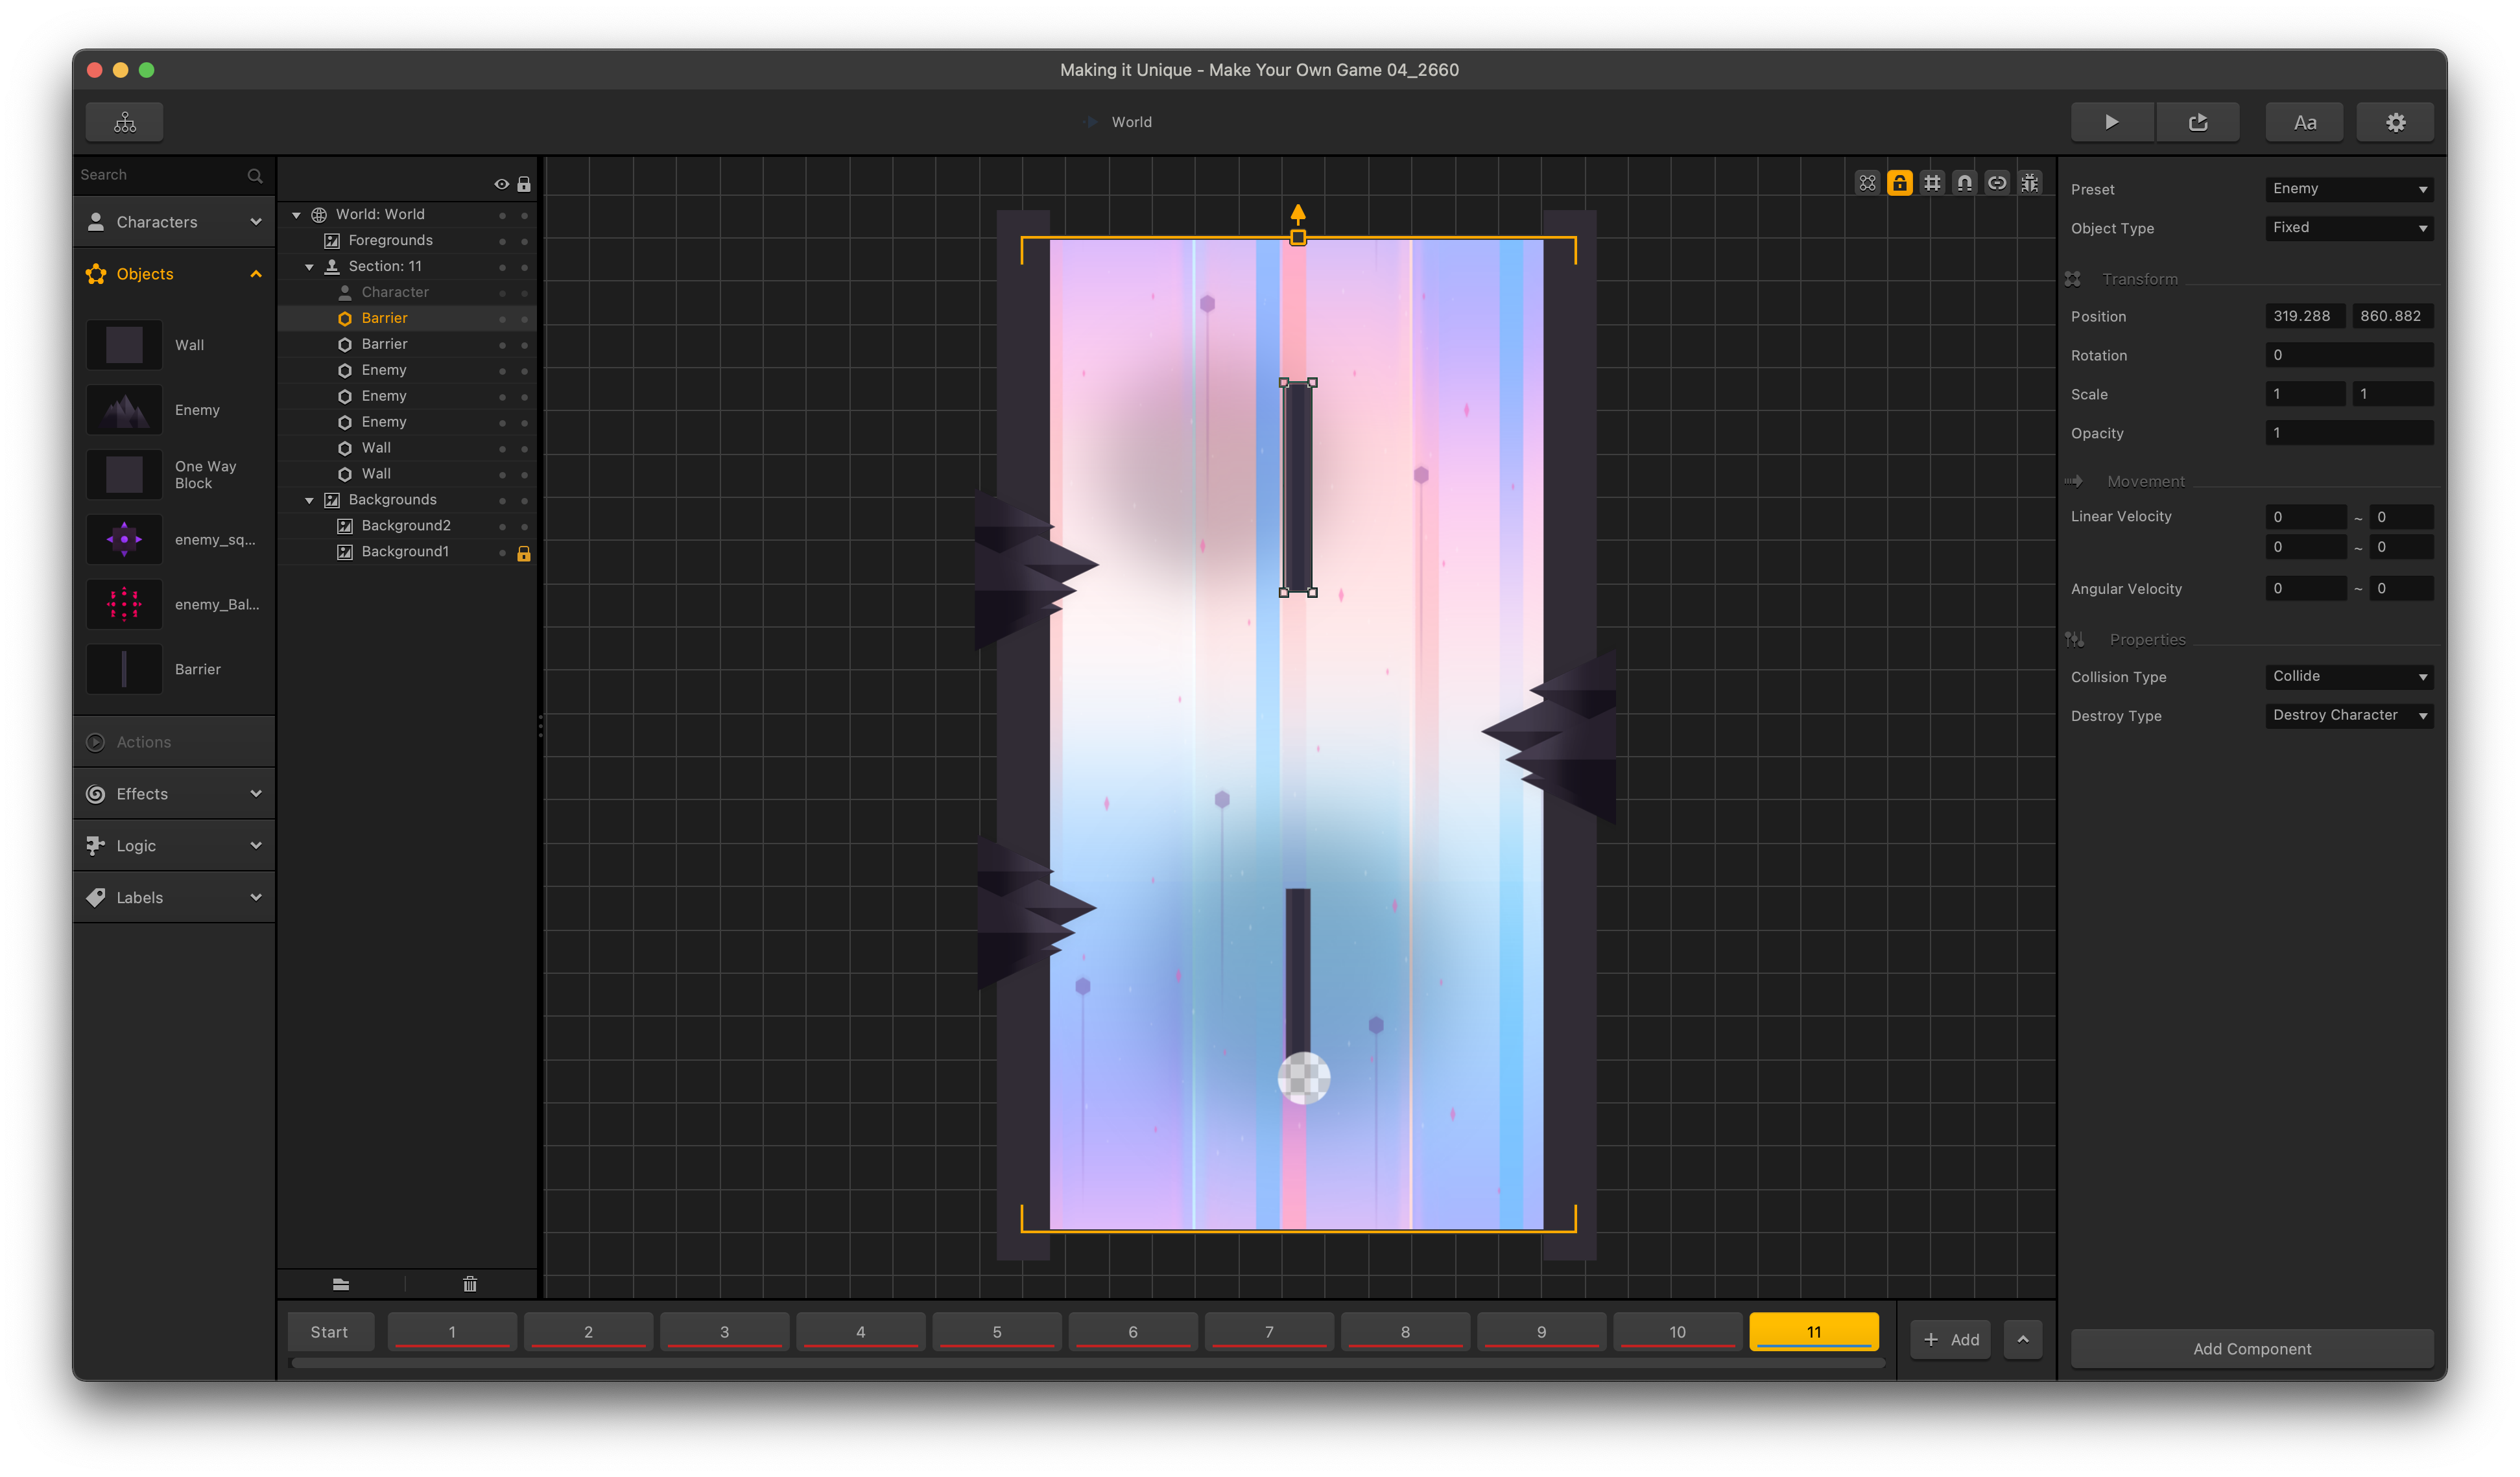
To import our new element, just drag the Barrier.png graphic into the object option on the drag and drop wheel, select the object in the assets panel, and check the collision shape.
The next step is to hold shift down while we drag the Barrier to keep it in a nice line, and put it near the bottom of the scene.
We’ll duplicate it upwards, and we’ll shift drag this one to the top of the scene.
Now let’s solo the scene by selecting it and hitting “S”. Before we test this, we want to remind you that Buildbox has the ability to make our game generate all our scenes in the order they appear at the bottom of the scene editor, or create them randomly for endless gameplay.
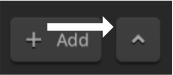
To do that, we have to open the Timeline Editor, which is done by pressing the arrow shown in the image below.
This will easily show you all the scenes and how they are arranged.
To go back to the simplified view, press the same button again.
The Start scene is a special scene that will always be first. All other levels can be placed anywhere in the timeline. If there are no overlaps, then scenes will just appear in order.
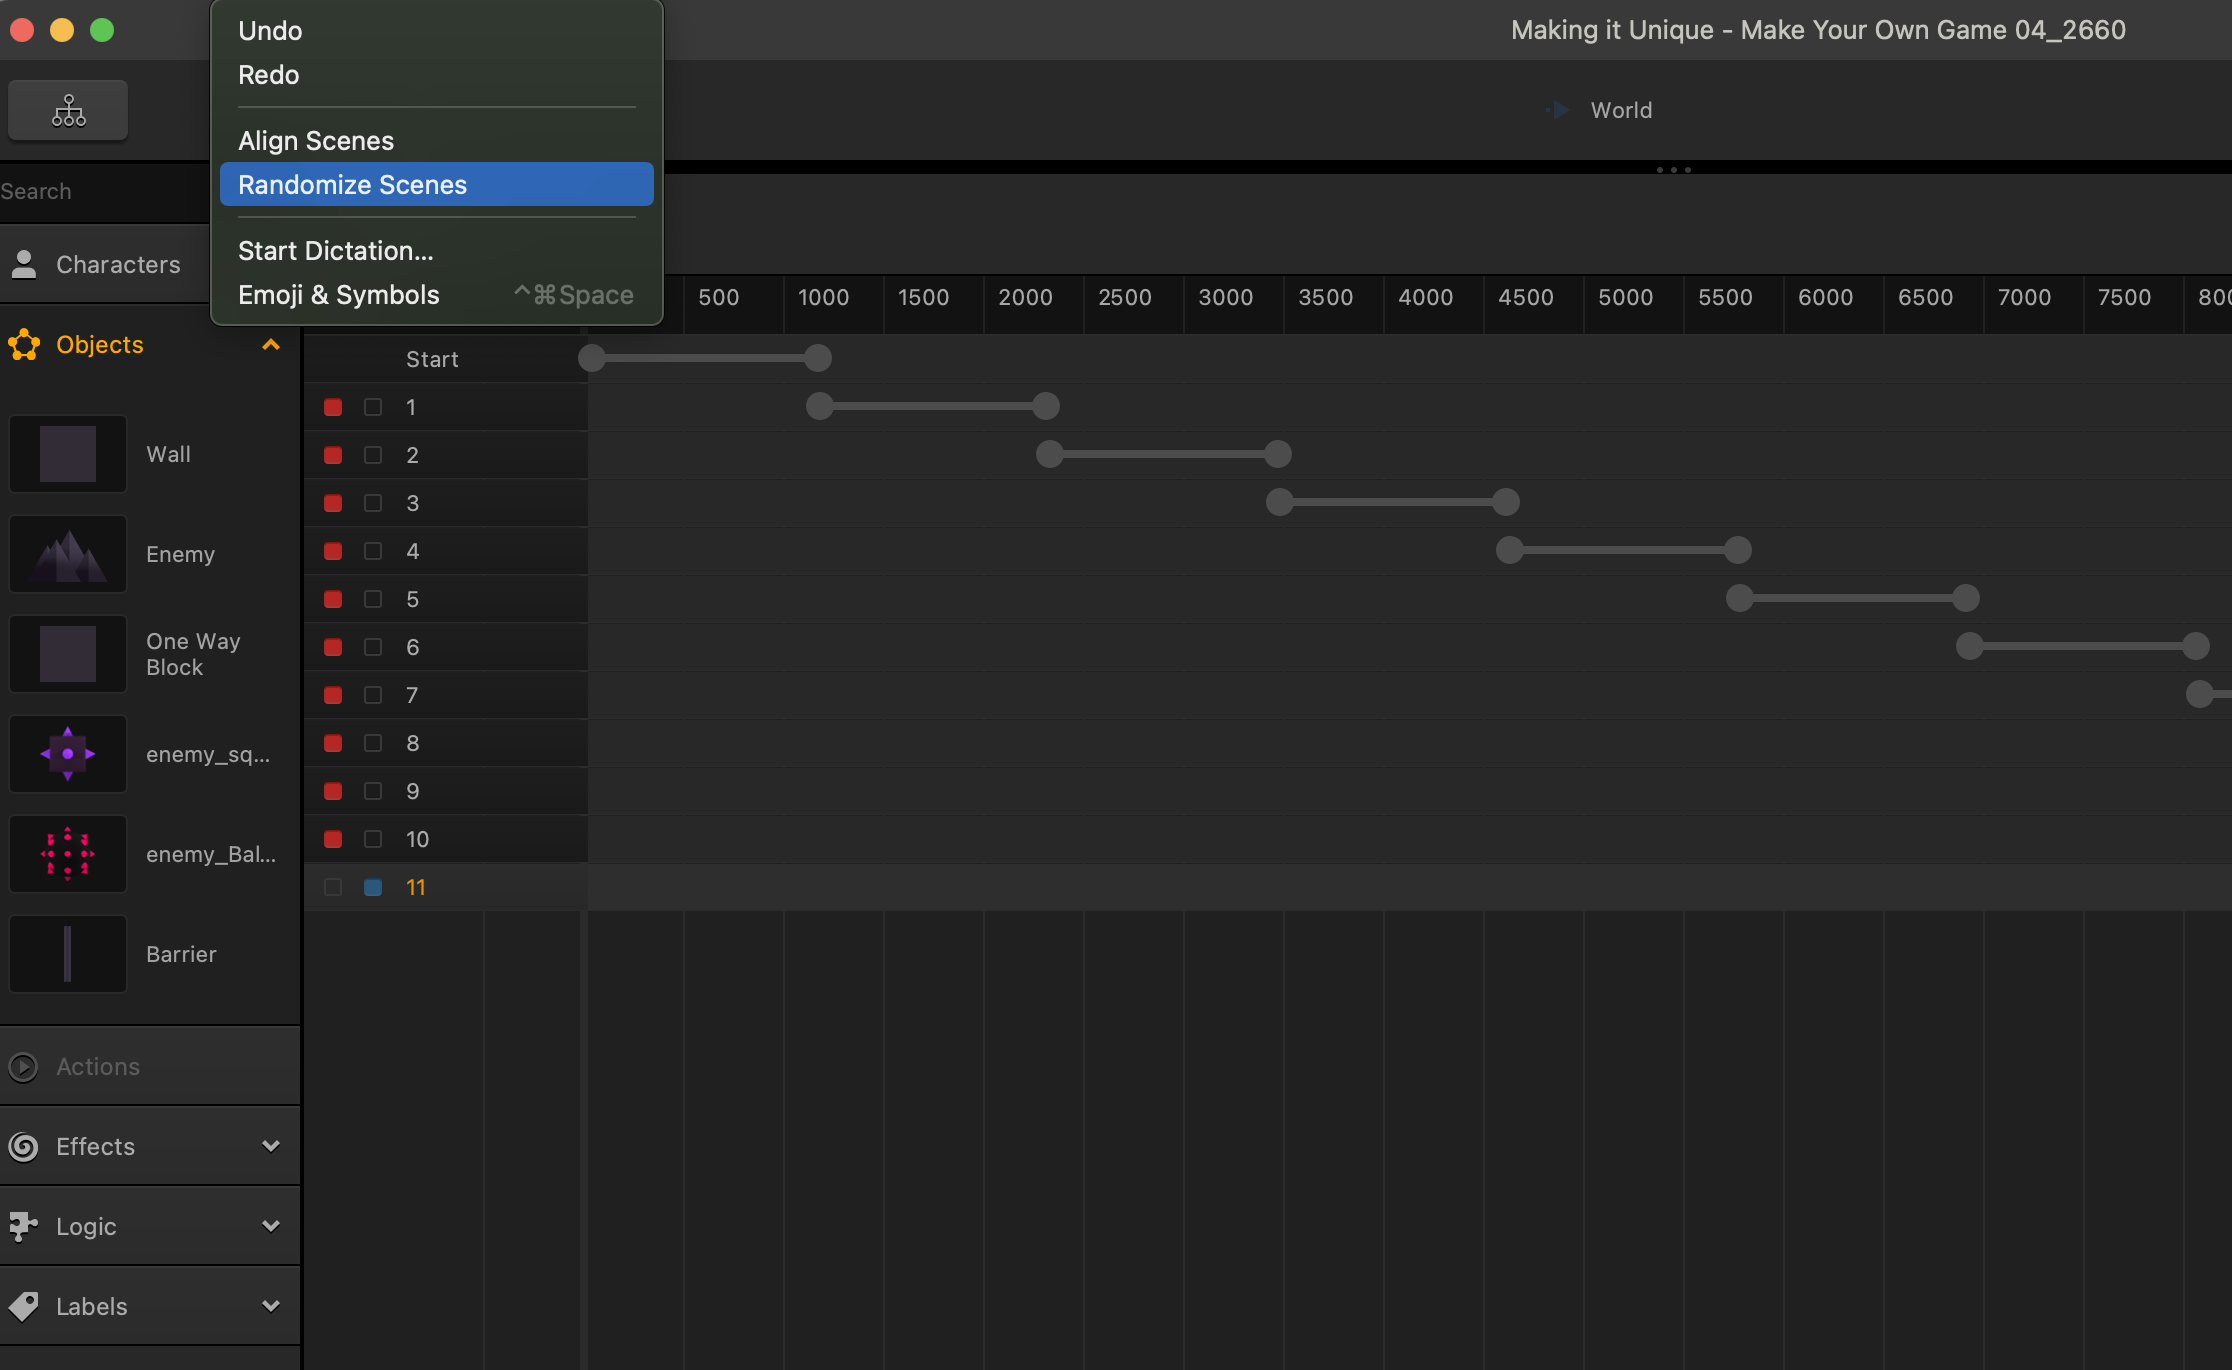
Where two or more scenes overlap – Buildbox will randomly select from each of them at run-time. Each level will have an even chance of appearing.
A scene in blue means it is soloed, and scenes in red are disabled for the Preview.
We shall now test our game to see if our placing of the barriers do not ruin the gameplay experience.
Remember, if you are going to randomize your scenes, one scene has to work with all the other scenes in the game.
What we see here with this small and unplayable gap resulting from our last scene. This odd gap needs to be fixed, since it serves no function. It just looks sloppy, and if this mistake kills our player, that will cause issues with player retention.
We are going to make this more compatible to similar setups from other scenes. To do so, Let’s drag these barriers into the middle, remember to hold shift while dragging to keep things in a nice line.
Let’s adjust the size of our mountain enemies to be a little easier to live through on this scene. You can hold shift while resizing them to keep their aspect ratio.

You might wonder… What if when we hit this barrier, it threw us up against the wall as a punishment mechanic, essentially making it a bumper?
The way we are going to achieve this is by learning about a character component called advanced move.
Click on the character on the assets panel to bring up its global settings on the far right so we can tinker with these advanced moves.
This whole time, you have seen advanced move components in action every time we play glitch, combined with a switch button on our games user interface, which we will see in a later chapter.
Advanced move has been changing our character’s linear velocity every time we tap the switch button that’s covering the screen.
When you look at the character settings, you’ll see that this component gives us our initial velocity at the game start, and then these two have been changing that velocity every time they see the switch activated.
Now, click on “Add Component” and click on “Advanced Move”.
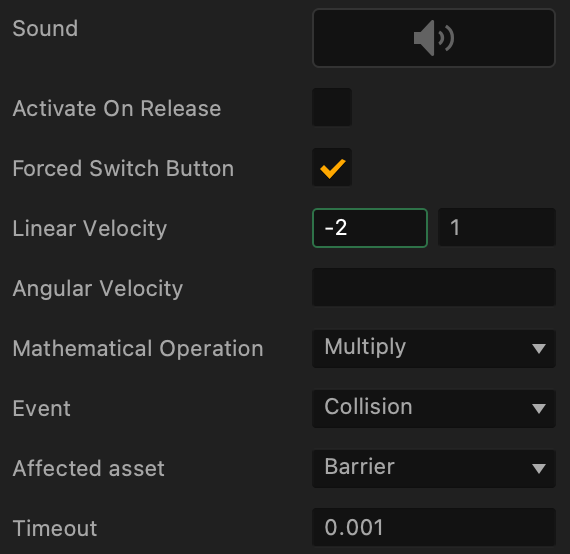
For the new “Advanced Move” we have to make it so that the character changes the direction when it collides with our barrier no matter which direction the character is going.
To do this let’s set it to collide, and select our barrier as the affected asset, and give it a very very tiny timeout so the calculation stops immediately.
The best way to change an object’s direction to go in the opposite direction is to change its positive or negative value to the opposite value.
Let’s set our advanced move to multiply our x-axis velocity by -2 and have no change on the y value. Now when we hit the barrier, we should see an instant change in our direction along the x-axis.
When you test it, you would see that it looks perfect. What would be really neat, is if the bumper changed in some way to provide even more feedback when we hit it. I think we can achieve this by making this an enemy that does zero damage.
This way when we hit it, we can do damage to it, and trigger an animation called a take damaged animation. This will look really neat when we get it all set up, and there are only a few steps to it.
Select the barrier from the assets panel to reveal its global options in the far right. Add two components: the first being “Health”; and the second being “Damage”.
Let’s give the barrier a Damage of “0” so it won’t harm our player in any way. We can give it a health of “999” so it can survive the damage our player will give when it hits the barrier.
Next, we drag in the PNG sequence from the “Barrier” folder into the taking damage animation slot. We then make the barriers enemies in the scene. Don’t worry, since it has 0 damage, it won’t harm our players in any way. What this merely does is our character can now harm the barrier and make it play its “taking damage animation” to give the barrier the bumper effect we’re looking for.
To trigger the “taking damage animation” for the barrier, we need to give our character a damage component. Click on the character on the assets panel to bring up the global settings on the far right of the screen, click on “Add Component” and click on “Damage”. Since our character now has a damage component, we need to increase the health of all our enemies in the game, which is at a default of 1. This way, enemies don’t disappear when our character crashes into them.
Take the scene off of solo and preview our game. Test if the barriers are playing their animations nicely every time our character bumps into them. You’ll have to make sure all bumpers are set to “enemies” for this to work. You may have to make a few adjustments to the other objects as well.