
No game is complete without music or sound effects. Music and sound are principal elements in gaming. Good background music sets the atmosphere and tone. It can help users connect emotionally with the game as well. Sound effects at crucial moments or during specific actions can inform players and give them direction on the next move to make.
In this lesson we’ll cover how to not only animate the menu sections like the game title or start button but how to load music into your game and trigger specific sound and animation effects. You’ll learn new ways to integrate sound and music throughout your game.
When you’re a game developer, it’s important to get your music and sound effects in your game just right. So, included in this lesson is also some bonus material that focuses on how to add defeated sounds and animations properly to your game over menu.
The secret to making a good game great is in the details, like sound and effects.
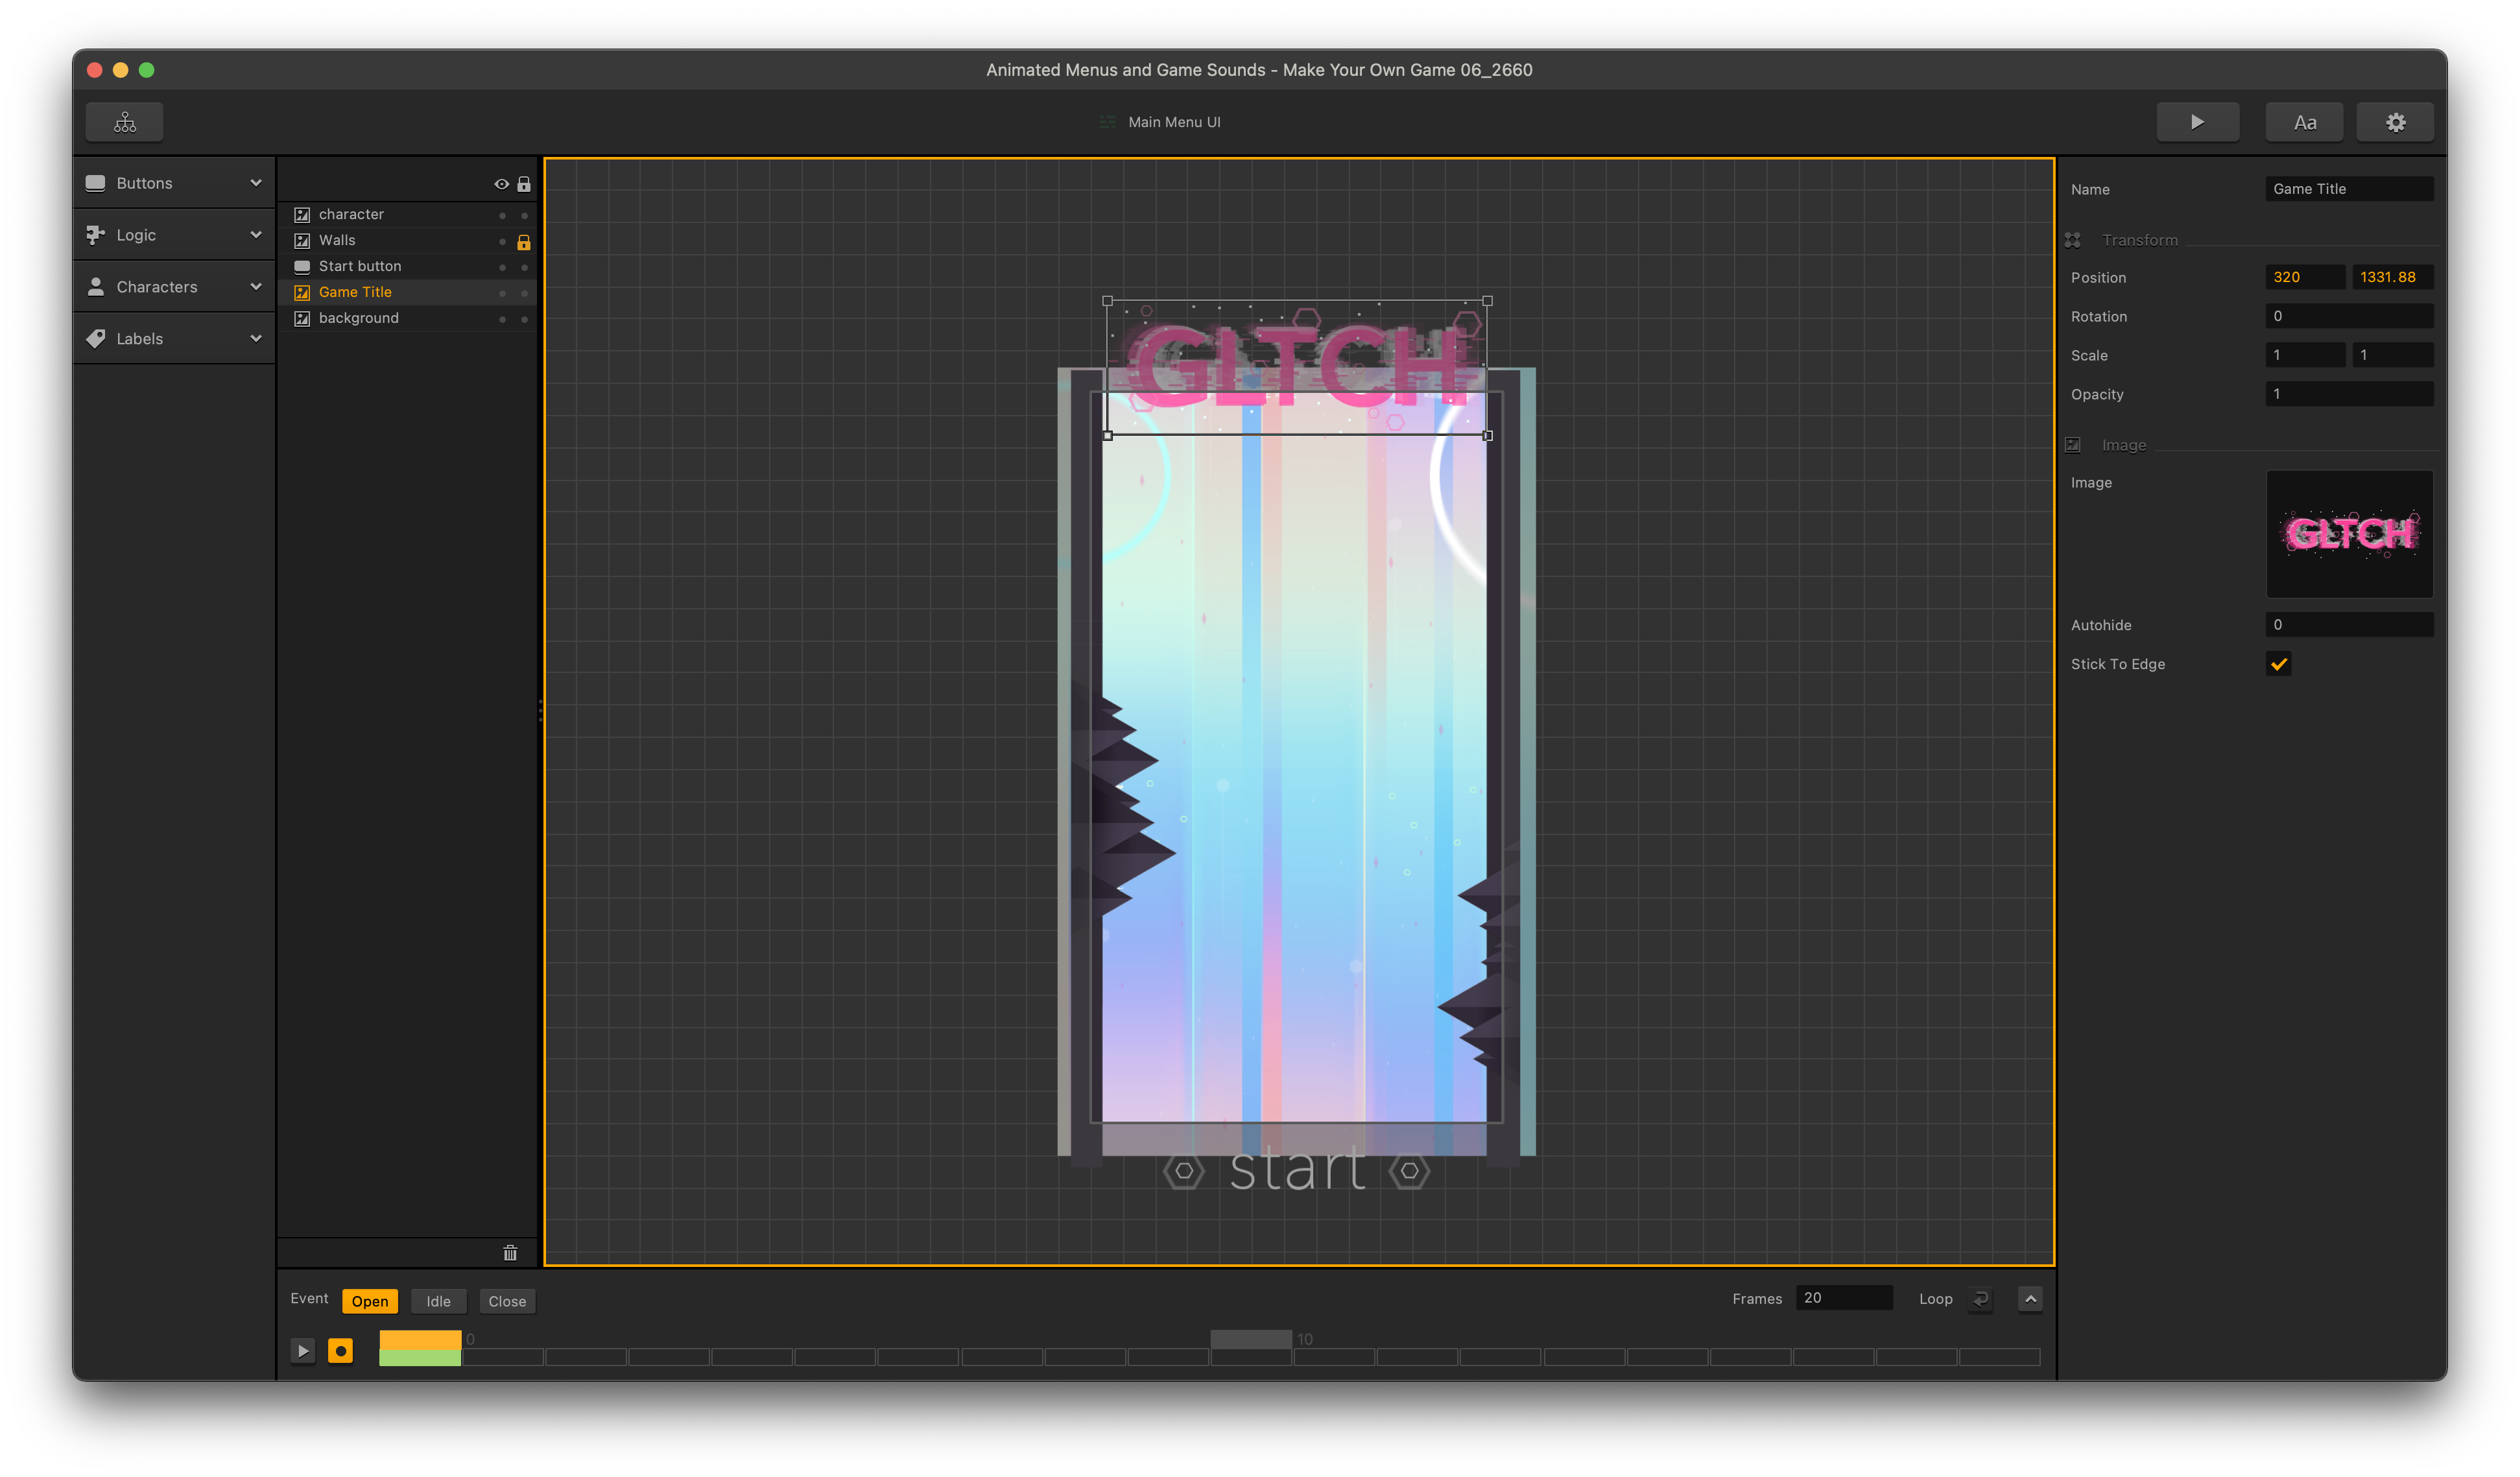
Let’s start off with animating the main menu. Let’s click on a mind map button in the upper left, and Buildbox will take us up into the mind map. And now let’s double-click on our main menu user interface. At the bottom of the window is where we will find the options to animate menu elements. Let’s say whenever we open this menu like when the game starts, we want the title to come down from the top and the start button to come up from the bottom.
Let’s start with animating the title. Let’s select the title and at the bottom where the Animation editor is, let’s select “Open”, as this is the animation we want to happen any time we open this menu. Let’s push the record button so we are in record mode, and now let’s move our title off-screen towards the top.
As long as the record button is enabled like it is, once we get our title into position and let go of the mouse button, Buildbox will record the position data at that frame. Which we are at frame 0, and we see a green bar added to the Animation editor. These green bars signify a position point for Buildbox to use, and we can add quite a few things we want Buildbox to record.
Let’s expand the Animation editor at the bottom. If we want to rotate the title, Buildbox will remember the rotation at that frame, and as we feed Buildbox more Position keys along the timeline, Buildbox will extrapolate everything in between for us.

Now let’s move our orange frame bar to the next point in time that we want to record a position point say 20 frames in, and let’s drag our title to the position we want it at and let go of the mouse button. When we do this, we see another green position point added to our timeline at the bottom. Take a look at what happens now when this menu opens. If done right, the title starts off the screen and enters as we intend it to.
Let’s rewind our orange timeline marker back to frame 0, and shift drag our start button off-screen. Now let’s drag our orange timeline marker to frame 20 and drag our start button to where we want it, and when we let go of the mouse button, we see another position point recorded for our start button.
We can also play with what we have inside the editor so we don’t have to preview our game every time. Just take the editor off record and bring our orange frame marker back to zero and play it. Let’s animate our character to fade in off the wall as it comes to its resting point. Let’s hide everything but the walls and the character, and lock the walls and let’s zoom in where it’s nice and easy to see. Now, we have our title and start button coming to rest at frame 20 and I want our character to be exactly where it is now at frame 20, but I want it to fade in with some movement.
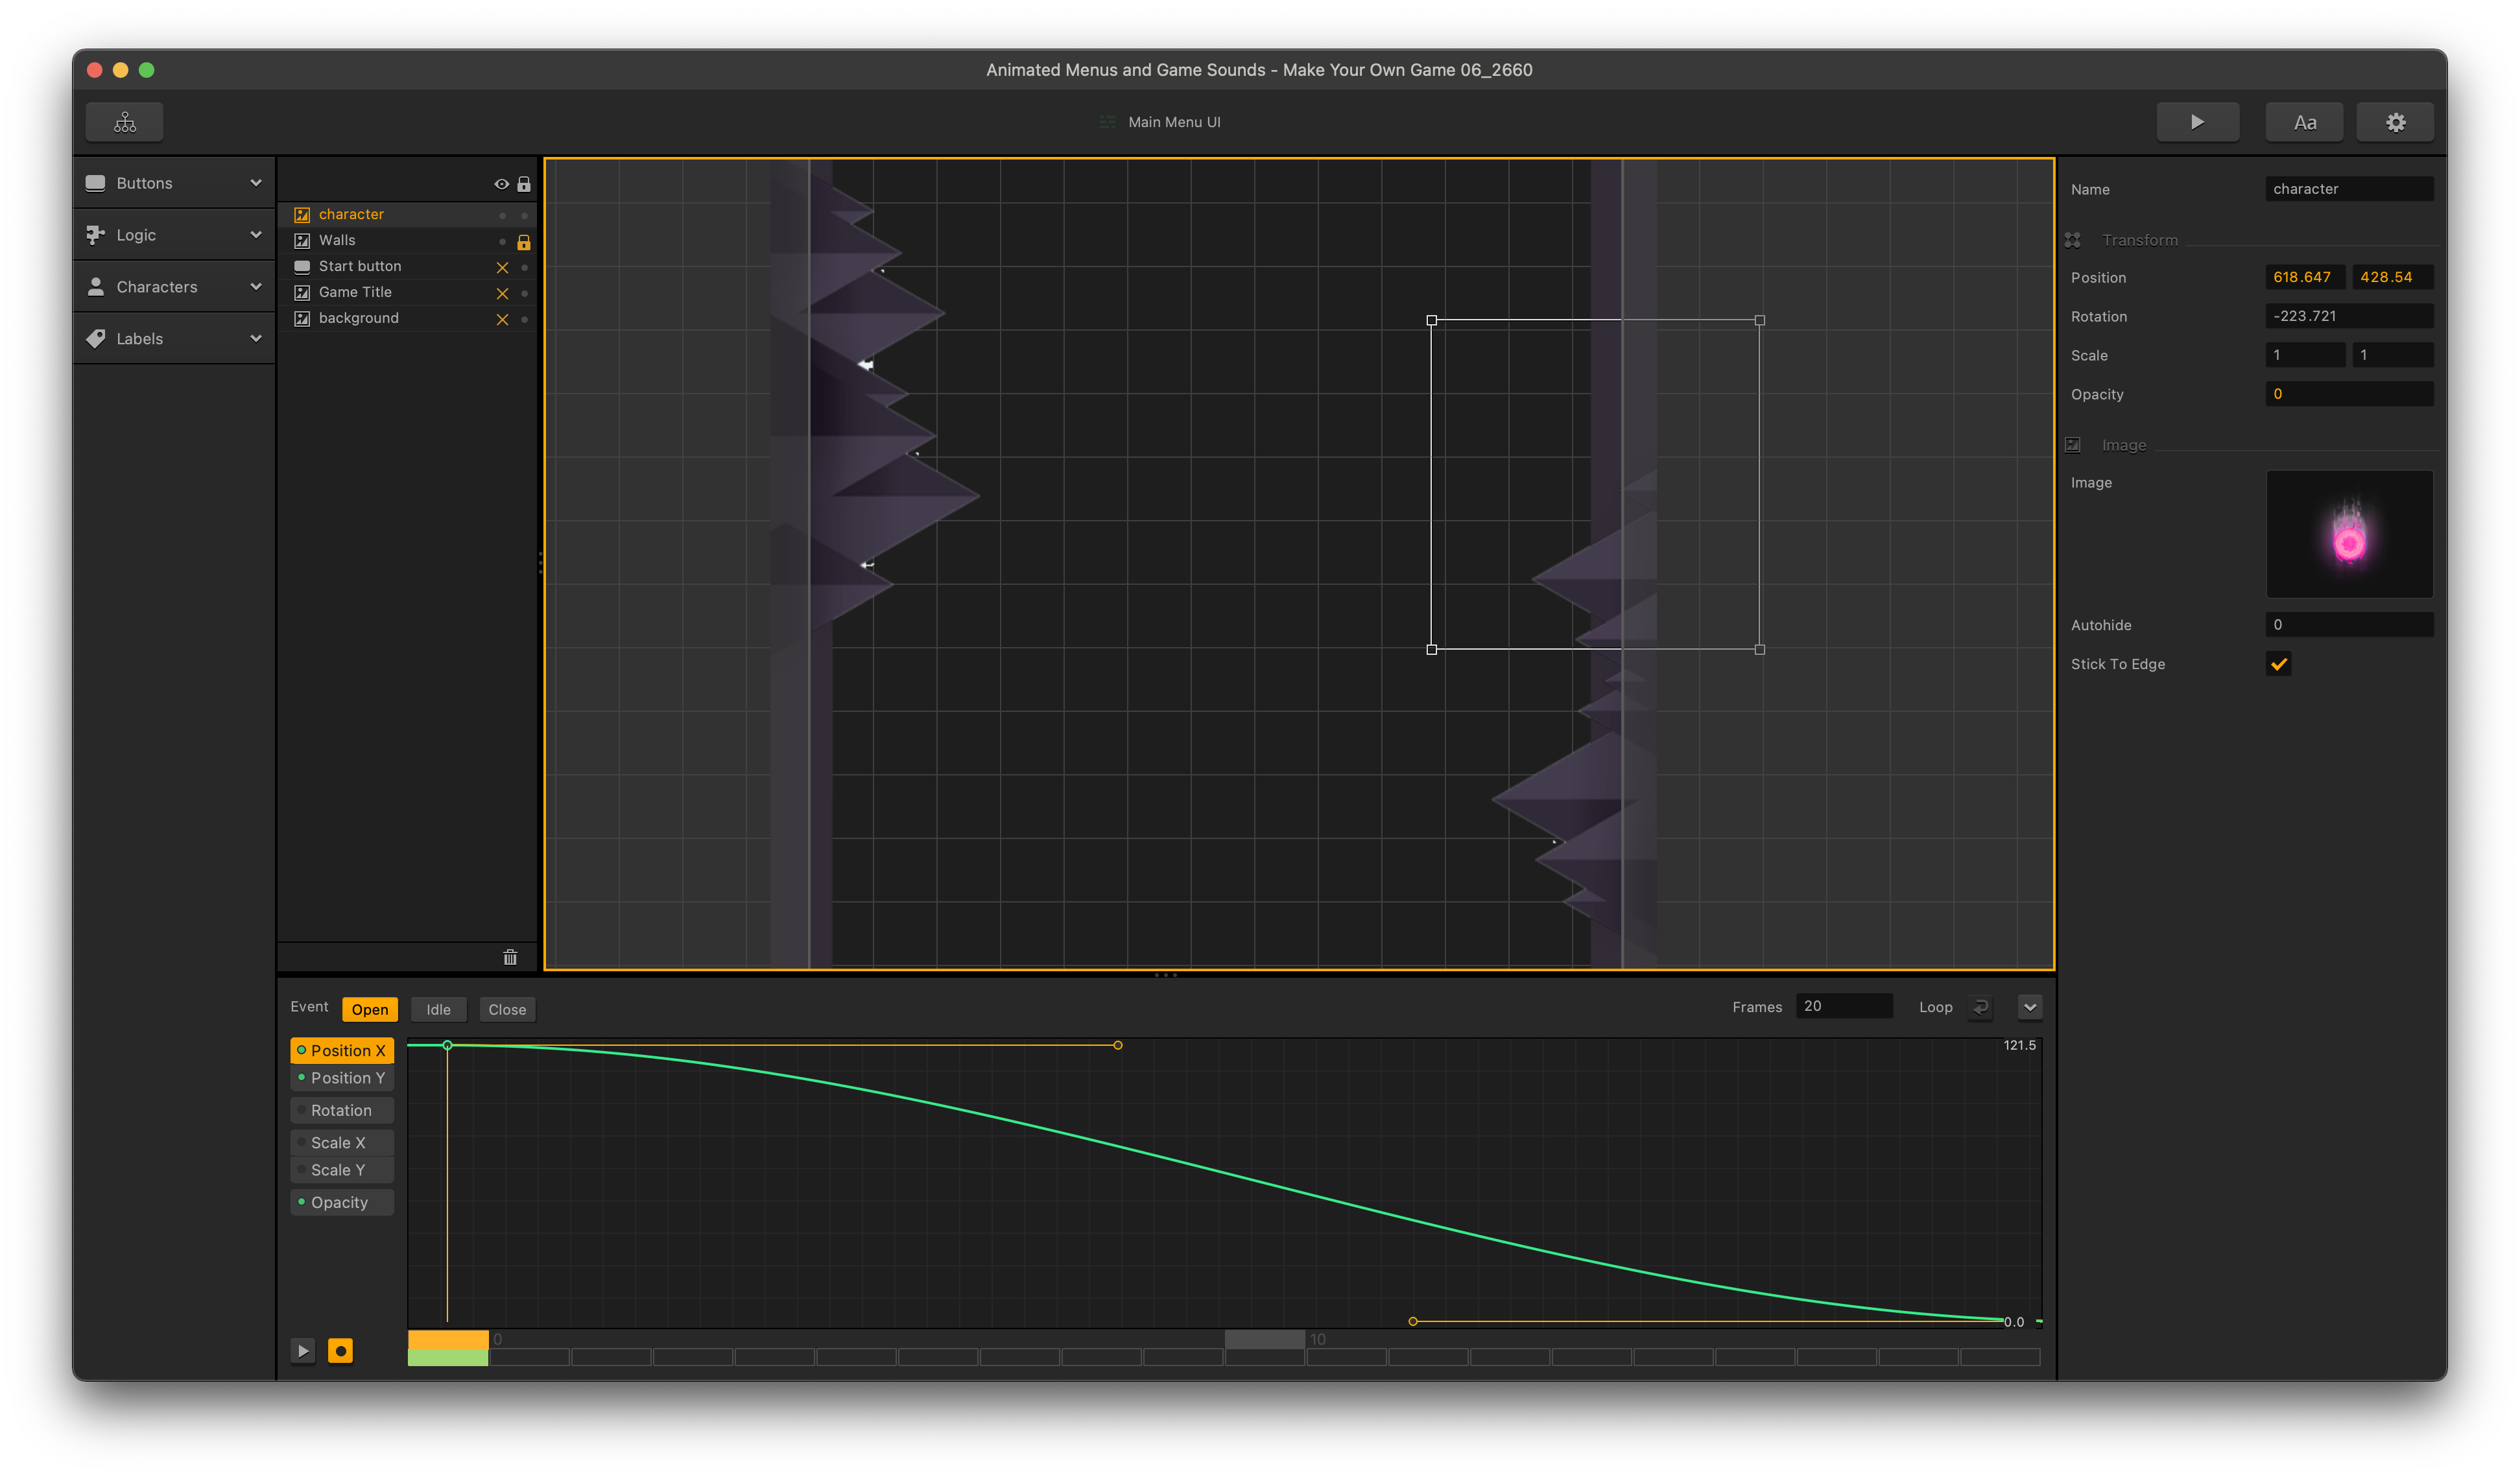
Select the character, and at frame 20, let’s click in the position boxes in the far right of the screen and just hit enter. This will force Buildbox to record a position point. Then at frame 20, let’s set the opacity to 1. Then we can bring our orange timeline marker to frame 0 and move our character more against the wall and set the opacity to 0. And let’s take off the record button and play the Animation editor by pressing the play button next to the record button.
Now, using these lessons you have to animate the Game Over Menu and its buttons. You can also add a “Close” animations for the menus. Be creative with your menus and have fun.
Now we’ll get into the idle animation sequence by animating the start button by giving it a little shake. Remember that Buildbox animates at 30 frames per second, so 60 frames will give us a two second loop. Select the start button, and get our timeline marker to frame 0, and enable record, and select the rotation timeline, and let’s make sure we force Buildbox to record a position point by clicking in the rotation option and just hitting enter.
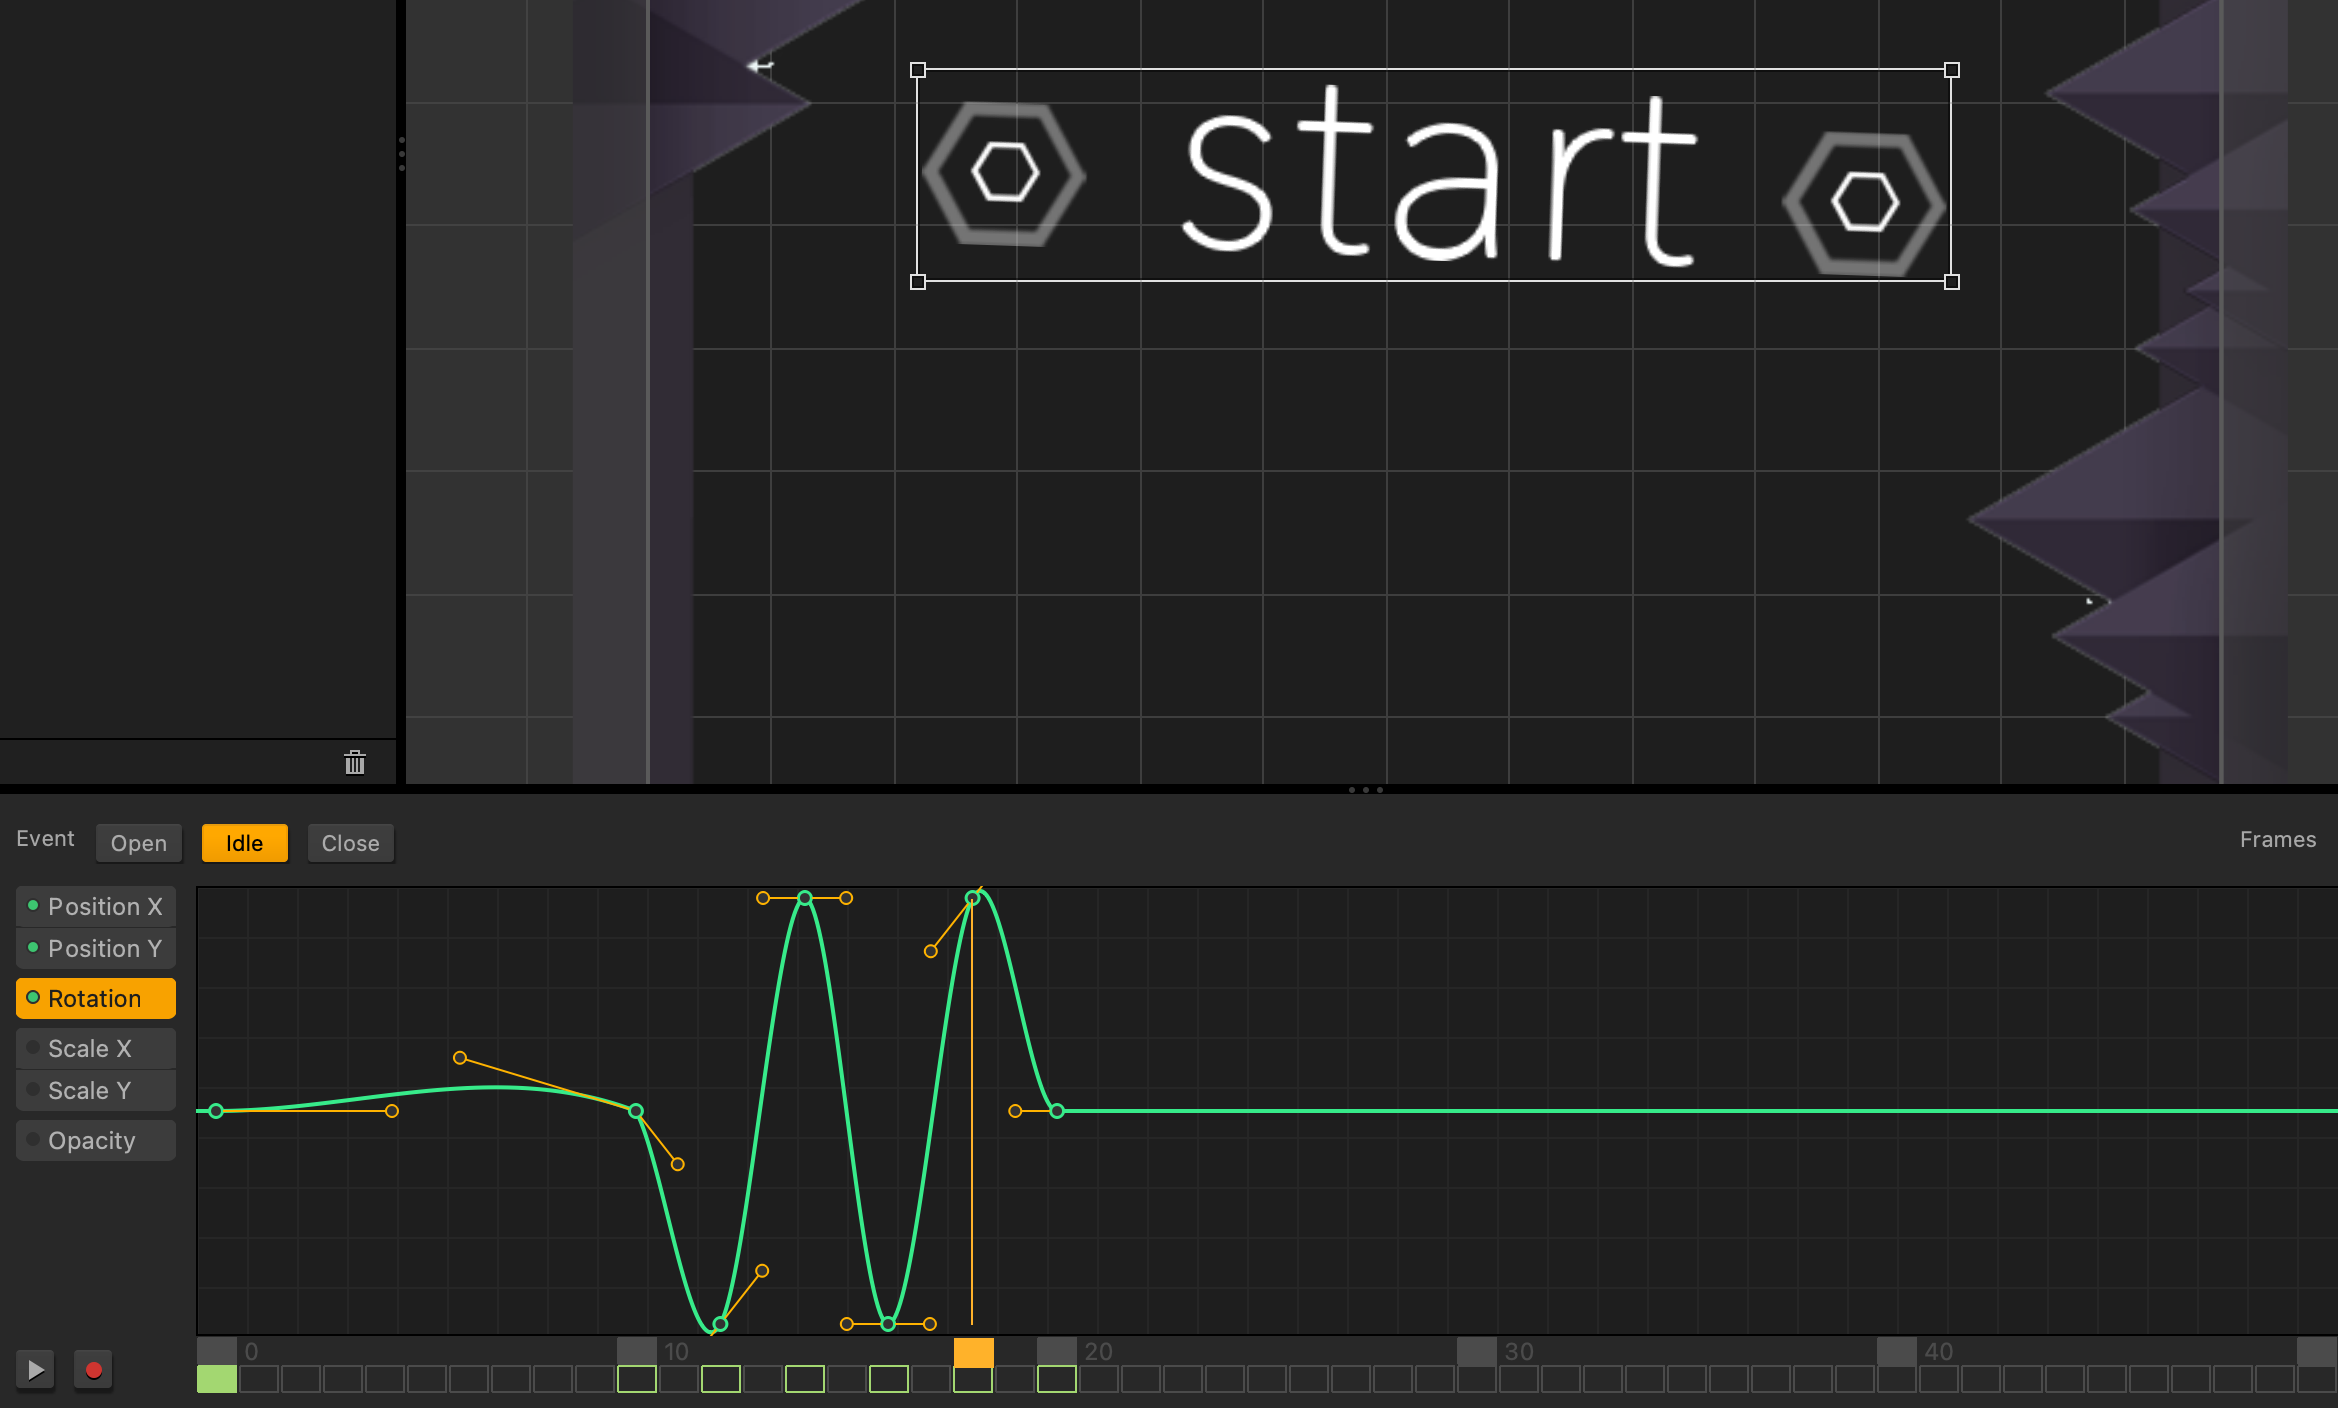
And we see the position marker appear in the timeline. Let’s do the same at frame 10, but now at framed 12, 14, 16, and 18, let’s cook up a little shake by changing the rotation between negative 2 and 2 degrees, until again recording 0 at frame 20. Now, let’s preview our game. The start button should do a little shake every two seconds.
Let’s talk about sounds. No game is complete without music and sound effects. Although it is in style to not include music in some games today, we will just give our player the option to mute it if they so desire. So, let’s start by bringing some music into the game. To hear music in the game, we actually need to load music into the user interfaces that we use. Having just animated our game over menu, let’s go back up into the mind map, and put music in the game over menu that will get triggered every time it loads. You can see the option for music here. Just drag an mp3 into that slot and you’re done. It’s that simple.
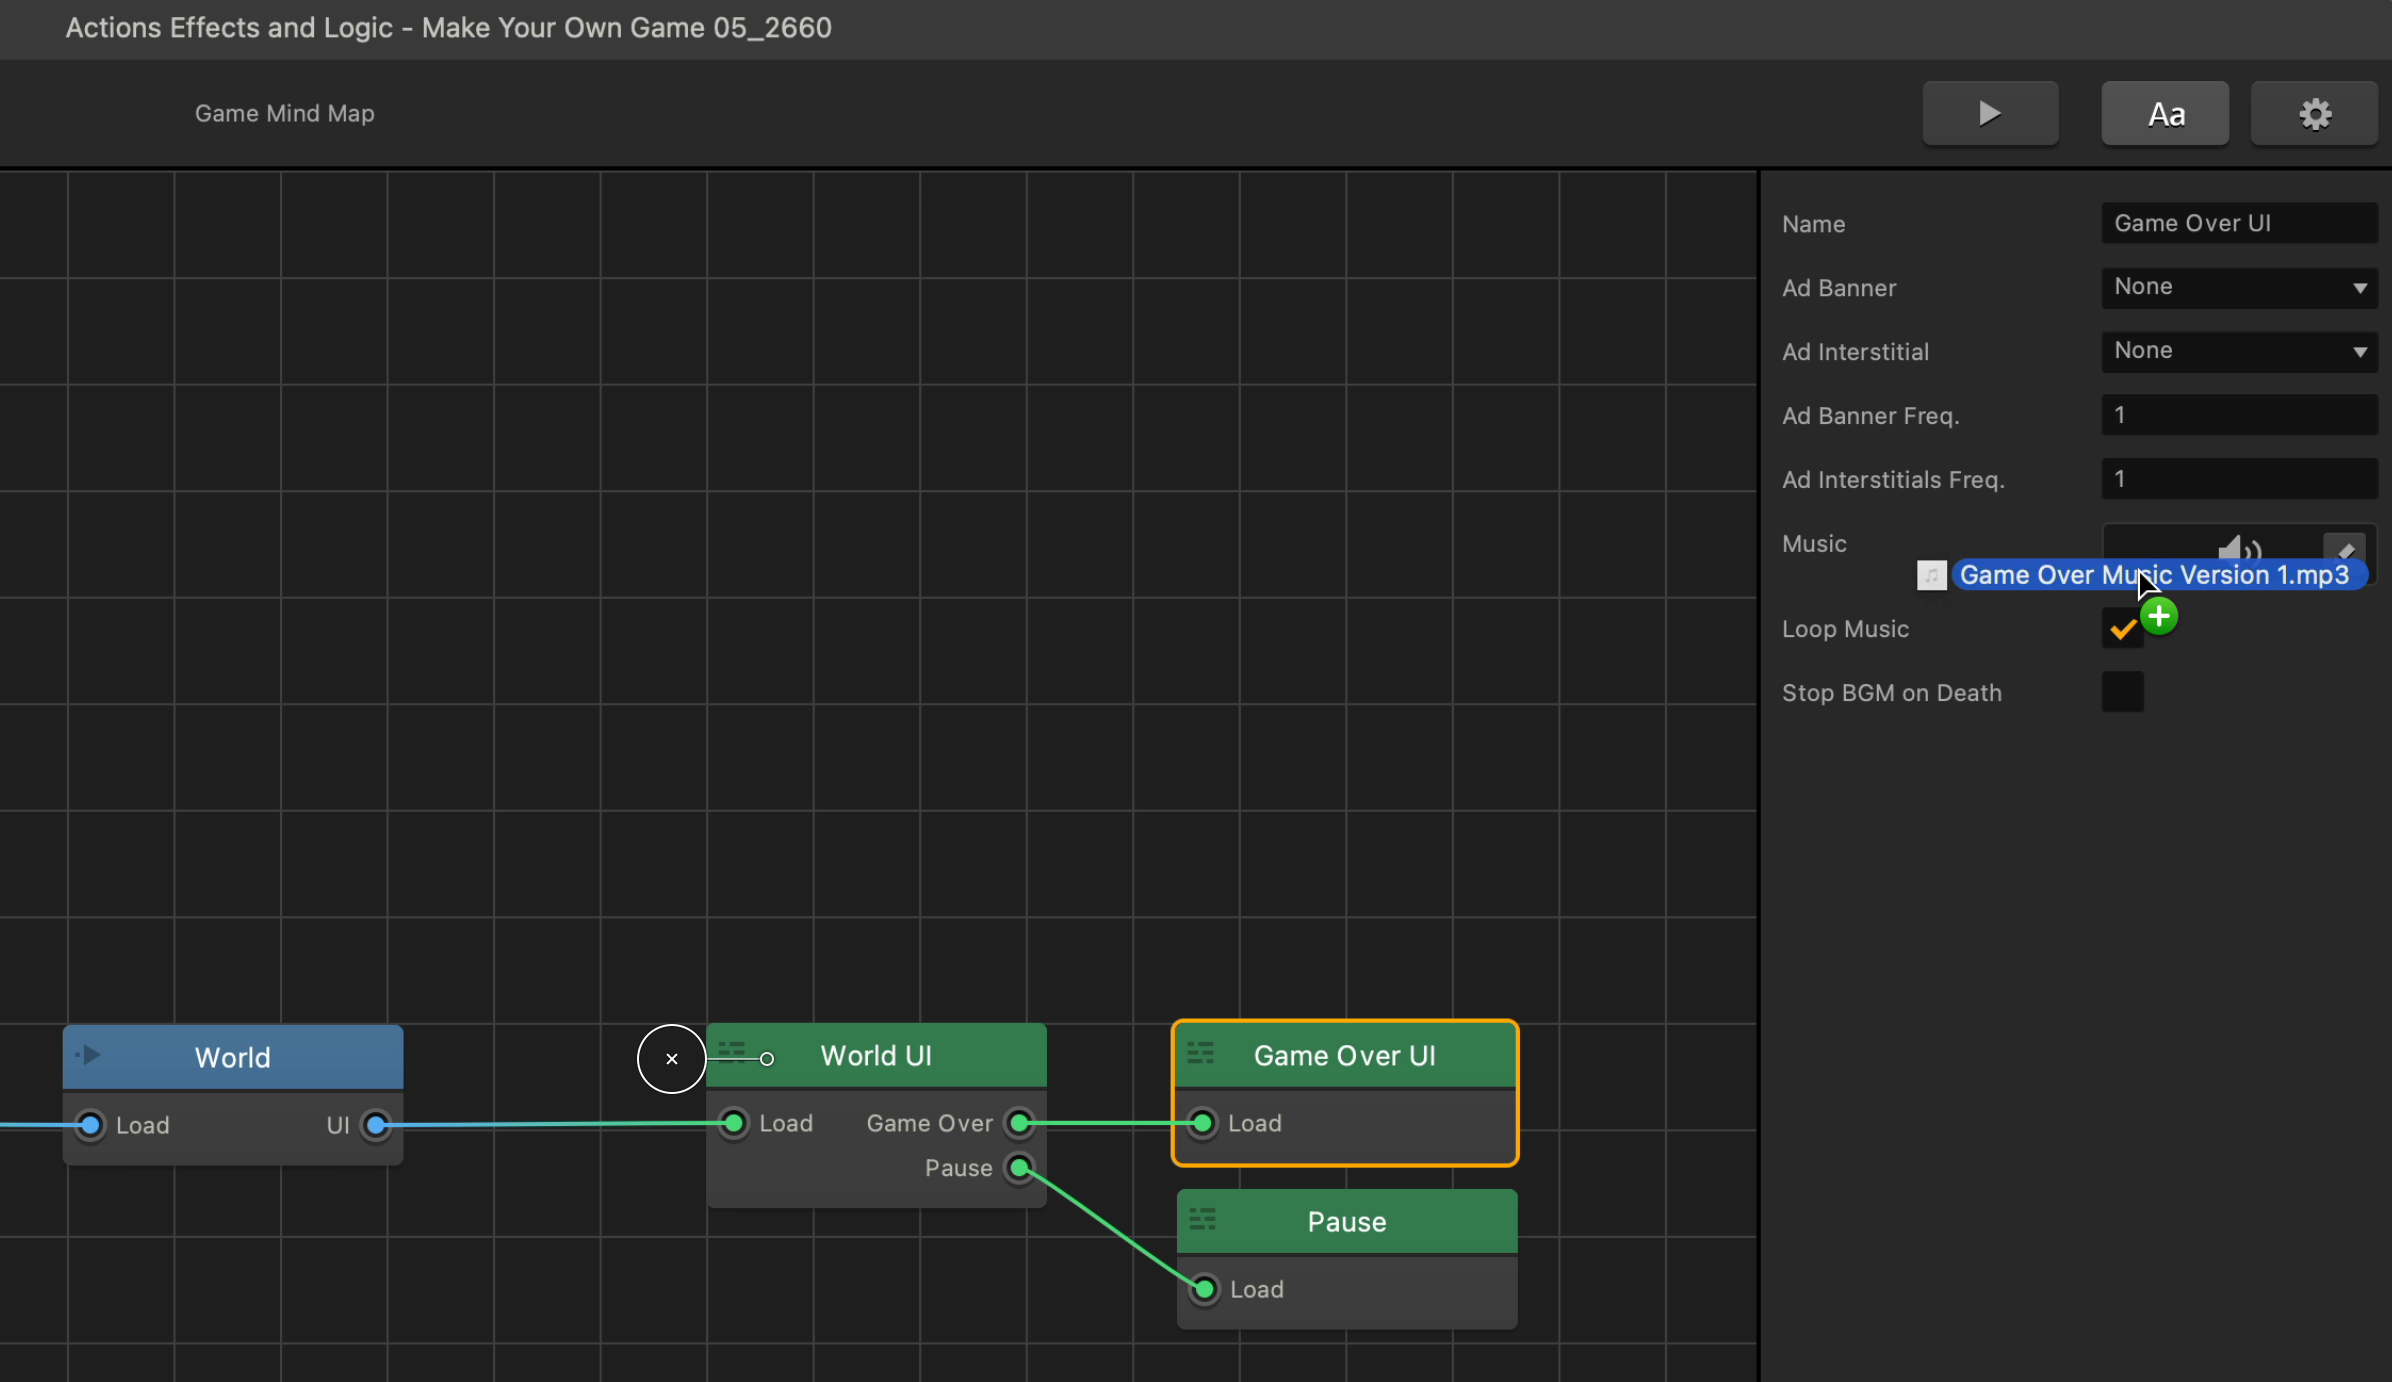
Now when the game over menu is loaded, Buildbox will play that music until it encounters another UI with music on it. So, if we wanted a different song to play when the game goes back to the main menu, we would select our game’s main menu, and add music there. But keep in mind that each menu our game loads, will load that music. So, if our player is dying a lot and restarting different music over and over and over, that might get really annoying. So, one way to avoid this is to put music on just the start menu so that no other menu would trigger or re trigger music. And if we already added the music we want to another menu, we can just add it here without dragging it in again.
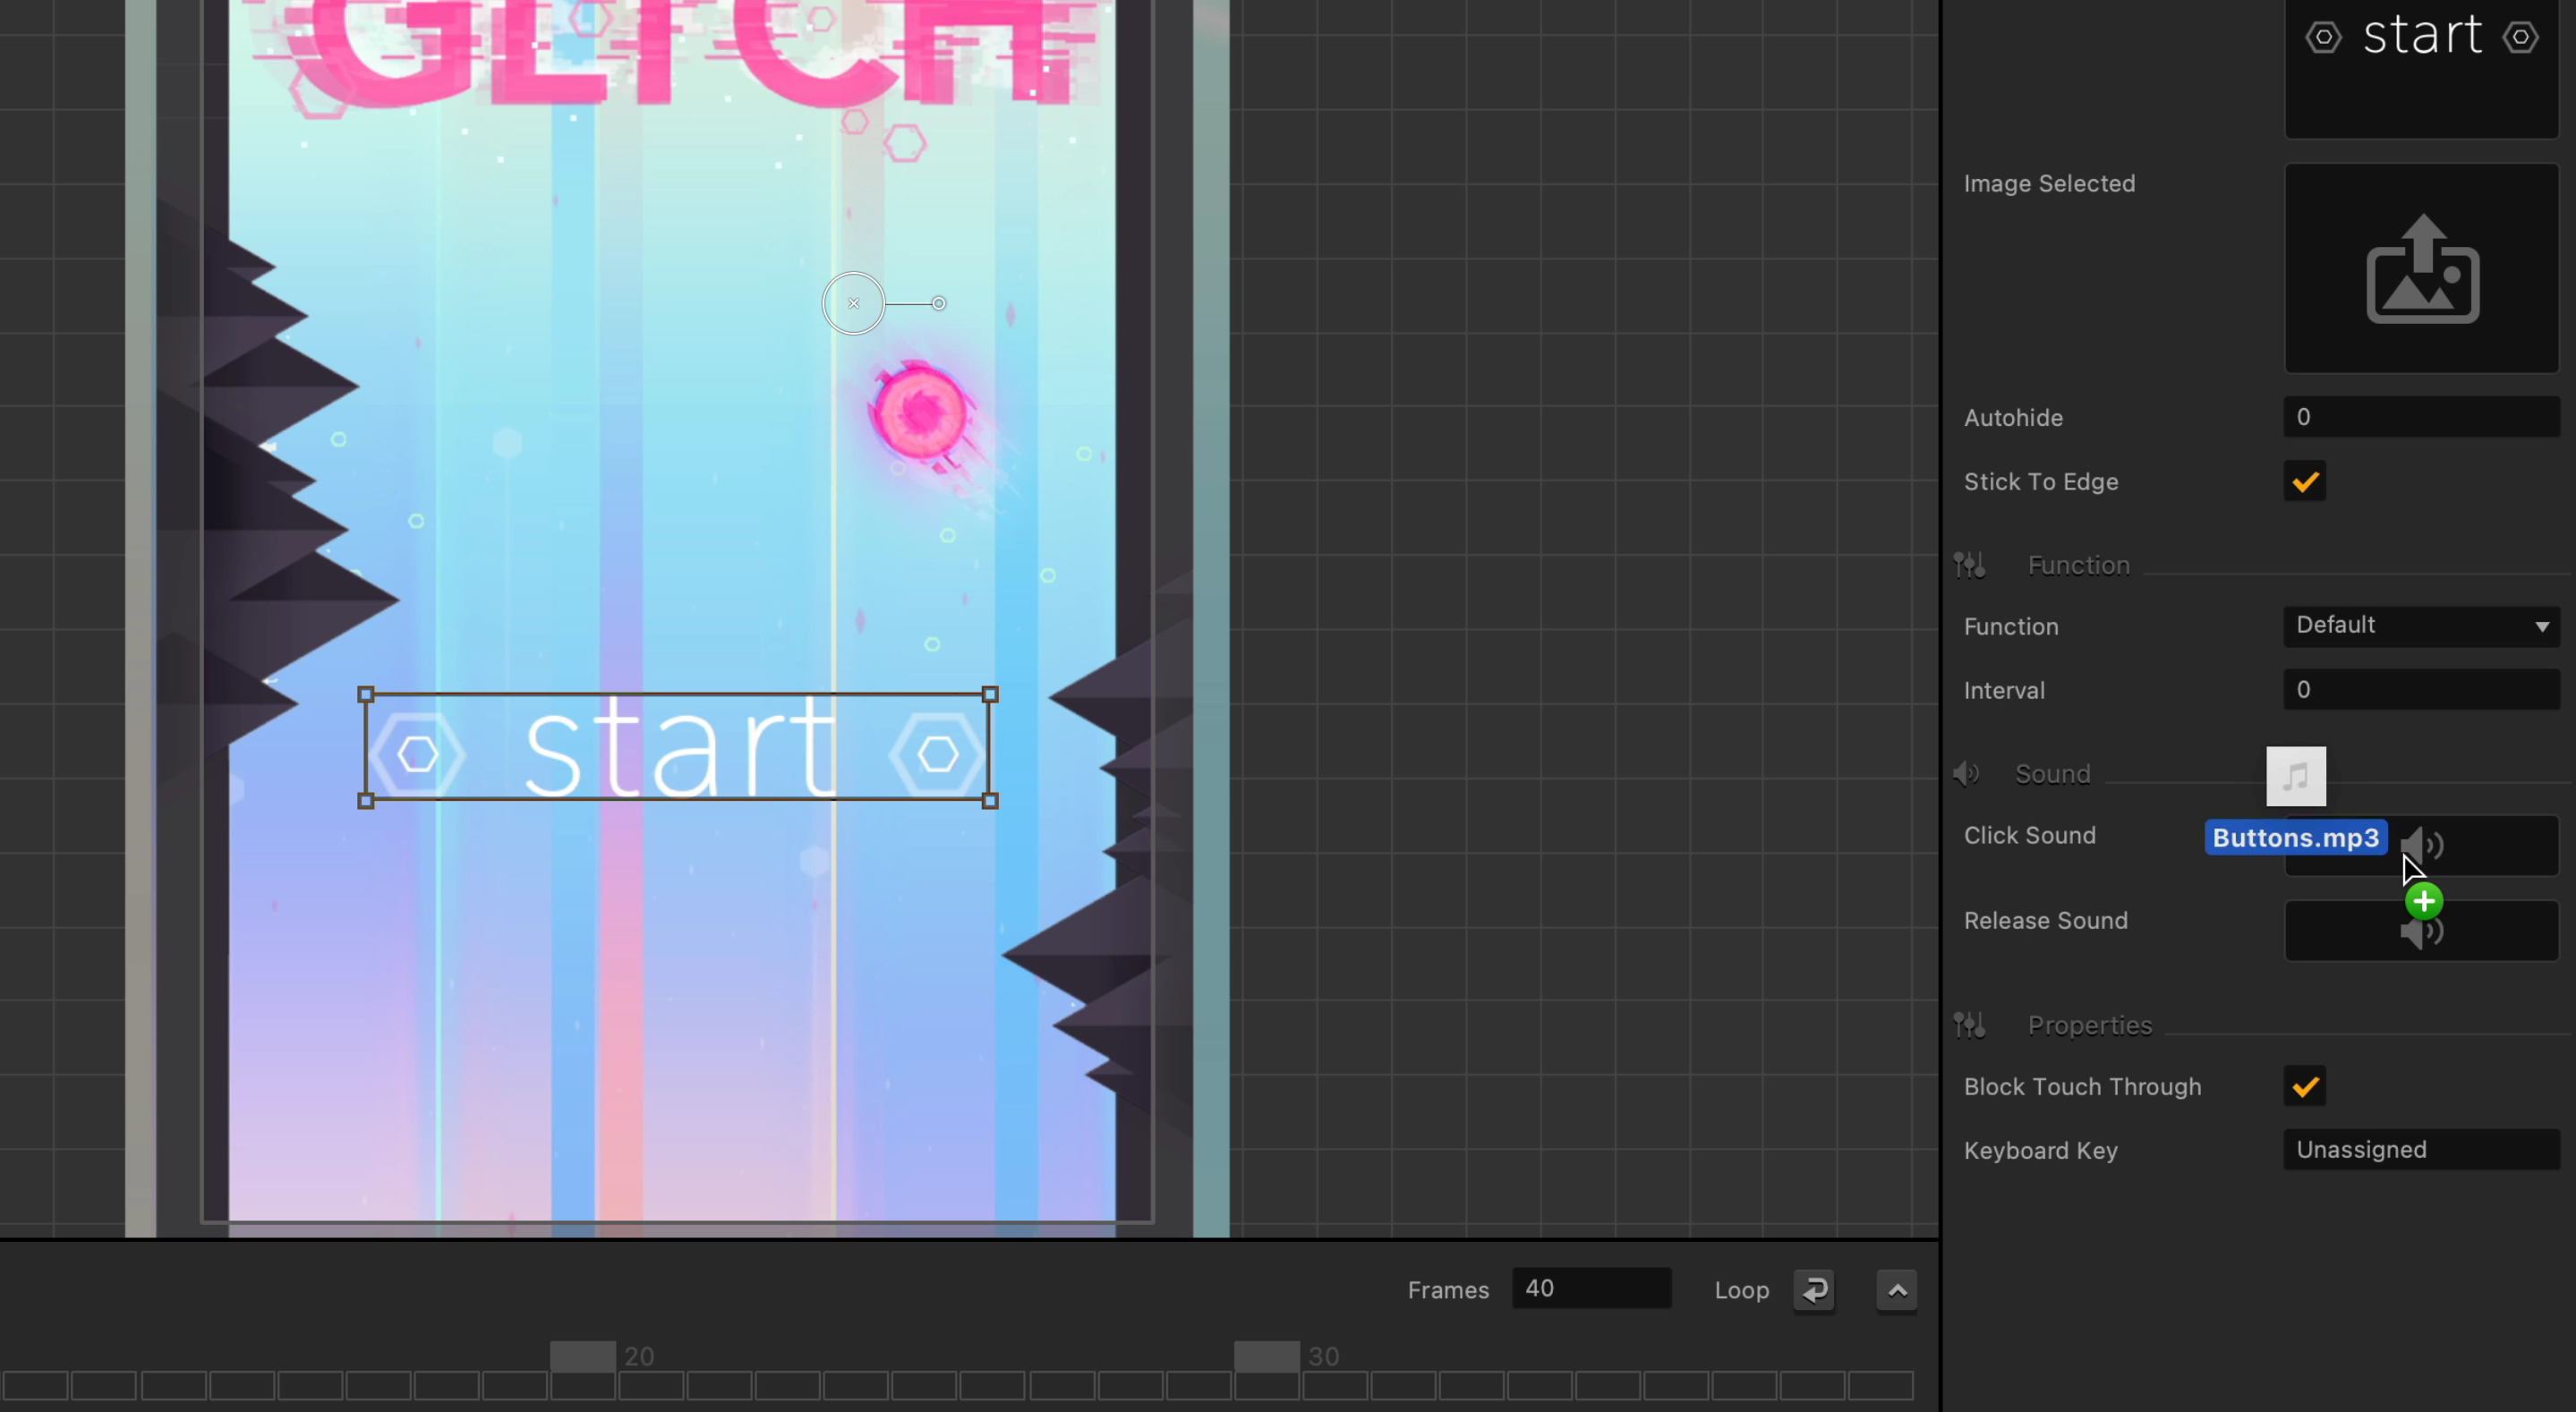
This time, let’s talk about sound effects, and the perfect place to start is right in our main menu. We have options to add sounds to a lot of different things in Buildbox, including buttons in our menus. So, let’s drag an mp3 into the click slot of our start button. If we wanted to add the same sound to the other buttons in the other menus just like the music, we don’t have to drag it in again, we can just select it in the slot.
Let’s put the same sound in our pause menu buttons, and our buttons we just animated in the game over UI as well. Now that we have animated our Game Over Menu and added sounds to the buttons, there are some options we need to look at when the player dies that concern how soon the game over menu gets loaded.
First, go back to the scene editor and select our character from the assets panel. Drag in an mp3 for the Defeated Sound slot
Now when we die we should hear the defeated sound play. You will also notice that a few things happen before the game over menu loads. We see our player turn into a particle effect, we see a camera shake and a camera flash.
We may want to change the default defeated animation Buildbox has generated for us. The defeated animation can be changed, we can just drag in any image or PNG sequence into the option. We just adjust the speed at which the frames play looping it if we wanted to but if we didn’t want to loop it and we wanted to give the death animation time to play out, we would have to set our game over effects properly.
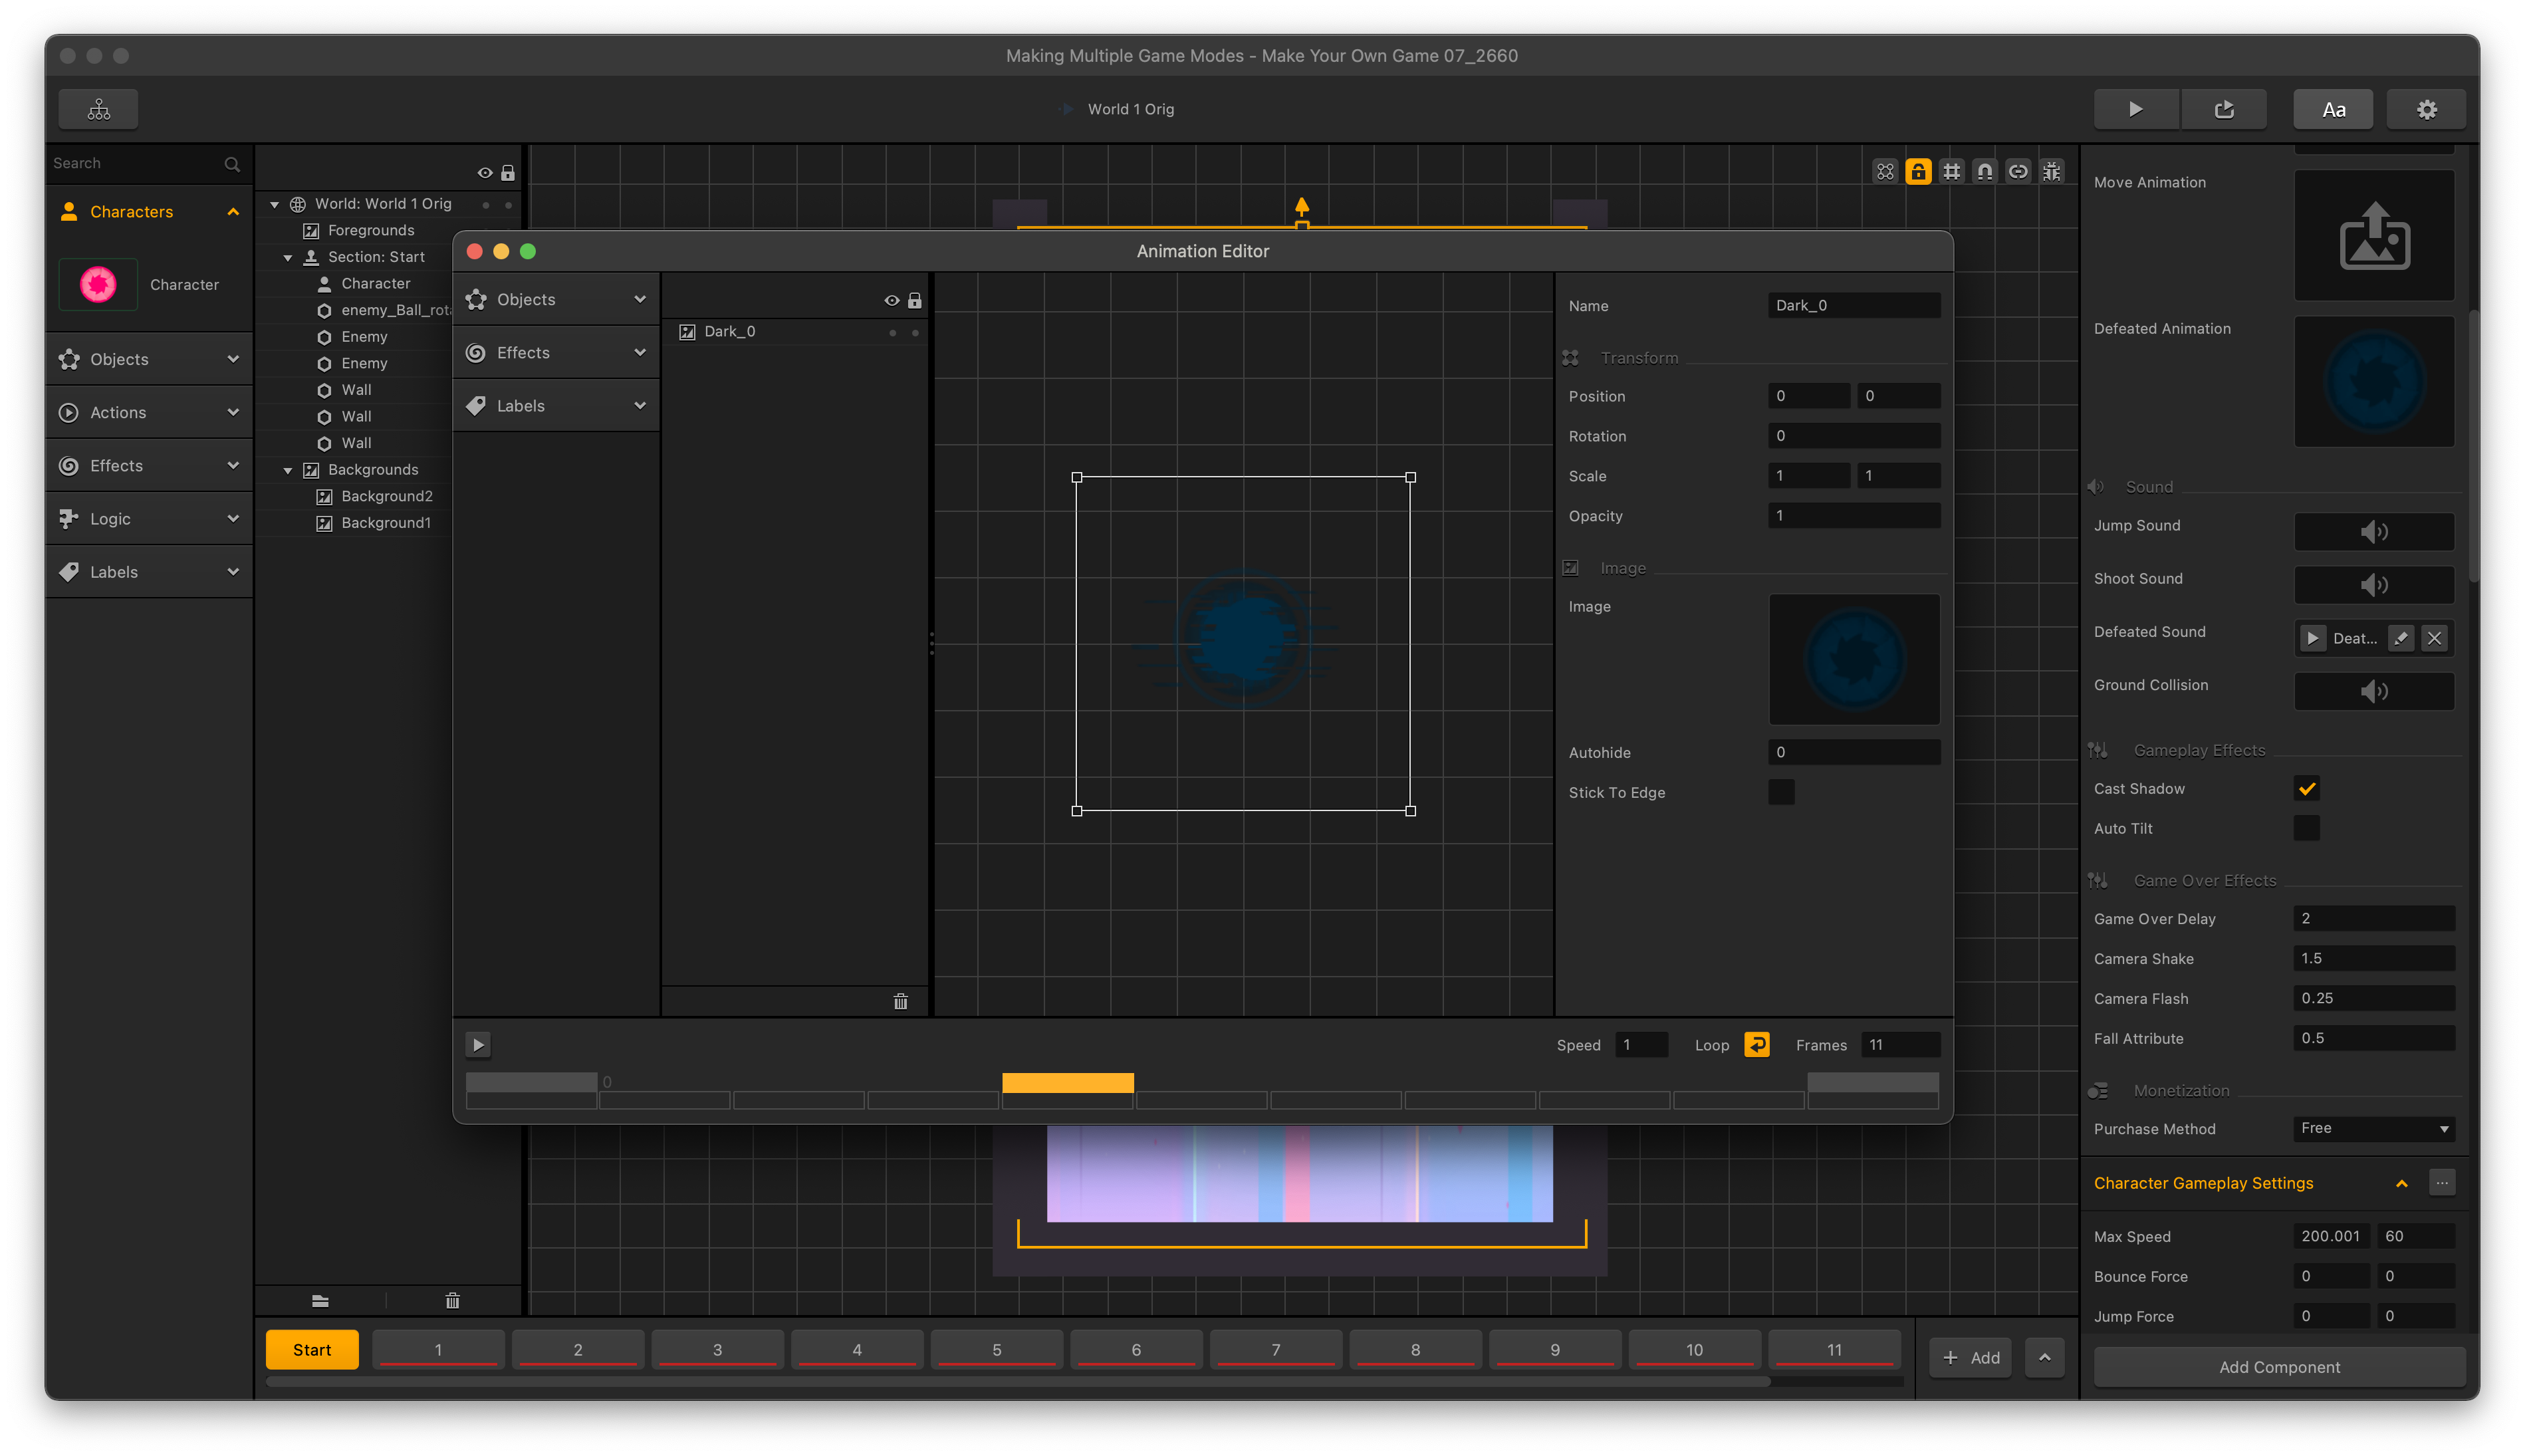
Game over delay is in seconds. So, a 2 in here would give us a two-second delay from the time the player dies to the time the game over menu loads. The camera shake and camera flash is the same as it is in the actions that we covered in part 5, and is also in seconds. Let’s make our camera shake 1.5 and our flash 0.25. Fall attribute is a setting that if set to a non-zero value, it will cause the character to fall with the gravity or direction of the game. And the number represents how much the character will bounce before falling. So, this is great for platformers, but also works with our game because if we set this to zero, we see our player pretty much stops dead while the game over mechanics play out. So, let’s make that 0.5.
Let’s add some other sounds into the game. Let’s select our swirly enemies here and give them some sounds to play when they wake up, and also let’s give our bumper a ticking damage sound. So that every time we trigger that cool ticking damage animation that throws us up against the wall, it also plays a nice sound with it. Let’s add a sound to our invincibility powerup, and also to our coins. Preview the game and hear our game really come together for the first time.


